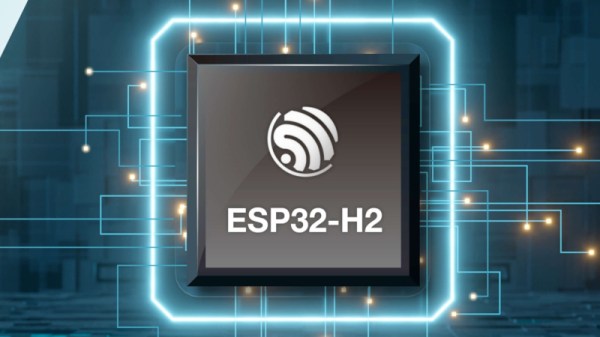
Cycling Cadence Display With ESP32

Terry Pratchett once said “Wisdom comes from experience. Experience is often a result of lack of wisdom.” This is as true with technical skills as it is with the rest of life, and you won’t truly understand a specific topic unless you’ve struggled with it a bit. [publidave] wanted a simple wireless display for a bluetooth cycling cadence sensor, and soon found himself deep down the rabbit hole of Micropython and Bluetooth Low Energy on the ESP32.

[publidave] had converted his bicycle for indoor training during lockdown and winter, and realized he can’t use the guided training app and view his cadence simultaneously, so he needed a dedicated cadence display. Since [publidave] was comfortable with Python, he decided to give Micropython on the ESP32 ago. Bluetooth Low Energy can be rather confusing if you haven’t implemented it before, especially if good examples are hard to come by. In short, the ESP32 needs to find the sensor, connect to it, select the right service, and listen for the notifications containing the data. The data is then converted to RPM and displayed on a small OLED display. [publidave] does an excellent job of describing what exactly he did, highlighting the problems he encountered, and how he solved them.

In the end, he had a functional display, a good idea of what he would do differently next time, and a lot of additional knowledge and understanding. In our book that’s a successful project.

Since so much of the health related devices work with Bluetooth Low Energy, it could be handy to know the technology and how to interface with it. It would allow you to do things like unbrick a $2000 exercise bike,

Wireless, Low Power E-Ink Weather Gadget

Not that long ago, making a low-power and wireless weather display complete with an e-ink screen would have required a lot of work and almost certainly would have been larger than the device [Dmitry] created.

(1) Weather alert indicator, (2) Current temperature, (3) Humidity and wind, (4) 24-hour temperature graph, (5) 24-hour precipitation probably graph

His low power e-ink weather gadget takes advantage of one of the niftier developer boards out there to create a useful and slim device that does exactly what he needs and not a lick more. It’s fast to look up weather online, but not as fast as glancing at a display in a convenient location.

The board [Dmitry] selected is a LilyGO TTGO T5s, an ESP32-based board that integrates an e-ink display, which requires no power unless being updated. It has been loaded with just enough smarts to fetch weather information using the OpenWeather API, and update the display accordingly.

Powering up the WiFi to fetch an easily-parsed JSON file and update the display only once per hour means that a battery can provide months of runtime. As a bonus, the LilyGO board even includes the ability to charge the battery, making things awfully convenient.

The bill of materials is here and code for the device, including setup directions, is on the project’s GitHub repository. And if your tastes happen to run more towards the artistic than utilitarian, we have just the weather display for you.

Laser Galvos And An ESP32 Recreate Old-School Asteroids

Playing Asteroids now isn’t quite what it used to be when it came out 40 years ago. At the time, the vector-scan display was part of the charm; making do with an emulator running on a traditional raster display just doesn’t quite do it for purists. But if you manage to build your own laser-projector version of the game like [Chris G] did, you’re getting close to capturing some of the original magic of the game.

There’s a lot to unpack about this project, and the video below does a good job explaining it. Where the original game used a beam of electrons flashing inside a CRT to trace out each object in the game, [Chris] substituted an off-the-shelf two-axis galvanometer from eBay and a 5-mW laser LED. This can project a gamefield on a wall up to two meters on a side, far bigger than any version of the machine ever built. The galvos are driven by op-amp drivers and an SPI DAC on a custom PCB. And in comparison to the discrete logic chips and 6502 running the original game, [Chris] opted for an ESP32.

As interesting as the hardware for this is, the real story is in the software. [Chris] does an excellent job running through his design, making the bulk of the video feel like a master class in game programming. His software is from scratch — no emulations here. As such it doesn’t perfectly reproduce the original games — no flying saucers and no spaceship explosion animations (yet) — but when coupled with the laser vector display, it certainly captures the feel of the original.

Being devoted Asteroids fans from back in the day, this one really pushes our buttons. We’ve seen laser-based recreations of the game before, but this one makes us think we can finally afford to recapture the glory of our misspent youth.

Continue reading “Laser Galvos And An ESP32 Recreate Old-School Asteroids”

Minimal MQTT With Micropython

I have been meaning to play around with MQTT for some time now, and finally decided to take the plunge one evening last week. I had three cheap home temperature and humidity sensors, and was bothered that they often didn’t agree. Surprisingly, while the analog one had a calibration adjustment in the back, I have no idea how to calibrate the two digital ones. I took this as a sign that it was time to learn MQTT and be able to install my own, accurate sensors. Of course, I began by ordering the cheapest sensors I could find, but I can always upgrade later on.

Three Cheap Sensors

While we have written quite a bit about MQTT in Hackaday, I had to go all the way back to 2016 to find this introductory four-part series by Elliot Williams. Five years is a long time in the tech world, but I decided to give it a try anyway. Continue reading “Minimal MQTT With Micropython”

FreeTouchDeck Upgrades Its Hardware And Its Name: ESP32 Touchdown

With many folks continuing to work from home for far longer than they ever thought, it’s no surprise that we’re seeing the rise of small DIY devices to make that video call or virtual presentation a little easier. [Dustin Watts] was interested in the functionality of the Elgato Stream Deck — a macro keyboard where each key is its own screen. But that kind of fancy hardware comes with a formidable price tag. So he built his own, and made it open source!

His first iteration — FreeTouchDeck — was built using commonly available modules but has since evolved into the ESP32 Touchdown which does it all with a single PCB. It’s a highly-customizable touchscreen macro keyboard which provide easy access shortcuts and macros for quick actions. Need a quick mute button, want to switch camera views on OBS, or maybe you want smarter shortcut keys for your CAD of choice. This will can get you there.

There a few key differences from the first version (FreeTouchDeck). The ESP32 dev board was ditched for a tidy PCB the directly integrates the module. This one has a capacitive touch controller (FT6236) rather than a resistive one as the capacitive screens deliver a far nicer user experience. A built-in battery and charger circuit (which the FreeTouchDesk didn’t have) allows for the extra bit of flexibility to stream from anywhere (within wireless range of course). Multiple case designs are available in STL form that allows it to be placed on a wall or desk with ease.

Datasheets, gerbers, kicad files, BOMs, and example firmware is provided on GitHub. The software is easily configurable so it can be set up to do any sort of macro, key combination, or action. This isn’t just limited to emulating a Bluetooth keyboard as there are examples showing how to connect to Home Assistant. All in all, this is a wonderful example of continued iteration on a project.

Thanks [Timothy Gregory] for sending this one in!

Hands-On: The RISC-V ESP32-C3 Will Be Your New ESP8266

We just got our hands on some engineering pre-samples of the ESP32-C3 chip and modules, and there’s a lot to like about this chip. The question is what should you compare this to; is it more an ESP32 or an ESP8266? The new “C3” variant has a single 160 MHz RISC-V core that out-performs the ESP8266, and at the same time includes most of the peripheral set of an ESP32. While RAM often ends up scarce on an ESP8266 with around 40 kB or so, the ESP32-C3 sports 400 kB of RAM, and manages to keep it all running while burning less power. Like the ESP32, it has Bluetooth LE 5.0 in addition to WiFi.

Espressif’s website says multiple times that it’s going to be “cost-effective”, which is secret code for cheap. Rumors are that there will be eight-pin ESP-O1 modules hitting the streets priced as low as $1. We usually require more pins, but if medium-sized ESP32-C3 modules are priced near the ESP8266-12-style modules, we can’t see any reason to buy the latter; for us it will literally be an ESP8266 killer.

On the other hand, it lacks the dual cores of the ESP32, and simply doesn’t have as many GPIO pins. If you’re a die-hard ESP32 abuser, you’ll doubtless find some features missing, like the ultra-low-power coprocessor or the DACs. But it does share a lot of the ESP32 standouts: the LEDC (PWM) peripheral and the unique parallel I2S come to mind. Moreover, it shares the ESP-IDF framework with the ESP32, so despite running on an entirely different CPU architecture, a lot of code will run without change on both chips just by tweaking the build environment with a one-liner.

One of these things is not like the other

If you were confused by the chip’s name, like we were, a week or so playing with the new chip will make it all clear. The ESP32-C3 is a lot more like a reduced version of the ESP32 than it is like an improvement over the ESP8266, even though it’s probably destined to play the latter role in our projects. If you count in the new ESP32-S3 that brings in USB, the ESP32 family is bigger than just one chip. Although it does seem odd to lump the RISC-V and Tensilica CPUs together, at the end of the day it’s the peripherals more than the CPUs that differentiate microcontrollers, and on that front the C3 is firmly in the ESP32 family.

Our takeaway: the ESP32-C3 is going to replace the ESP8266 in our projects, but it won’t replace the ESP32 which simply has more of everything when we need it. The shared codebase and peripheral architecture makes it easier to switch between the two when we don’t need the full-blown ESP32. In that spirit, we welcome the newcomer to the family.

But naturally, we’ve got a lot more to say about it. Specifically, we were interested in exactly what the RISC-V core brought to the table, and ran the module through power and speed comparisons with the ESP32 and ESP8266 — and it beats them both by a small margin in our benchmarks. We’ve also become a lot closer friends with the ESP-IDF SDK that all of the ESP32 family chips use, and love how far it has come in the last year or so. It’s not as newbie-friendly as ESP-Arduino, for sure, but it’s a ton more powerful, and we’re totally happy to leave the ESP8266 SDK behind us.

Continue reading “Hands-On: The RISC-V ESP32-C3 Will Be Your New ESP8266”

An ESP Will Read Your Meter For You

As home automation starts to live up to its glossy sci-fi promise there remains a deficiency when it comes to interfacing between the newer computerised components and legacy items from a previous age. A frequent example that appears in projects on Hackaday is the reading of utility meters, and in that arena [jomjol] has a very neat solution involving an ESP32 camera module and a software neural network to identify meter readings directly.

The ESP and camera sit at the top of a 3D-printed housing that fits over the meter. The clever trick comes as each photo’s orientation is determined, and not only is OCR used to read digits but also figures are derived from small dial meters and other indicators on the meter face. It’s a very well-thought-out system, with a web-based configuration tool that allows full customisation of the readable zones and how they should be treated.

This project makes full use of the ESP32’s capabilities, and the attention to detail that has gone into making it usable is particularly impressive. It certainly raises the bar against previous OCR meter reading projects.

[Thanks for the tip Sascha]