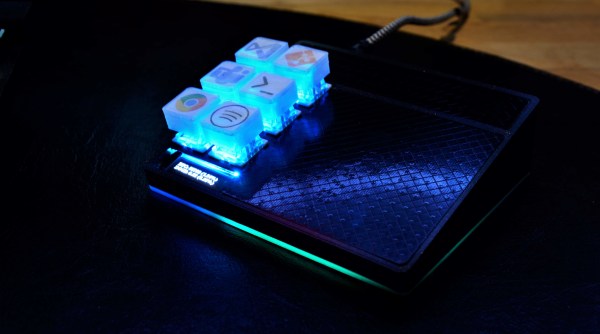
A common sight on factory floors, stack lights are used to indicate the status of machinery to anyone within visual range. But hackers have found out you can pick them up fairly cheap online, so we’ve started to see them used as indicators in slightly more mundane situations than they were originally intended for. [Tyler Ward] recently decided he wanted his build own network controlled stack light, and thought it would double as a great opportunity to dive into the world of Power Over Ethernet (PoE).
Now the easy way to do this would be to take the Raspberry Pi, attach the official PoE Hat to it, and toss it into a nice enclosure. Write some code that toggles the GPIO pins attached to the LEDs in the stack light, and call it a day. Would be done in an afternoon and you could be showing it off on Reddit by dinner time. But that’s not exactly what [Tyler] had in mind.
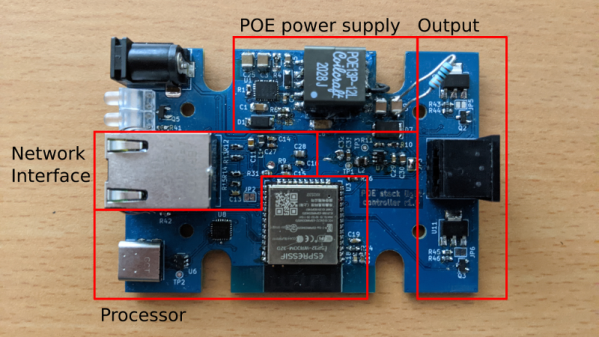
He decided to take the scenic route and designed his own custom PCB that combines an Ethernet interface, PoE hardware, and the ESP32 into one compact unit. It’s no great secret that it only takes a few extra components to plug the ESP32 into the network rather than relying on WiFi, but it’s still not something we see done very often by hobbyists. Rarer still is seeing somebody roll their own PoE solution, but thanks to the in-depth documentation [Tyler] has provided for his circuit, that may change in the future.
On the software side [Tyler] has developed a firmware for the ESP32 that supports both Art-Net and RDM protocols, which are subsets of the larger DMX protocol. That means the controller should be compatible with existing software designed for controlling theatrical lighting systems. If you’d rather take a more direct approach, the firmware also sports a web interface and simple HTTP API to provide some additional flexibility.
While it’s exceptionally impressive, not everyone will need such a robust solution. If you just want a quick and easy way to fire up your stack light, a USB controlled relay and some Python can get you where you need to go.