If you’re building a CNC machine from scratch, the number of decisions you have to make is nearly boundless. Metal or wood construction? Welded or bolted? Timing belts or lead screws? And even once the mechanical bits are sorted, you still face a universe of choices in terms of control electronics. That’s where something like this modular CNC controller could really prove to be a game-changer.
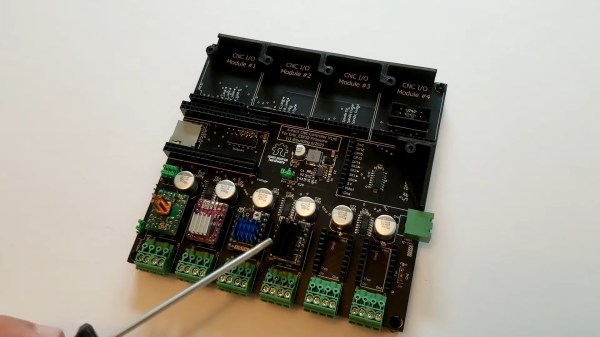
The idea behind [Barton Dring]’s latest creation started with his port of GRBL to the ESP32. In fact, the current controller bears a strong family resemblance to his version 1.0 dev board, with a few conspicuous and intriguing additions. First, everything is modular — the main PCB is basically a motherboard with little more than a 5-volt power supply and some housekeeping electronics, plus a lot of headers. There’s support for up to six channels of steppers, either directly on the board with Pololu-style modules or as external drivers using pluggable screw terminal blocks. There’s also room for five IO modules; the current collection of modules includes a four-channel switch input, a relay output, an RS-485 module and a 0-10-V interface for talking to a variable frequency drive (VFD) spindle controllers, and buffered 5-V output module. The best part is that the IO module spec is completely open, so designing custom modules should be a snap.
The video below gives a quick tour of the controller. We’re really impressed with the thought that went into this, and we’ll venture a guess that having something like this available is going to kickstart a lot of stalled CNC machine projects. We can think of one shop that finally lost its last excuse for making the move.

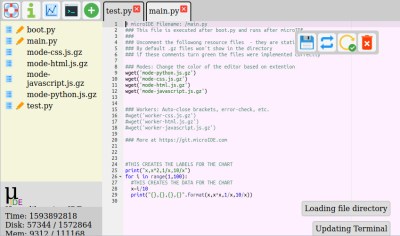 Using the IDE is easy enough, install a binary, connect to the ESP with a web browser, start writing MicroPython code. There is a choice of connecting directly to the chip as a hotspot, or connecting via another WiFi network. The interface is looking pretty slick but he’s at pains to remind us that it’s a work in progress. Sadly there is no source code yet as it’s a binary distribution that is free for non-commercial use, we’d hope that an open-source release might one day happen. It’s not for everyone, but the convenience of accessing the same interface from almost any modern device should help attract a healthy community.