You will no doubt have seen those videos where MRI machines suck up all sorts of metallic objects with hilariously disastrous results. The magnetic field in one of these machines can easily pull in metal objects from across the room, exerting a force of several hundred pounds on any ferrous object unlucky enough to wander too close. As you can probably imagine, designing mechanical devices that can operate in such an intense magnetic field is exceptionally difficult.
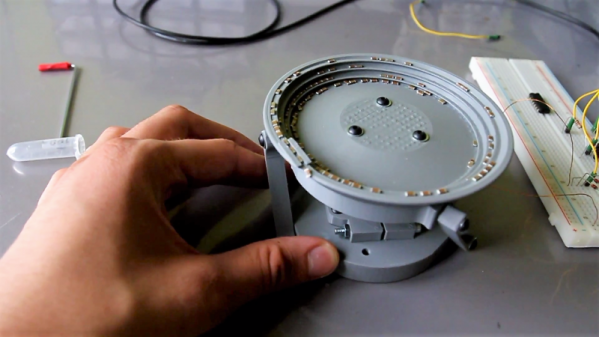
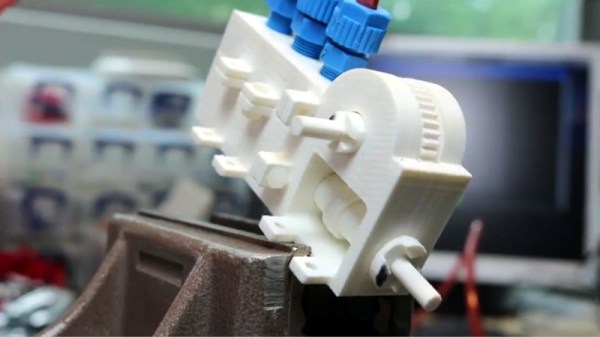
 But this fully 3D printed pneumatic stepper motor designed by [Foad Sojoodi Farimani] might one day change that. The PneuAct, which he presented at the recent International Conference on Robotics and Automation (ICRA) in Brisbane, Australia, manages to run at up to 850 RPM with full position control using bursts of air rather than electronic pulses. Made entirely of plastic and without any electronic components, the PneuAct can not only operate in intense magnetic fields but also areas with flammable gases where sparks could potentially cause an explosion.
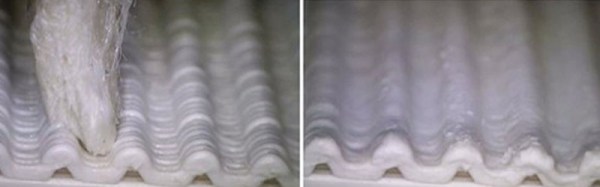
We often say that a design is “fully” 3D printable, even though it might require screws or other bits of hardware. But in the case of the PneuAct, it’s truly all printed. It has to be, or else the whole thing would be ripped apart when it got to close to the MRI machine. Each and every piece of the motor is printed in ABS, and can be used without any additional machining or cleanup. No lubrication is required, and [Foad] mentions that the whole thing is so cheap that it can be disposable. Which is a huge advantage in medical environments where contamination could be a concern.
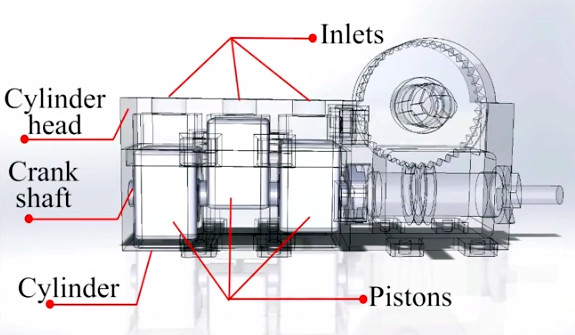
Design-wise the PneuAct is essentially an expanded version of the 3D printed air motors we’ve seen previously, but it would be fair to say that none has ever been studied so closely before.
Continue reading “An MRI-Safe 3D Printed Pneumatic Stepper Motor”