Mood Lighting With LEDs And An Arduino

Regular candles can be awfully boring at times. They can only produce one color and the flicker is so… predictable. They can’t even be controlled by an infrared remote control, not to mention the obvious fire hazard. Now, however, [Jose] has come up with an LED candle that solves all of these problems. (Original link to the project in Spanish.)

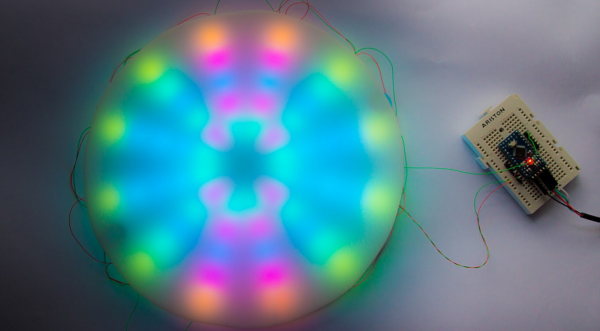
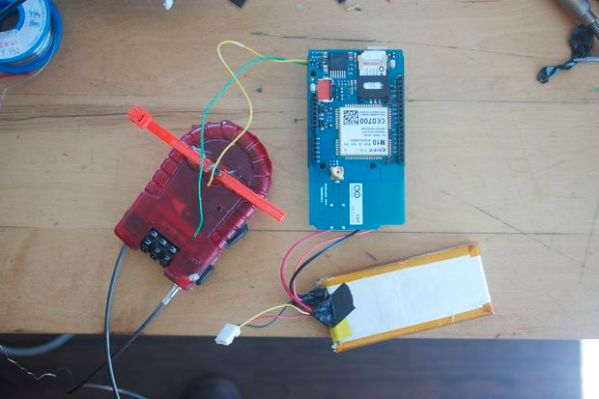
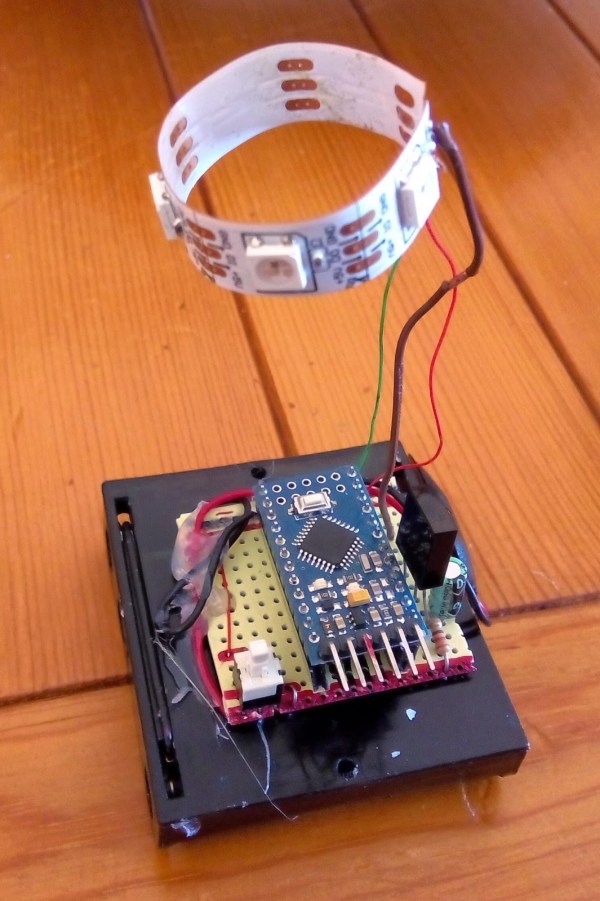
The heart of the project is an Arduino Pro Mini, which is especially suited for this project because of its size. [Jose] put the small form-factor microcontroller in the base of a homemade wax enclosure and wired it to a Neopixel WS2812b LED strip. The strip can produce any color, and has some programmed patterns including flicker, fade, rainbow, and fire.

The artificial candle is controlled with an infrared remote control, and all of the code for the project is available on the project site if you want to build your own. [Jose] has been featured here before for his innovative Arduino-driven RGB lighting projects, and this is another great project which builds on that theme!


PiMagic RaspPi to Arduino Shield Interface

Adding I/O To The Rasberry Pi Models A & B

The Raspberry Pi has been the basis for many cool projects. Even so, Models A and B have been criticized for having only a handful of GPIO pins available. Sure, the new Model B+ has a 40-pin GPIO header but what if you want to use your old RaspPi with a bunch of in and outputs? [Steve] is one of those guys and has done something about it by creating a pretty neat solution he calls the PiMagic. It’s a Pi Plate that has an on board ATMEGA328 running an Arduino bootloader. The RaspPi and the Arduino communicate via UART as [Steve] felt it was a bit simpler than going the SPI or I2C route.

The RaspPi GPIO’s run on 3.3v and the ATMEGA328’s like 5v. To solve this, the PiMagic has a Level Shifter that keeps the I/O of the two boards happy. Older Pi’s had a problem burning out PCB traces when supplying too much current on the 5v supply line. [Steve] threw in a fuse that will burn out before the Pi does to ensure that no Pi’s were harmed in the making of this project.

Now that a bunch of I/O are available, how do you physically access them? Well, the PiMagic has female headers in the typical Arduino layout. This way any Arduino Shield will plug right in. [Steve] made all his source files available for those who want to make one themselves. Find an assembly video after the break.

Continue reading “Adding I/O To The Rasberry Pi Models A & B”

kegerator

End Table Kegerator Hides The Tap When You’re Not Looking

What’s better than an ordinary end table? How about an end table that can serve you beer? [Sam] had this exact idea and used his skills to make it a reality. The first step of the build was to acquire an end table that was big enough to hold all of the components for a functional kegerator. This proved to be a bit tricky, but [Sam] got lucky and scored a proper end table from a garage sale for only $5.00.

Next, [Sam] used bathroom sealant to seal up all of the cracks in the end table. This step is important to keep the inside cold. Good insulation will keep the beer colder, while using less electricity. Next, a hole was cut into the top of the table for the draft tower.

The draft tower is mounted to a couple of drawer slides. This allows the tower to raise up and down, keeping it out of sight when you don’t want it. The tower raises and lowers using a simple pulley system. A thin, high strength rope is attached to the tower. The other end is attached to a spool and a small motor. The motor can wind or unwind the spool in order to raise and lower the tower.

The table houses an Arduino, which controls the motor via a homemade H bridge. The Arduino is hooked up to a temperature sensor and a small LCD screen. This way, the users can see how cold their beer will be before they drink it.

To actually keep the beer cold, [Sam] ripped apart a mini fridge. He moved the compressor and condenser coils to the new table. He had to bend the coils to fit, taking care not to kink them. Finally he threw in the small keg, co2 tank and regulator. The final product is a livingroom gem that provides beer on demand.

Demo video (which is going the wrong way) can be found after the break.

Continue reading “End Table Kegerator Hides The Tap When You’re Not Looking”

kaleidoscope

Arduino Powered Digital Kaleidoscope

[Jose’s] latest project brings an old visual effect toy up to date with digital electronics. Most of us are familiar with inexpensive kaleidoscope toys. Some of us have even built cheap versions of them with paper tubes, mirrors, and beads. [Jose] wanted to try to recreate the colorful pattern effects created by a kaleidoscope using an Arduino and an addressable LED strip.

The build is actually pretty simple. The base is a disc of PVC cut to just a few inches in diameter. [Jose] started with an addressable LED strip containing 60 LEDs. He then cut it into 12 sections, each containing five LEDs. The smaller strips were then mounted to the disc, similar to spokes on a bicycle wheel. The LED strip already has an adhesive backing, so that part was trivial.

The final step was to add some kind of diffuser screen. The LED strips on their own are not all that interesting. The diffuser allows the light to blend together, forming interesting patterns that are more reminiscent of the patterns you might see in a real kaleidoscope. Without the diffuser you would just see individual points of light, rather than blended color patterns.

The whole thing is controlled by a small Arduino. [Jose] has made the code available at the bottom of his blog post. Be sure to watch the video of the system in action below. Continue reading “Arduino Powered Digital Kaleidoscope”

Master Clock Keeps Time For All Other Clocks

[Brett] just finished construction and long-term testing of this extremely accurate timepiece. It keeps such great time by periodically syncing with the atomic clock in Mainflingen, Germany.

The core of the project is an ATMega328 which uses the new DCF77 library for decoding the signal broadcast by an atomic clock. The libraries written by Udo Klein significantly increase the noise tolerance of the device reading the signal, but they will not work with any project that use a resonator rather than a crystal.

In the event of a complete signal loss from the atomic clock, the micro driving the clock also has a backup crystal that can keep the clock running to an accuracy of within 1 second per day. The clock can drive slave clocks as well, using pulses with various timings depending on what [Brett] needs them to do. The display is no slouch either: six seven-segment displays show the time and an LCD panel reads out data about the clock. It even has chimes for the hour and quarter hour, and is full of many other features to boot!

One of the most annoying things about timekeeping is daylight savings time corrections, and this clock handles that with a manual switch. This can truly take care of all of your timekeeping needs!

Arduino-Powered Alarm System Has All The Bells And Whistles

Put aside all of the projects that use an Arduino to blink a few LEDs or drive one servo motor. [IngGaro]’s latest project uses the full range of features available in this versatile microcontroller and has turned an Arduino Mega into a fully-functional home alarm system.

The alarm can read RFID cards for activation and control of the device. It communicates with the front panel via an I2C bus, and it can control the opening and closing of windows or blinds. There is also an integrated GSM antenna for communicating any emergencies over the cell network. The device also keeps track of temperature and humidity.

The entire system can be controlled via a web interface. The Arduino serves a web page that allows the user full control over the alarm. With all of that, it’s hard to think of any more functionality to get out of this tiny microcontroller, unless you wanted to add a frickin’ laser to REALLY trip up the burglars!

GPS Bike Tracker

GPS Tracker Tracks Your Stolen Bike

Bikes are great for cruising through congested cities but there is a serious downside to pedaling your two-wheeler around… bike theft. It’s a big deal, for example, yearly estimates for stolen bikes in NYC are in the 60,000 – 100,000 range. Only an extremely small percentage of those are ever recovered. [stbennett] just got himself a halfway decent bike and is not too interested in having it stolen, and if it is stolen, he wants a way to find it so he built himself a GPS tracker for his bike.

The entire project is Arduino-based. It uses a GSM Shield and a GPS module along with a few other small odds and ends. A 2-cell LiPo battery provides the required power for all of the components. It’s pretty neat how this device maintains an extremely long battery life. The metal cable of the bike lock is used as a conductor in the circuit. When the cable is inserted and locked into the lock housing a circuit is completed that prevents electricity from passing through a transistor to the Arduino. In other words, the Arduino is off unless the bike cable is cut or disengaged. That way it is not running 24/7 and draining the battery.

The entire system works like this, once the bike lock cable is cut, the Arduino wakes up and gives a 15 second delay before doing anything, allowing the legitimate user to reconnect the bike lock and shut down the alarm system. If the bike lock is not re-engaged, the unit starts looking for a GPS signal. At that time it will send out SMS messages with the GPS location coordinates. Punching those numbers into Google Maps will show you exactly where the bike is.

Of course your other option is to park your bike where nobody else can access it, like at the top of a lamp pole.