Honey, I Shrunk The Arduino Core

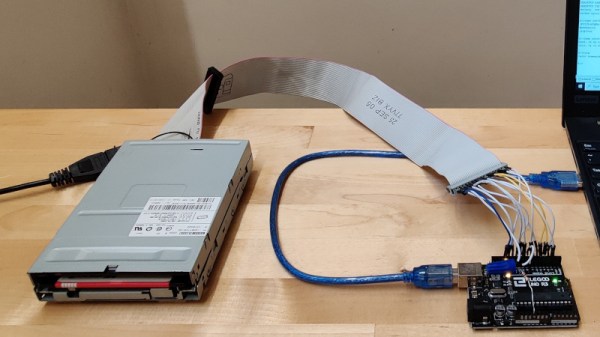
High-level programming languages do a great job of making a programmer’s job easier, but these languages often leave a lot of efficiency on the table as a compromise. While a common thought is to move into a lower-level language like assembly to improve on a program’s speed or memory use, there’s often a lot that can be done at the high level before resorting to such extremes. This, of course, is true of the Arduino platform as well, as [NerdRalph] demonstrates by shrinking the size of the Arduino core itself.

[NerdRalph] had noticed that the “blink” example program actually includes over 1 kB of extraneous code, and that more complicated programs include even more cruft. To combat this issue, he created ArduinoShrink, which seeks to make included libraries more modular and self-contained. It modifies some of the default registers and counters to use less memory and improve speed, and is also designed to improve interrupt latency as well by changing when the Arduino would otherwise disable interrupts.

While there are some limits to ArduinoShrink, such as needing to know specifics about the pins at compile time, for anyone writing programs for Arduinos that are memory-intensive or need improvements in timing, this could be a powerful new tool. If you’d prefer to go in the opposite direction to avoid ever having to learn C or assembly, though, you can always stick with running Python on your embedded devices.

Ultrasonic Sonar Detects Hidden Objects

While early scientists and inventors famously underestimated the value of radar, through the lens of history we can see how useful it became. Even though radar uses electromagnetic waves to detect objects, the same principle has been used with other propagating waves, most often sound waves. While a well-known use of this is sonar, ultrasonic sensors can also be put to use to make a radar-like system.

This ultrasonic radar project is from [mircemk] who uses a small ultrasonic distance sensor attached to a rotating platform. A motor rotates it around a 180-degree field-of-view and an Arduino takes and records measurements during its trip. It interfaces with an application running on a computer which shows the data in real-time and maps out the location of all of the objects around the sensor. With some upgrades to the code, [mircemk] is also able to extrapolate objects hidden behind other objects as well.

While the ultrasonic sensor used in this project has a range of about a meter, there’s no reason that this principle couldn’t be used for other range-finding devices to extend its working distance. The project is similar to others we’ve seen occasionally before, but the upgrade to the software to allow it to “see” around solid objects is an equally solid upgrade.

Nixie Shot Timer Adds Useful Elegance To Espresso Machine

Once you’ve ground the beans and tamped the grounds just so, pulling the perfect shot of espresso comes down to timing. Ideally, the extraction should last 20-30 seconds, from the first dark drips to the tan and tiger-striped crema on top that gives the espresso a full aftertaste.

[Marco] has a beautiful espresso machine that was only missing one thing: an equally beautiful shot timer with a Nixie tube display. Instead of messing with the wiring, [Marco] took the non-invasive approach and is using a DIY coil to detect the magnetic field of the espresso machine’s pump and start a shot timer.

An LM358-based op-amp magnifies the current induced by the machine and feeds it to an Arduino Nano, which does FFT calculations. [Marco] found a high-voltage interface driver to switch 170 V to the Nixies instead of using two handfuls of transistors. Grab yourself a flat white and check it out after the break.

The last Nixies may have been mass-produced in the 1980s, but never fear — Dalibor Farny is out there keeping the dream alive and making new Nixies.

Continue reading “Nixie Shot Timer Adds Useful Elegance To Espresso Machine”

Arduino CLI For I/O Pin Testing

Need to quickly toggle or read some logic signals without the hassle of writing a quick program? [Thor_x86], aka [Eric], built an Arduino sketch that does just that — and he threw in the ability to send (or receive) serial messages, too. This is a neat idea — kind of a simplified Bus Pirate.

We should warn you that this is an early release, and there are a few minor issues which we are sure [Eric] will iron out soon. We discovered the function strtol() was misspelled in cmd_send.cpp, and there are some configuration #defines which need to be sorted out in file parsePin.cpp, depending on which Arduino module you are running. We got it running on an Arduino Leonardo the quickest, because it has support for Serial1().

Don’t be discouraged by these glitches in this rev 0 deployment — [Eric] has really made quite a nice tool here. Check his GitHub repository for updates (or submit corrections yourself). All in all, it’s a good addition to your digital tool box. On a completely unrelated note, we really like [Eric]’s USB cable with the right-angle micro connector, grungy though it may be.

Besides the standard tools like Bus Pirate, GreatFET, FTDI modules, etc., are there any similar tools you like to use for bit banging and serial testing? Let us know in the comments below.

Arduino And FPGA Done Differently

FPGA guru [Max Maxfield] recently took a look at the XLR8 (pronounced accelerate) board from a company called Alorium. On the surface, it looks like another Arduino UNO clone. But instead of a CPU, it contains an Intel MAX10 FPGA that runs a softcore AVR processor. Of course, that’s only part of the story. If the board was just a mock Arduino using an FPGA, that’s not very interesting for practical purposes. However, by incorporating accelerator blocks or XBs, you can add FPGA modules to the soft CPU. [Max] shows an example that you can see in the video below where an FPGA block controls servos more easily than a standard Arduino. There’s also a version that looks like an Arduino Nano, but can clock much faster as well as use the XBs.

In addition to prebuilt XBs, there is a workflow to build your own if you are familiar with working with FPGAs. The products aren’t exactly new, but we enjoyed [Max’s] take on the product. We also appreciated the simple code examples showing exactly how you would convert a program to use the accelerated functions. Continue reading “Arduino And FPGA Done Differently”

Negative Reinforcement: Drill Bits Edition

In theory, it’s fun to have a lot of toys tools around, but the sad reality is that it’s only as fun as the organization level applied. Take it from someone who finds organization itself thrilling: it really doesn’t matter how many bits and bobs you have, as long as there’s a place for everything and you put away your toys at the end of the day.

[Cranktown City] is always leaving drill bits lying around instead of putting them back in their bit set boxes. Since he responds well to yelling, he decided to build an intelligent drill bit storage system that berates him if he takes one out and doesn’t put it back within ten minutes.

But [Cranktown City] did much more than that. The system is housed in a really nice DIY stand that supports his new milling and drilling machine and has space to hold a certain type of ubiquitous red tool box beneath the drill bits drawer.

All the bits now sit in a 3D-printed index that fits the width of the drawer. [Cranktown City] tried to use daisy-chained pairs of screws as contacts behind each bit that could tell whether the bit was home or not, but too much resistance interfered with the signal. He ended up using a tiny limit switch behind each bit instead. If any bit is removed, the input signal from the index goes low, and this triggers the Arduino Nano to do two things: it lights up a strip of red LEDs behind the beautiful cut out letters on the drawer’s lip, and it starts counting upward. Every ten minutes that one or more bits are missing, the drawer complains and issues ad hominem attacks. Check out the demo and build video after the break, but not until you put your tools away. (Have you learned nothing?)

Okay, so how do you deal with thousands of jumbled drill bits? Calipers and a Python script oughta do it.

Continue reading “Negative Reinforcement: Drill Bits Edition”

Planetary Escape (-Room In A Box)

The trick to a fun escape room is layers. For [doktorinjh]’s Spacecase, you start with an enigmatic aluminum briefcase and a NASA drawstring backpack. A gamemaster reads the intro speech to set the mood, and you’re ready to start your escape from the planet. The first layer is the backpack with puzzles you need to solve to get into the briefcase. In there, you discover a hidden compartment and enough sci-fi references to put goofy smiles on our faces. We love to see tools reused as they are in one early puzzle, you use a UV LED to reveal a hidden message, but that light also illuminates puzzle clues later.

All the tech in Spacecase makes it a wonder of mixed media. The physical layer has laser engraved wood featuring the font from the 1975 NASA logo, buttons, knobs, LEDs, toggle switches, and a servo. Beneath the visible faceplate is an RGB sensor, audio player, speaker, and at the center is an Arduino MEGA. We’d love to get our hands on Spacecase for a game, and we’re inspired to pull out all the stops and build games with our personal touches. Maybe something with a mousetrap.

This isn’t the first escape room hardware we’ve seen and [doktorinjh] similarly made a bomb diffusing defusing game.

Continue reading “Planetary Escape (-Room In A Box)”