What’s Cooler Than A 7-Segment Display? A 7200-Segment Display!

If you look around your desk right now, odds are you’ll see a 7-segment display or two showing you some vital information like the time or today’s weather. But think of how much information you could see with over 1,100 digits, like with [Chris Combs’] 7200-segment display.

For [Chris], this project started the same way that many of our projects start; finding components that were too good of a deal to pass up on. For just “a song or two plus shipping”, he was the proud owner of two boxes of 18:88 7-segment displays, 500 modules in total. Rather than sitting and using up precious shelf space, [Chris] decided to turn them into something fancy he could hang on the wall.

the 7200 segment display grayscaling to show the time
The IS31FL3733 can produce 8 levels of dimming 8-bit PWM, allowing [Chris] to display in grayscale
The first challenge was trying to somehow get a signal to all of the individual segments. Solutions exist for running a handful of displays in one device, but there are certainly no off-the-shelf solutions for this many. Even the possible 16 addresses of the IS31FL3733 driver IC [Chris] chose for this project were not enough, so he had to get creative. Fearing potential capacitance issues with simply using an i2C multiplexer, he instead opted to run 3 different i2C busses off of a Raspberry Pi 4, to interface with all 48 controllers.

The second challenge was how to actually wire everything up. The finished display comes out to 26 inches across by 20.5 inches tall, much too large for a single PCB. Instead, [Chris] opted to design a series of self-contained panels, each with 6 of the display modules and an IS31FL3733 to drive them. While the multiplexing arrangement did leave space for more segments on each panel, he opted to go for this arrangement as it resulted in a nice, clean, 4:3 aspect ratio for the final display.

The end result was a unique and beautiful piece, which Chris titled “One-to-Many”. He uses it to display imagery and art related to the inevitability of automation, machines replacing humans, and other “nice heartwarming stuff like that”, as he puts it. There’a video after the break, but if you are interested in seeing the display for yourself, it will be on display at the VisArt’s Concourse Gallery in Rockville, MD from September 3 to October 17, 2021. More info on [Chris’s] website.

This isn’t [Chris’s] first adventure in using 7-segment displays in such a unique way, click here to read about the predecessor to this project that we covered last year.

Continue reading “What’s Cooler Than A 7-Segment Display? A 7200-Segment Display!”

vektorkollektor-deploy-familyInPark

Vektor Kollektor Inspector

With the world opening up again, [Niklas Roy] and [Kati Hyyppä] have been busy making a public and collaborative project. Meet the Vektor Kollektor, a portable drawing machine experience, complete with a chip-tune soundtrack. It’s great to see public art meet the maker community with zero pretension and a whole lot of fun!

The build started with an HP7475A pen plotter from the 80s, one that was DOA (or was fried during initial testing). [Niklas] and [Kati] kept the mechanism but rebuilt the controls allowing for easy integration with an Arduino Nano and to be powered with a motorcycle battery.

The magic seems to be less in the junk-bin build (which is great) and more in the way this team extended the project. Using a joystick with arcade buttons as an input, they carted Vektor Kollektor to public parks and streets where they invited others to make art. The Kollekted drawings are available on a gallery website in a very cool animated form, freely available for download, on t-shirts, 3D prints, and on coffee mugs because, why not?

Some select drawings are even spray-painted on walls using a large plotter, and we really hope [Niklas Roy] and [Kati Hyyppä] share details on that build soon. Of course this comes hot on the heels of the workshop window cyborg we saw from these two hardware artists.

Continue reading “Vektor Kollektor Inspector”

video of someone pushing the button to generate new art

AI Generating Paintings Off To A Flying Art

The philosophical question of “What is art?” has an ethereal, transient quality to it. A definition seems to slip away as you get close to an answer. Embracing that quality, [Max Fischer] has created an AI-powered painting that paints a new piece of art at the push of a button. When the button below the screen is pushed, a new image is generated and the old one is forever lost, which in a way, makes the frame a piece of art itself.

The really makes this project stand is the sheer quality of documentation on the GitHub repo. The instructions are incredibly detailed. Everything from setting up the Jetson to building the control box out of half-inch MDF (12mm for the sane part of the world) is laid out with copious pictures. Despite the ease of generating images ahead of time, [Max] took the hard route Hackaday route and did all inference locally and in real-time. To handle the processing requirements, an Nvidia Jetson Xavier NX single-board computer was used. He trained StyleGAN with high-resolution abstract art that gets generated whenever the button below the screen is pushed. To prevent screen burn-in, a PIR was added to turn the screen off when no one is around.

Here at Hackaday, we’ve seen several projects putting old laptop screens or monitors into a nice wooden case and mounting them to the wall. Since 32″ laptops are rather hard to find, [Max] opted to take a different approach and instead got a 32″ Samsung Frame for relatively cheap.

For all their detail, [Max] did leave one thing out of the readme: the AI that generates the art. [Max] hints that he wants others to create their picture frames, but with their own art generation. So what are you waiting for? Go make some art.

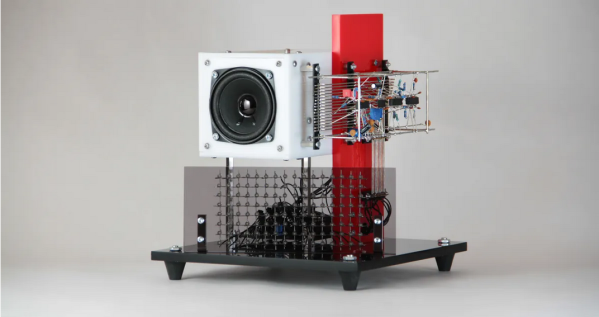
Automated musical instrument with LED array

ESP32 Is The Brains Behind This Art Installation

The ESP32 has enabled an uncountable number of small electronics projects and even some commercial products, thanks to its small size, low price point, and wireless capabilities. Plenty of remote sensors, lighting setups, and even home automation projects now run on this small faithful chip. But being relegated to an electronics enclosure controlling a small electrical setup isn’t all that these tiny chips can do as [Eirik Brandal] shows us with this unique piece of audio and visual art.

The project is essentially a small, automated synthesizer that has a series of arrays programmed into it that correspond to various musical scales. Any of these can be selected for the instrument to play through. The notes of the scale are shuffled through with some random variations, allowing for a completely automated musical instrument. The musical generation is entirely analog as well, created by some oscillators, amplifiers, and other filtering and effects. The ESP32 also controls a lighting sculpture that illuminates a series of LEDs as the music plays.

The art installation itself creates quite haunting, mesmerizing tunes that are illustrated in the video linked after the break. While it’s not quite to the realm of artificial intelligence since it uses pre-programmed patterns with some randomness mixed in, it does give us hints of some other projects that have used AI in order to compose new music.

Continue reading “ESP32 Is The Brains Behind This Art Installation”

Spiffy Summer Project Sources Solar Sounds From Scraps

[Gijs Gieskes] has a long history of producing electronic art and sound contraptions, and his Zonneliedjes (sunsongs) project is certainly an entertaining perpetuation of his sonic creations. With the stated goal of making music from sunlight, the sunsongs most prominent feature is solar panels.

Although It’s not clear how the photons transform into the rhythmic crashes and random beep-boop sounds, the results are quite satisfying. We have a strong suspicion that the same principals that turn random junk into BEAM robots are at work, maybe with some circuit bending sprinkled on for good measure. One detail we were able to glean from a picture of the device he calls “mobile” was a 40106 oscillator, which [Gijs] has used in previous projects.

The construction style that [Gijs] uses reminds us of the “Manhattan” construction style the amateur radio homebrewing community favors. Squares of copper PCB are glued directly to the back of the solar cells and the circuits are built atop them. Looking carefully at the pictures we can also see what look like cutoff leads, suggesting a healthy amount of experimentation to get the desired results, which we can all relate to.

Be sure to check out the video after the break, and also [Gijs] website. He’s been hacking away at projects such as these for a very long time, and we’ve even featured his projects going back more than 15 years. Thanks for the continued hacks, [Gijs]. We look forward to seeing what you come up with next!

If the terms “BEAM robotics” and “circuit bending” are unfamiliar to your ears (or if a refresh is due), be sure to check out our recent re-introduction to BEAM robotics and our classic “Intro to Circuit Bending” to get acquainted. Continue reading “Spiffy Summer Project Sources Solar Sounds From Scraps”

Retrotechtacular: Understanding Protein Synthesis Through Interpretive Dance

With the principles of molecular biology very much in the zeitgeist these days, we thought it would be handy to provide some sort of visual aid to help our readers understand the complex molecular machines at work deep within each cell of the body. And despite appearances, this film using interpretive dance to explain protein synthesis will teach you everything you need to know.

Now, there are those who go on and on about the weirdness of the 1960s, but as this 1971 film from Stanford shows, the 60s were just a warm-up act for the really weird stuff. The film is a study in contrasts, with the setup being provided by the decidedly un-groovy Paul Berg, a professor of biochemistry who would share the 1980 Nobel Prize in Medicine for his contributions to nucleic acid research. His short sleeves and skinny tie stand in stark contrast to the writhing mass of students capering about on a grassy field, acting out the various macromolecules involved in protein synthesis. Two groups form the subunits of the ribosome, a chain of ballon-headed students act as the messenger RNA (mRNA) that codes for a protein, and little groups standing in for the transfer RNA (tRNA) molecules that carry the amino acids float in and out of the process.

The level of detail, at least as it was understood in 1971, is impressively complete, with soloists representing things like T-factor and the energy-carrying molecule GTP. And while we especially like the puff of smoke representing GTP’s energy transfer, we strongly suspect a lot of other smoke went into this production.

Kitsch aside, and with apologies to Lewis Carroll and his Jabberwock, you’ll be hard-pressed to find a modern animation that captures the process better. True, a more traditional animation might make the mechanistic aspects of translation clearer, but the mimsy gyre and gimble of this dance really emphasize the role random Brownian motion plays in macromolecular processes. And you’ll never see the term “tRNA” and not be able to think of this film.

Continue reading “Retrotechtacular: Understanding Protein Synthesis Through Interpretive Dance”

Cool WS2811 Trick Makes LED Art Installation Smooth

Normally, when a project calls for addressable LEDs, we just throw a strip of WS2812s and an Arduino together, cobble together some code from the examples in the FastLED library, and call it a day. We don’t put much thought into what’s going on under the hood, unless and until we run into an LED project that’s a little more challenging.

Inventor [Leo Fernekes] found himself in such a situation recently, when he pitched in on an LED art installation. The project called for rings of LED bars around the trunks of trees on a private estate. The physical size of the project and the aesthetic requirements created significant challenges, though. One of these was finding a way to control the LED bars, each of which draws about 100 mA and needs to be very smoothly dimmed. [Leo] looked at the WS2811 LED driver, but found that the low drive current and the 8-bit PWM output failed to tick either of those boxes.

[Leo] solved both problems by using two of the three PWM channels on the chip in concert — one to control the current and one to PWM the LED. The circuit he came up with is deceptively simple — just four transistors, a Schottky diode, and a bunch of passives. The other clever bit is the data interface between LED bars, which can be configured as either single-ended or differential. This allows the same interface to be used for the short distance between bars on a tree, and the longer runs between trees.

As usual, [Leo] does a great job of explaining his design and how it works, which we find very instructional. He did something similar when he managed to dim a non-dimmable LED fixture.

Continue reading “Cool WS2811 Trick Makes LED Art Installation Smooth”