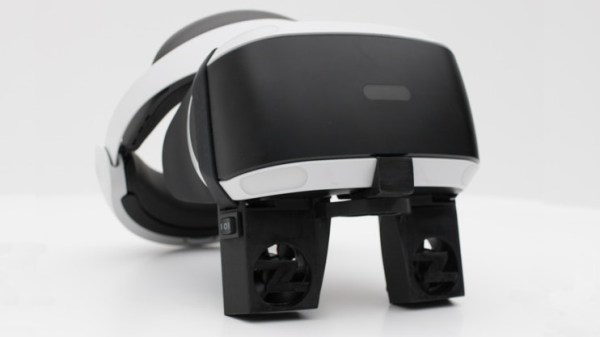
A simple way to integrate physical feedback into a virtual experience is to use a fan to blow air at the user. This idea has been done before, and the fans are usually the easy part. [Paige Pruitt] and [Sean Spielberg] put a twist on things in their (now-canceled) Kickstarter campaign called ZephVR, which featured two small fans mounted onto a VR headset. The bulk of their work was in the software, which watches the audio signal for recognizable “wind” sounds, and uses those to turn on one or both fans in response.
The benefit of using software to trigger fans based on audio cues is that the whole system works independently of everything else, with no need for developers and software to build in support for your project, or to use other middleware. Unfortunately the downside is that the results are only as good as the ability of software to pick the right sounds and act on them. Embedded below is a short video showing a test in action.
Some people collect stamps, some collect barbed wire, and some people even collect little bits of silicon and plastic. But the charmingly named [videoschmideo] collects memories, mostly of his travels around the world with his wife. Trinkets and treasures are easy to keep track of, but he found that storing the audio clips he collects a bit more challenging. Until he built this audio memory chest, that is.
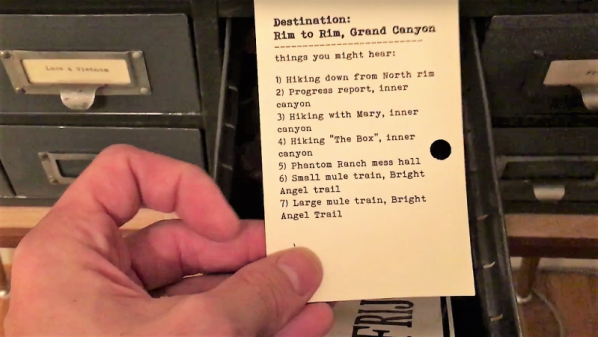
Granted, you might not be a collector of something as intangible as audio files, and even if you are, it seems like Google Drive or Dropbox might be the more sensible place to store them. But the sensible way isn’t always the best way, and we really like this idea. Starting with what looks like an old card catalog file — hands up if you’ve ever greedily eyed a defunct card catalog in a library and wondered if it would fit in your shop for parts storage — [videoschmideo] outfitted 16 drawers with sensors to detect when they’re opened. Two of the drawers were replaced by speaker grilles, and an SD card stores all the audio files. When a drawer is opened, a random clip from that memory is played while you look through the seashells, postcards, and what-have-yous. Extra points for using an old-school typewriter for the drawer labels, and for using old card catalog cards for the playlists.
This is a simple idea, but a powerful one, and we really like the execution here. This one manages to simultaneously put us in the mood for some world travel and a trip to a real library.
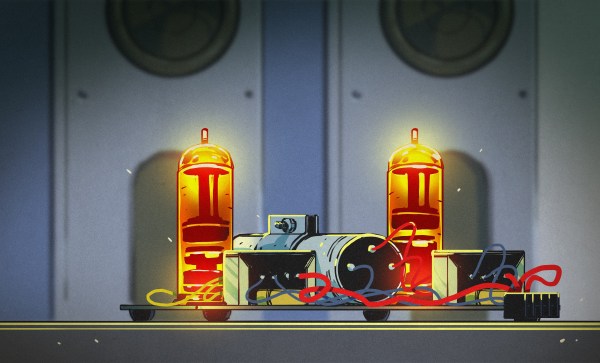
There are few greater follies in the world of electronics than that of an electronic engineering student who has just discovered the world of hi-fi audio. I was once that electronic engineering student and here follows a tale of one of my follies. One that incidentally taught me a lot about my craft, and I am thankful to say at least did not cost me much money.
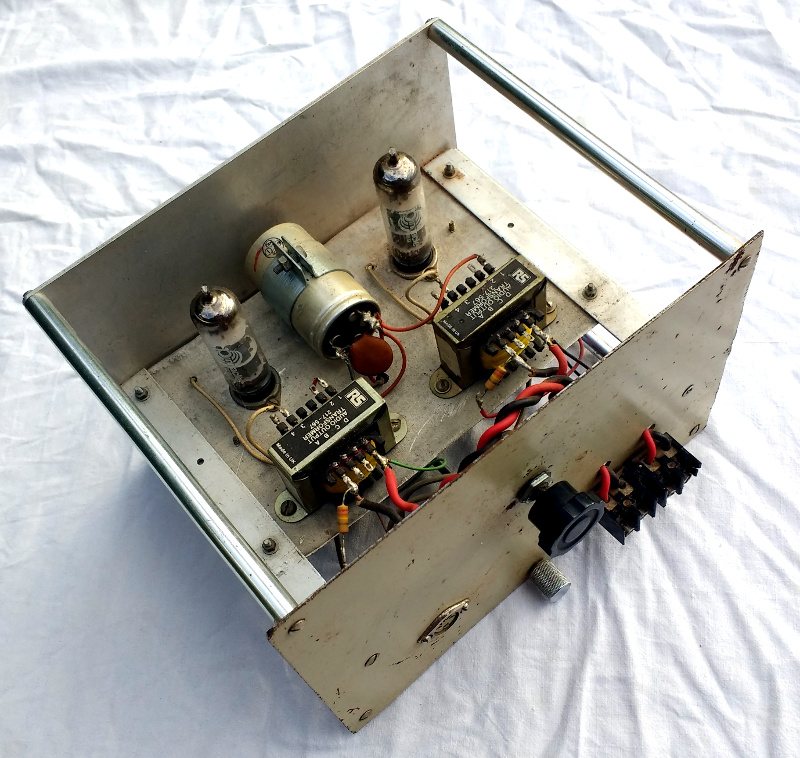
Construction more suited to 1962 than 1992.
It must have been some time in the winter of 1991/92, and being immersed in student radio and sound-and-light I was party to an intense hi-fi arms race among the similarly afflicted. Some of my friends had rich parents or jobs on the side and could thus afford shiny amplifiers and the like, but I had neither of those and an elderly Mini to support. My only option therefore was to get creative and build my own. And since the ultimate object of audio desire a quarter century ago was a valve (tube) amp, that was what I decided to tackle.
Nowadays, building a valve amp is a surprisingly straightforward process, as there are many online suppliers who will sell you a kit of parts from the other side of the world. Transformer manufacturers produce readily available products for your HT supply and your audio output matching, so to a certain extent your choice of amp is simply a case of picking your preferred circuit and assembling it. Back then however the world of electronics had extricated itself from the world of valves a couple of decades earlier, so getting your hands on the components was something of a challenge. I cut out the power supply by using a scrap Dymar Electronics instrument enclosure which had built-in HT and heater rails ready to go, but the choice of transformers and high-voltage capacitors was something of a challenge.
Pulling the amplifier out of storage in 2017, I’m going in blind. I remember roughly what I did, but the details have been obscured by decades of other concerns. So in an odd meeting with my barely-adult self, it’s time to take a look at what I made. Where did I get it right, and just how badly did I get it wrong?
There are times when I feel the need to really make a mess. When I think of making messes with a degree of permanency, I think of fiberglass. I also really like the smell, reminds me of a simpler time in 8th grade shop class. But the whole process, including the mess, is worth it for the amazing shapes you can produce for speaker pods and custom enclosures.
Utilizing fiberglass for something like a custom speaker pod for a car is not difficult, but it does tend to be tedious when it comes to the finishing stages. If you have ever done bodywork on a car you know what kind of mess and effort I am talking about. In the video below, I make a simple speaker pod meant for mounting a speaker to the surface of something like a car door.
You can also use a combination of wood and fiberglass to make subwoofer cabinets that are molded to the area around them. You can even replace your entire door panel with a slick custom shaped one with built in speakers if you’re feeling adventuresome.
If you are a wine, beer, or cider maker, you’ll know the ritual of checking for fermentation. As the yeast does its work of turning sugar into alcohol, carbon dioxide bubbles froth on the surface of your developing brew, and if your fermentation container has an airlock, large bubbles pass through the water within it on a regular basis. Your ears become attuned to the regular “Plop… plop… plop” sound they make, and from their interval you can tell what stage you have reached.
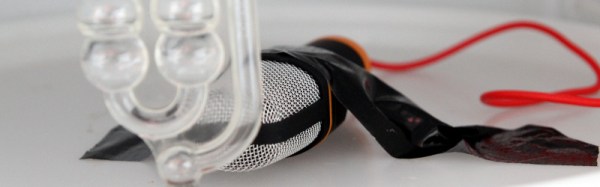
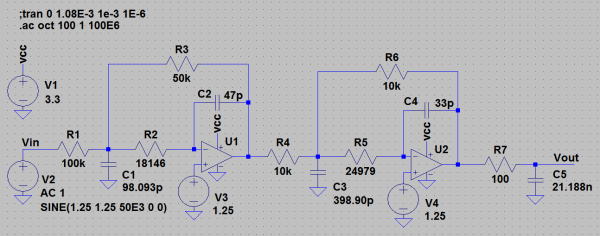
[Chris] automated this listening for fermentation bubbles, placing a microphone next to his airlock and detecting amplitude spikes through two techniques: one using an FFT algorithm and the other a bandpass filter. Both techniques yielded similar graphs for fermentation activity over time.
Once you fall deep enough into the rabbit hole of any project, specific information starts getting harder and harder to find. At some point, trusting experts becomes necessary, even if that information is hard to find, obtuse, or incomplete. [turingbirds] was having this problem with Bessel filters, namely that all of the information about them was scattered around the web and in textbooks. For anyone else who is having trouble with these particular filters, or simply wants to learn more about them, [turingbirds] has put together a guide with all of the information he has about them.
For those who don’t design audio circuits full-time, a Bessel filter is a linear, passive bandpass filter that preserves waveshapes of signals that are within the range of the filter’s pass bands, rather than distorting them in some way. [turingbirds]’s guide goes into the foundations of where the filter coefficients come from, instead of blindly using lookup tables like he had been doing.
For anyone else who uses these filters often, this design guide looks to be a helpful tool. Of course, if you’re new to the world of electronic filters there’s no reason to be afraid of them. You can even get started with everyone’s favorite: an Arduino.
One of the driving principles of a lot of the projects we see is simplicity. Whether that’s a specific design goal or a result of having limited parts to work with, it often results in projects that are innovative solutions to problems. As far as simplicity goes, however, the latest project from [153armstrong] takes the cake. The build is able to detect lightning using a single piece of equipment that is almost guaranteed to be within a few feet of anyone reading this article.
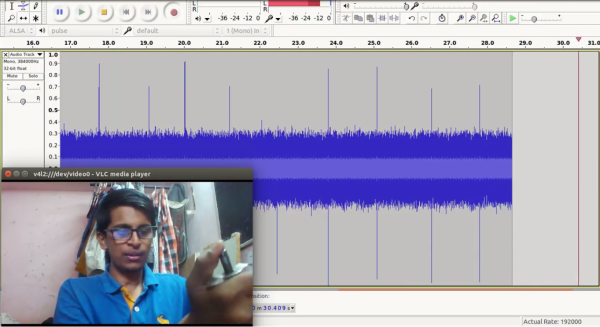
The part in question is a simple, unmodified headphone jack. Since lightning is so powerful and produces radio waves in many detectable ranges, it doesn’t take much to detecting a strike within a few kilometers. Besides the headphone jack, a computer with an audio recording program is also required to gather data. (Audio is often used as a stand-in for storing other types of data; in this case, RF information.) [153armstrong] uses a gas torch igniter as a stand-in for a lightning strike, but the RF generated is similar enough to test this proof-of-concept. The video of their tests is after the break.
Audacity is a great tool for processing audio, or for that matter any other data that you happen to be gathering using a sound card. It’s open source and fairly powerful. As far as lightning goes, however, it’s possible to dive far down the rabbit hole. Detecting lightning is one thing, but locating it requires a larger number of weather stations.