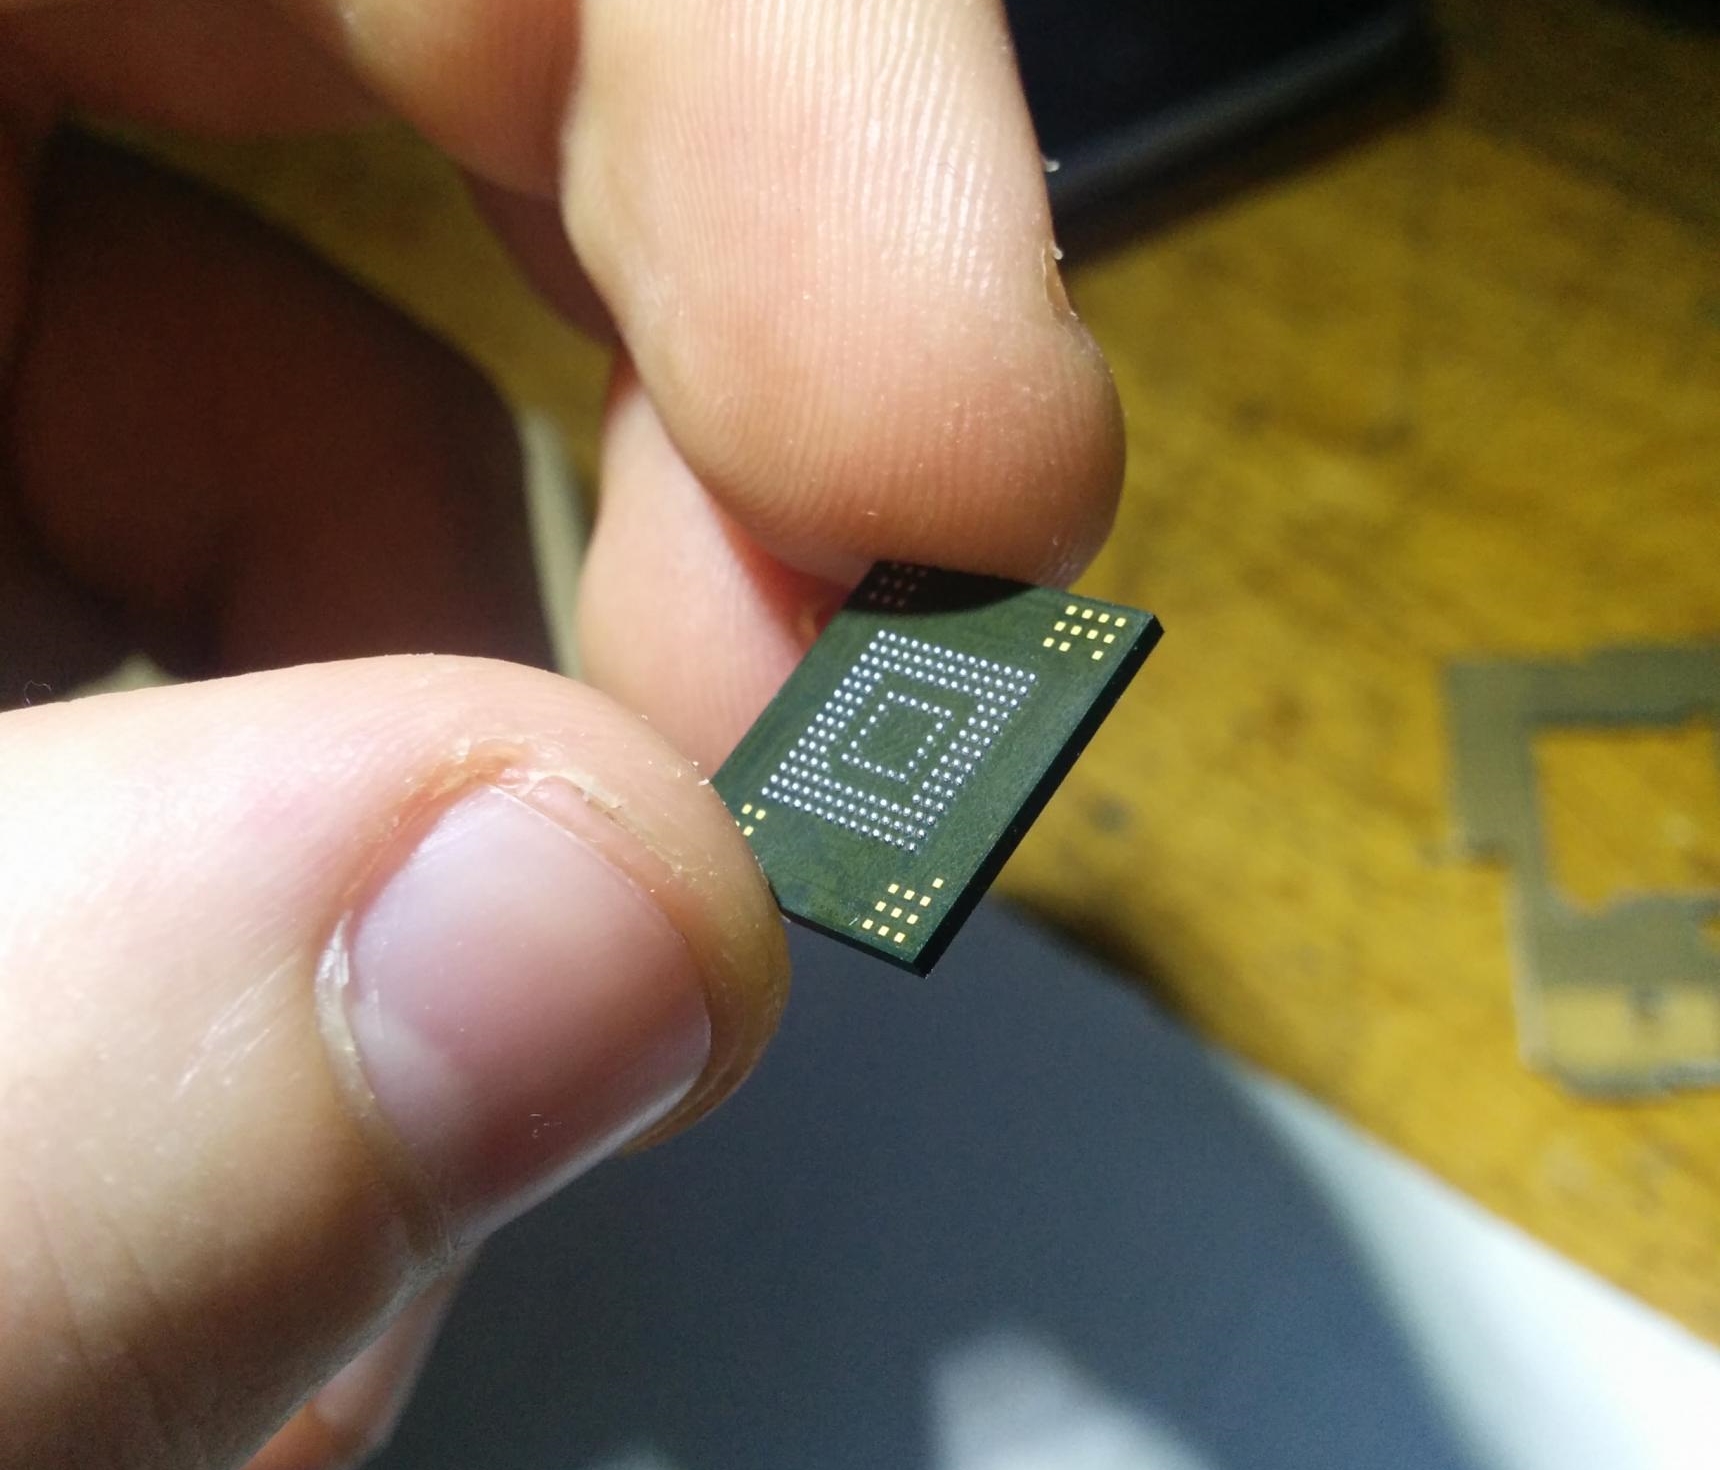
It’s well-known that buying Flash storage devices from cheap online retailers is fraught with danger. Stories abound of multi-gigabyte drives that turn out to be multi-megabyte ones engineered to falsely report their capacity. So when [Jason Gin] found a source of 64GB Toshiba eMMC chips for only $6 per device he bought a few, but was prepared for disappointment.
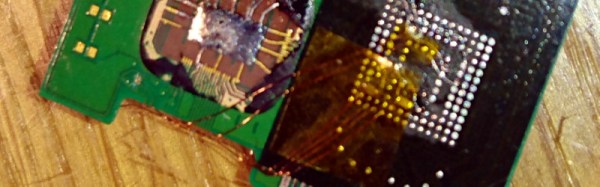
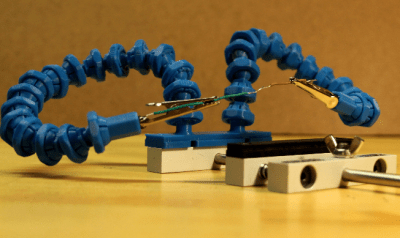
To test them, he decided to use an SD card interface. There are minor differences between eMMC and SD, but the interfaces are electrically the same and in most cases an SD controller will happily do business with an eMMC. It was not however an easy task to connect the two — these eMMCs were in BGA packages, hardly the easiest ones to work with. He resorted to dead-bug soldering the relevant interface wires to SD lines, and connecting up his computer.
His first attempt was something of a failure, wiring the chip to the PCB of a cheap USB-to-SD adaptor. This did not put him off though, he followed it up by cracking open a very old 2GB SD card that contained a PCB instead of being potted, and soldering his eMMC in place of its Flash and controller. This even fit in the original SD housing, and met with success when plugged into more reliable SD card readers. He was thus able to confirm the capacity of his chips.
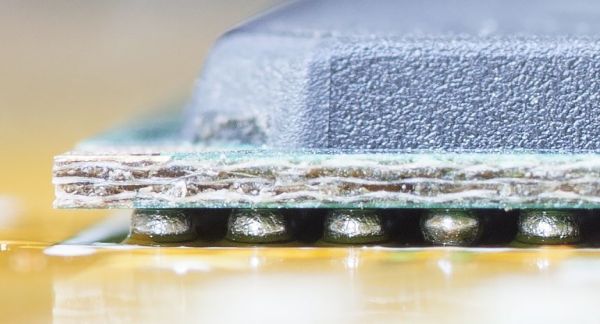
His blog post is worth a read for more than just the very fine soldering involved. He takes us through some of the intricacies of SD interfacing, as well as talking at length about the decoupling and termination required to make a reliable connection. We particularly like his use of an area of unconnected BGA balls as prototyping space for decouplers.
If you marvel at the exceptional dexterity required for hand BGA work, we’ve a couple of other treats for you. There is this TI infra-red sensor BGA soldered to a piece of stripboard, and this wafer-level chip package soldered to an SOIC prototyping board.
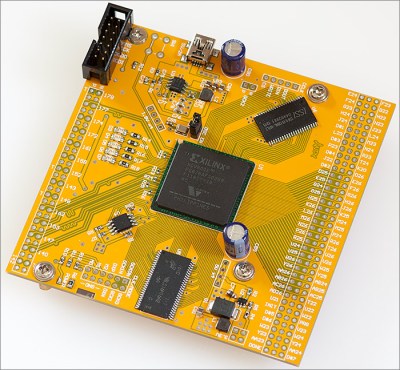 The project [Andy] had in mind for these chips was a generic dev board, which meant breaking out the IO pins and connecting some SRAM, SDRAM, and Flash memory. The first issue with this project is escape routing all the balls. Xilinx published a handy application note that recommends specific design parameters for the traces of copper under the chip. Unfortunately, this was a six-layer board, and the design rules in the application note were for 5/5mil traces. [Andy]’s board house can’t do six-layer boards, and their design rules are for 6/6mil traces. To solve this problem, [Andy] just didn’t route the inner balls, and hoped the 5mil traces would work out.
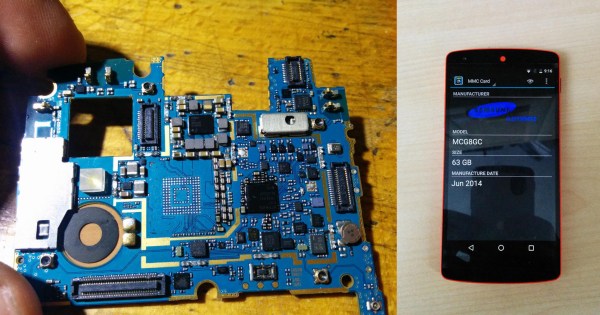


 We start with [Kuro] a

 We’ve covered this intriguing project before: the aim is to build a small, cheap module that


