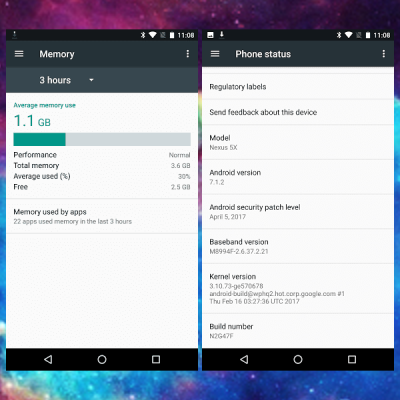
If you’re an Android fan, there’s a good chance you’ve heard of the Nexus 5X. The last entry in Google’s line of low-cost Nexus development phones should have closed the program on a high note, or at the very least maintained the same standards of quality and reliability as its predecessor. But unfortunately, a well known design flaw in the Nexus 5X means that the hardware is essentially a time-bomb. There are far too many reports of these phones entering into an endless bootloop right around the one year mark to say it’s just a coincidence.
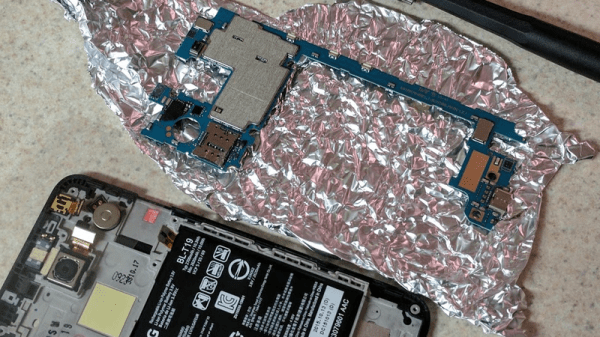
 The general consensus seems to be that faulty BGA chip soldering on the CPU works lose after about a year or so of thermal stress. Whatever the reason, [hillbillysam] recently found himself the proud owner of a dead Nexus 5X. Resigned to the fact that he would need to get a new phone, he at least wanted to get some of his data off the device before it went to that big landfill in the sky.
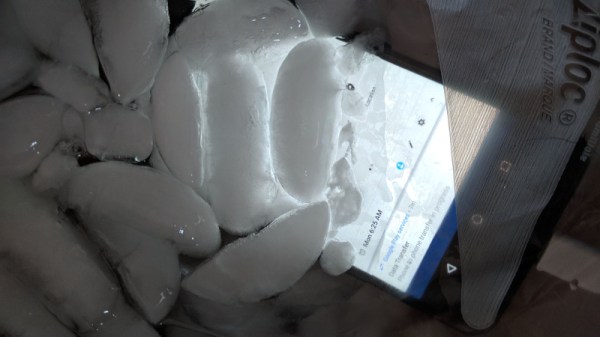
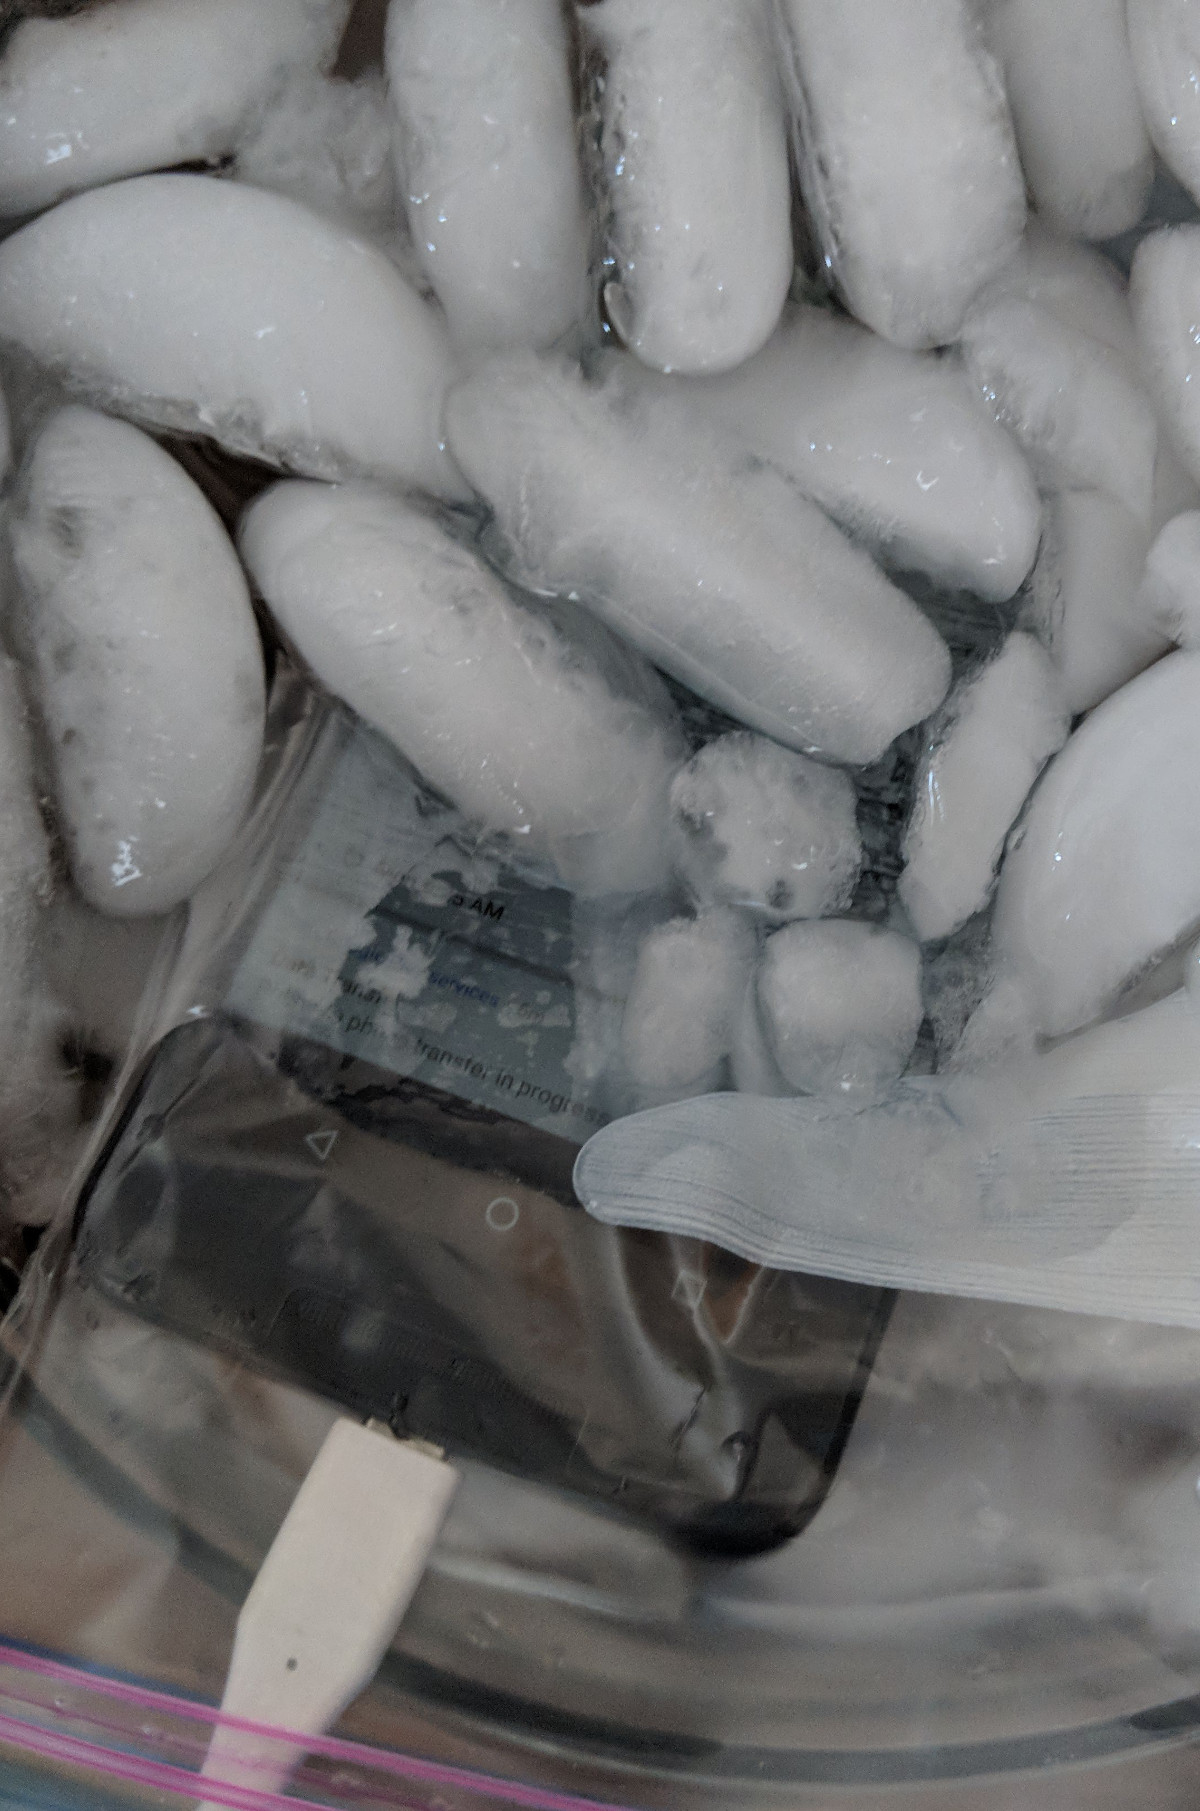
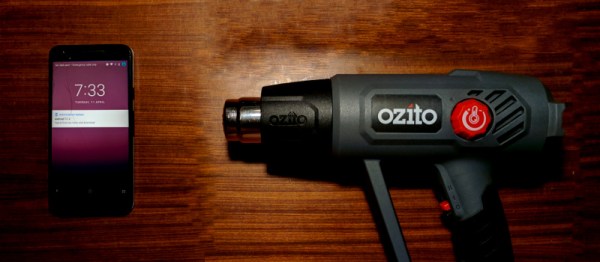
As it turns out these bootlooped phones can temporarily be revived by cooling them down, say by putting them in the freezer for a few hours. There’s plenty of debate as to why this works, but even our own [Lewin Day] can testify that it does seem to get the phone booting again; though only until it comes back up to operating temperature. With this in mind, [hillbillysam] reasoned that if he kept the phone as cold as possible while it was running, it may stay operational long enough for him to pull his files off of it over USB.
He couldn’t exactly freeze the phone in a block of ice, but remembering his high school chemistry, he came up with something pretty close. By adding salt to water, you can significantly lower temperature at which it freezes. Putting the phone into a watertight bag and submerging it in this supercooled solution is an easy and non-destructive way of keeping it very cold while still being accessible over USB.
His Nexus 5X was able to keep kicking the whole time it was luxuriating in its below-freezing saltwater bath, giving him plenty of time to copy everything he needed. It doesn’t sound like the kind of spa day we’d like to have personally, but to each their own.
If your Nexus 5X has met a similar fate, you may want to take a look at our previous coverage about the issue. While your mileage may vary, we’ve reported on a couple of success stories so it’s worth a shot.
[via /r/nexus5x]