Build A Binary Wall Clock For Just A Few Bucks

The weekend is almost here and if you’re looking for an afternoon project consider building your own binary wall clock. [Emihackr97] built the one you see above using parts on hand, but even if you put in an order for everything, it won’t cost you much.

He used a cardboard box as the housing for the clock, marking a grid for the LEDs on the face and drilling holes to house them. Two columns for hours and another two for minutes let the clock display 24-hour time with alternate firmware for 12 hour time. Since there are two buttons – one to set hours, the other to set minutes – a little coding would make it possible to select between the two either by clicking both buttons at once, or holding down one button.

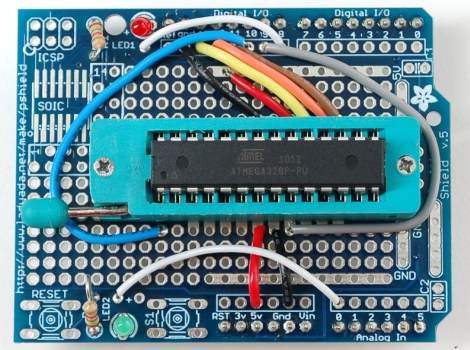
[Emihackr97] is driving the display with an ATmega48, which is a pin-compatible replacement for the ATmega168/328. Those chips are the type most commonly found on Arduino boards an indeed this project is running the Arduino bootloader, but uses an ISP programmer and breadboarded circuit to keep the costs low. There are plenty of pins to drive the 13 LEDs directly, making the soldering quick and painless. Check out a demo clip after the break.

If you’re successful at this build and get the itch for something with more style, there’s a ton of ways to spice up the look of a binary clock.

Continue reading “Build A Binary Wall Clock For Just A Few Bucks”

arduino_bootloader_burner

A Beginner’s Guide To Burning Arduino Bootloaders

When it comes to learning about microcontrollers, everyone has to start somewhere. [Lady Ada] recently posted a tutorial on burning the Arduino bootloader to standalone chips for those just getting started with the micro.

The tutorial cites a common situation, where someone is working on a project using an Arduino chip but they don’t want to sacrifice their dev board when just the micro and a few other components would do just fine. A short list of supplies is required, including an Arduino, a proto shield kit, a ZIF socket, and a blank ATmega chip.

The process is probably pretty straightforward and likely familiar to many of you out there. The ZIF socket is soldered to the board and handful of wires are added for powering and programming the new chip. The protoboard is installed on top of the Arduino like any other shield, and using a sketch that [Lady Ada] has made available, the bootloader burning process is a cinch.

It’s a useful tip for newcomers, and definitely a skill that seasoned Arduino users should have under their belts as well.

Bootloader Burning Basics

[Charles Gantt] and a few others were having trouble burning the Sanguino bootloader to an ATmega644 chip. With some help from the [Nils Vogil] via the RepRap IRC [Charles] got it worked out and wrote a guide for burning the bootloader using an Arduino as an ISP programmer.

We’re not familiar with the specifics of the Sanguino bootloader, but [Charles] mentioned that he was unable to flash it onto the AVR chip without a resonator. The resonator serves as an external clock source for the chip. We’d bet the programming process changes the fuse settings on the chip to use an external source. Without that source, you won’t be able to communicate with the chip afterwards.

The solution just adds the resonator to the programming circuit. This should be useful when burning any bootloader using an Arduino. But it does make us wonder if there isn’t an alternative method that would let you draw the clock signal from the Arduino itself?

Circuit Design For Multiple UART Connections

[Bill Porter] has a tip for designing circuits that have multiple connections to a single microcontroller UART. This stemmed from a review of a friend’s circuit design that used the UART in the project, but also called for an FTDI chip in order to reprogram via USB and a bootloader. Unlike the schematic above, the circuit called for straight connections without any resistors. With that design, a conflict will occur if two devices are connected and attempting to communicate at the same time.

The fix is easy. [Bill] discusses how to prioritize the connection by adding the pair of current limiting resistors seen above. This helps to ensure that damage will not occur, and that the FTDI chip will take precedence. Now the external hardware will not preclude the FTDI chip from accessing and programming via the bootloader. The tutorial is intended for those rolling their own boards out of an Arduino-based prototype, but it will work in any situation where you need multiple connections to a single set of UART pins.

Gitbrew Brings OtherOS Back To The PS3

otheros

Instead of simply watching the days pass by while the PSN network continues to be unavailable, why not do something useful with your PS3 console? [MS3FGX] wrote in to share some news regarding efforts to bring the OtherOS option back to the PS3.

The team at gitbrew.org have been diligently working to bring Linux back to the console for a little while now, and have released a dual-boot firmware they are calling OtherOS++. This firmware has two huge benefits over Sony’s original attempt at Linux support for the console. It can be run on the original “fat” PS3s as well as the newer “slim” models – something that was not possible until now. Additionally, it gives the Linux install full access to the PS3’s hardware rather than running the OS inside a virtual machine.

The project is relatively new, so the installation procedures and associated documentation are not suitable for the less experienced individuals out there, so consider yourself warned.

We love that there are people doing all they can to bring this awesome feature back to the PS3 – it’s a huge step in the right direction.

[Image via gitbrew]

Automated Chip Burning

[Alexsoulis] needed to burn the Arduino bootloader to a slew of ATmega328 chips. Instead of sitting there and plugged the chips into a programmer one at a time, he build a robotic microcontroller programmer.

It starts with the DIP package microcontrollers in a tube, with a servo motor to dispense them one-by-one. An arm swings over and picks up the chip with a fish pump powered vacuum tweezers similar to the pick-and-place head we saw recently. From there the chip is dropped into a ZIF socket and programmed by an Arduino. Once the process is complete it is moved to the side and the process repeats.

We’ve reported on using an Arduino as an AVR programmer but we’ve never actually done it ourselves (we use an AVR Dragon programmer). Take a look at the video after the break and let us know if you think the actual programming seems incredibly slow.

Continue reading “Automated Chip Burning”

Munchausen Makes NES A Cartridge Programmer

What a beautiful image of NES cartridges showing their private parts. These are the raw materials for the Munchausen Flash Cartridge project. A combination of a modified game cartridge and special USB cable makes it possible to program NES cartridges while inside an unmodified console. The cartridge has an added flash chip that is running a bootloader. By connecting a USB-to-NES cable to the second controller port a game image (or custom code image) can be flashed to one of the three game slots on the writable cartridge. The bootloader provides a menu at power-up to select between the three stored images, or can go straight to the previously selected image by holding down A when the console is turned on. There’s even a recovery routine in case of problems. Check out the demo after the break.

One thing we find interesting from the forum thread is a mention that it is technically possible to run code on the NES directly from the PC. That would sure make it easy to perform live chiptunes on NES.

Continue reading “Munchausen Makes NES A Cartridge Programmer”