Ironclad Tips For Copper-Clad Prototyping

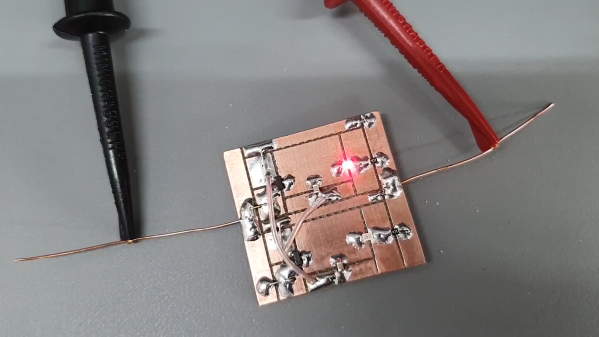
The idea of trying to prototype with SMD parts on the fly sounds like insanity, right? But then we watched [Leo Fernekes] walk calmly and carefully through his process (video, embedded below). Suddenly, SMD prototyping jumped onto our list of things to try soon.

[Leo] speaks from a lot of experience and tight client timelines, so this video is a fourteen-minute masterclass in using copper-clad board as a Manhattan-style scratch pad. He starts by making a renewable tool for scraping away copper by grinding down and shaping an old X-Acto blade into a kind of sharpened Swiss Army knife bottle opener shape. That alone is mind-blowing, but [Leo] keeps on going.

In these prototypes, he uses the through-hole version of whatever microcontroller is in the design. For everything else, he uses the exact SMT part that will end up on the PCB that someone else is busy designing in the meantime.

After laying the board out on paper, [Leo] carves out the islands of conductivity, beep-checks them for shorts, shines the whole thing with steel wool, and goes to town.

The tips and tricks keep coming as he makes jumps and joins ground planes with bare copper wire insulated with heat-proof Teflon tubing, and lays out the benefits of building up a stash of connectors and shelling out the money for a good crimp tool.

And why do you need a good crimp tool? Because when they’re done properly, crimped connections are stronger and more reliable than solder. There’s a lot more to them than you might think.

Continue reading “Ironclad Tips For Copper-Clad Prototyping”

Mimicking Exoplanet Exploration At Home

Mankind will always wonder whether we’re alone in the universe. What is out there? Sure, these past weeks we’ve been increasingly wondering the same about our own, direct proximity, but that’s a different story. Up until two years ago, we had the Kepler space telescope aiding us in our quest for answers by exploring exoplanets within our galaxy. [poblocki1982], who’s been fascinated by space since childhood times, and has recently discovered 3D printing as his new thing, figured there is nothing better than finding a way to combine your hobbies, and built a simplified model version simulating the telescope’s main concept.

The general idea is to detect the slight variation of a star’s brightness when one of its planets passes by it, and use that variation to analyze each planet’s characteristics. He achieves this with an LDR connected to an Arduino, allowing both live reading and logging the data on an SD card. Unfortunately, rocket science isn’t on his list of hobbies yet, so [poblocki1982] has to bring outer space to his home. Using a DC motor to rotate two “planets” of different size, rotation speed, and distance around their “star”, he has the perfect model planetary system that can easily double as a decorative lamp.

Obviously, this isn’t meant to detect actual planets as the real Kepler space telescope did, but to demonstrate the general concept of it, and as such makes this a nice little science experiment. For a more pragmatic use of our own Solar System, [poblocki1982] has recently built this self-calibrating sundial. And if you like rotating models of planets, check out some previous projects on that.

Continue reading “Mimicking Exoplanet Exploration At Home”

Hackaday Links Column Banner

Hackaday Links: May 24, 2020

We’re saddened to learn of the passing of Gershon Kingsley in December 2019 at the age of 97. The composer and electronic music pioneer was not exactly a household name, but the things he did with the Moog synthesizer, especially the surprise hit “Pop Corn”, which he wrote in 1969, are sure to be familiar. The song has been covered dozens of times, in the process of which the spelling of the name changed to “Popcorn.” We’re most familiar with the 1972 cover by Hot Butter, an earworm from our youth that doesn’t hide the Moog as deeply in the backing instruments as Kingsley did in the original. Or, perhaps you prefer the cover done by a robotic glockenspiel, because robotic glockenspiel.

A few months back, we covered the audacious plan to recover the radio gear from the Titanic. At the time, the potential salvors, Atlanta-based RMS Titanic, Inc., were seeking permission to cut into the submerged remains of the Titanic‘s Marconi room to remove as much of the wireless gear as possible. A federal judge granted permission for the salvage operation last Friday, giving the company the green light to prepare an expedition for this summer. The US government, through the National Oceanic and Atmospheric Administration and the National Park Service, argued strenuously to leave the wreck be and treat it as a tomb for the 1,527 victims. For our part, we had a great discussion about the merits in the comments section of the previous article. Now that it’s a done deal, we’d love to hear what you have to say about this again.

Although life appears to be slowly returning to what passes for normal, that doesn’t mean you might not still have some cycles to spare, especially when the time spent can bolster your skillset. And so if you’re looking to adding FPGAs to your resume, check out this remote lab on FPGA vision systems offered by Bonn-Rhein-Sieg University. The setup allows you to watch lectures, download code examples, and build them on your local computer, and then upload the resulting binaries to real hardware running on the lab’s servers in Germany. It sounds like a great way to get access to FPGA hardware that you’d otherwise have a hard time laying hands on. Or, you know, you could have just come to the 2019 Hackaday Superconference.

Speaking of skill-builders, oscilloscope owners who want to sharpen their skills could do worse than to listen to the advice of a real scope jockey like Allen Wolke. He recently posted a helpful video listing the five most common reasons for your scope giving “wrong” voltage readings. Spoiler alert: the instrument is probably doing exactly what you told it to do. As a scope newbie, we found the insights very helpful, and we can imagine even seasoned users could make simple mistakes like using the wrong probe attenuation or forgetting that scope response isn’t flat across its bandwidth.

Safety tip for the gearheads among us: your jack stands might be unsafe to use. Harbor Freight, the stalwart purveyor of cheap tools, has issued a recall of two different models of its jack stands. It seems that the pawls can kick out under the right conditions, sending the supported load crashing to the ground. This qualifies as a Very Bad Day for anyone unlucky enough to be working underneath when it happens. Defective jack stands can be returned to Harbor Freight for store credit, so check your garage and be safe out there in the shop.

And finally, because everyone loves a good flame war, Ars Technica has come up with a pronunciation guide for common tech terms. We have to admit that most of these are not surprising; few among the technology literate would mispronounce “Linux” or “sudo”. We will admit to a non-fanboy level of ignorance on whether the “X” in “iOS X” was a Roman numeral or not, but learning that the “iOS” part is correctly pronounced as three syllables, not two was a bit shocking. It’s all an exercise in pedantry that reminds us of a mildly heated discussion we had around the secret Hackaday writers’ bunker and whether “a LED” or “an LED” is the correct style. If the Internet was made for anything, it was stuff like this.
Finding RF Cable Impedance

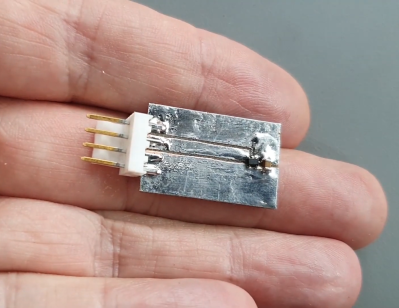
At DC and low frequency, we can pretend wires are perfect conductors. At radio frequencies, though, there are many effects that you need to take into account for wires and cables. One of these is characteristic impedance. If you have a marked cable, you can look it up on the Internet, of course. But what if you don’t know what kind of wire it is? With help from [The Offset Volt], you can measure it as he shows in the video below.

This is one of those things that used to take exotic test equipment like an LCR bridge, but these days meters that measure inductance and capacitance are commonplace. The trick is simple: measure the capacitance and then short one end of the cable and measure the inductance.

Continue reading “Finding RF Cable Impedance”

Arduband Gives Your Eyes A Hand

Let’s face it, we probably all sit at our computers for way too long without getting up. Yes, there’s work to be done, games to be played, and the internet abounds with people who are wrong and must be down-voted and/or corrected. We totally get and respect all that. However, if you want to maintain your middle- and long-range vision, you should really get up regularly and gaze out the window for a bit.

In fact, the Arduband does you one better. Its Arduino Nano and accelerometer check your position every ten minutes. If you haven’t changed your Z by the third check, then it’s time for a break. The combination of an RGB LED, buzzer, and vibrating disc motor working together should be enough to pull you out of any computerized stupor, and they won’t give up and go back to sleep until you have stood up and remained upright for one minute.

We like that [ardutronics123] spun up a board and made it small enough to be wrist-mounted using a watch strap. It would work just as well worn around your neck, and would probably even fit in your pocket. Blink a few times before you check out the build video after the break.

Arduband would be great on the go, but who does that anymore? If you spend every day at the same desk, you could point a time-of-flight sensor at your chair and start a timer.

Continue reading “Arduband Gives Your Eyes A Hand”

DMCA Takedown Issued Over Casio Code That Wasn’t

Earlier this month, we posted coverage of an ingenious calculator hack that took a Casio calculator and put an ESP8266 module and an OLED display in the space occupied by its solar cell. Controlled by a pair of unobtrusive Hall effect devices, the calculator could have been used as an ingenious cheating device but was to us the epitome of a well-executed hack. We may have liked it but it seems the folks at Casio didn’t, because they’ve issued a DMCA takedown notice for the project’s GitHub repository.

Editor’s Update: [Tom Fleet] reports that GitHub has completed the DMCA review and found the code repo does not infringe on Casio’s IP. However, it appears the copyright claim on the YouTube video has not been resolved and that video remains unavailable. However, that video is still available on the Internet Archive.

This is a picture of Barbra Streisand, who might almost be the patron saint of unintended consequences. Unknown author / Public domain
This is a picture of Barbra Streisand, who might almost be the patron saint of unintended consequences. Unknown author / Public domain.

We’re not lawyers, but if you’d care to visit our original coverage and watch the video in full, you’ll see that the ESP does not in any way tap into the calculator’s functions. The epoxy blob over the Casio processor is intact and no wires connect to the calculator mainboard, so it is difficult to imagine how any Casio code could have found its way into a repository full of ESP8266 code for the Arduino IDE. A quick search for “Hack-Casio-Calculator” on GitHub, at the time of publishing, turned up the relevant code despite Casio’s takedown, and we can’t see what they’re on about. Maybe you can?

Over the years there have been many attempts to use the DMCA on projects in our community. Some have been legitimate, others have been attempts to suppress exposure of woeful security, and still more have been laughably absurd. This one seems to us to edge into the final category, because it is difficult to see how the project described could contain any Casio code at all. It would be entirely legitimate to  issue a DMCA takedown had the epoxy blob been removed and Casio’s code been retrieved from the calculator chip (and we’d certainly cover that story!), but as far as we can see taking a scalpel to a calculator’s case and stuffing a module behind the solar panel window does not come close.

It’s evident that Casio do not like the idea of one of their calculators being turned into a cheating device, and we understand why that might be the case. But to take the DMCA route has served only to bring more publicity to the affair, and those of us with long memories know that this can only lead to one conclusion.

Thanks [Tom] and others for the tip.

Matrix Of Resistors Forms The Hot Hands Behind This Thermochromic Analog Clock

If you’re going to ditch work, you might as well go big. A 1,024-pixel thermochromic analog clock is probably on the high side of what most people would try, but apparently [Daniel Valuch] really didn’t want to go to work that day.

The idea here is simple: heat up a resistor by putting some current through it, lay a bit of thermochromic film over it, and you’ve got one pixel. The next part was not so simple: expanding that single pixel to a 32 by 32 matrix.

To make each pixel square-ish, [Daniel] chose to pair up the 220-ohm SMD resistors for a whopping 2,048 components. Adding to the complexity was the choice to drive them with a 1,024-bit shift register made from discrete 74LVC1G175 flip flops. With the Arduino Nano and all the other support components, that’s over 3,000 devices with the potential to draw 50 amps, were someone to be foolish or unlucky enough to turn on every pixel at once. Luckily, [Daniel] chose to emulate an analog clock here; that led to additional problems, like dealing with cool-down lag in the thermochromic film when animating the hands, which had to be dealt with in software.

We’ve seen other thermochromic displays before, including recently with this temperature and humidity display. This one may not be the highest resolution display out there, but it’s big and bold and slightly dangerous, and that makes it a win in our book.