ESP32-Cam Does Time Lapse

Just a few years ago, had someone asked you how much a digital camera with WiFi would cost, you probably wouldn’t have said $6. But that’s about how much [Bitluni] paid for an ESP32-CAM. He wanted to try making the little camera do time lapse, and it turns out that’s pretty easy to do.

Of course, the devil is in the details. The camera starts out needing configuration on the USB interface and that enables the set up of Arduino integration and WiFi configuration. Because it stores each frame of the image on an SD card, the board can’t take rapid-fire pictures. [Bitluni] reports a 3-second delay was about the shortest he could manage, but for most purposes, he was using at least ten seconds.

The program has a live preview window to help you set up the shot, but before your recordings start that should be turned off so as not to overload the little processor and the I/O buses. The result is a bunch of JPG images that you can easily convert to a video on a PC if you wish.

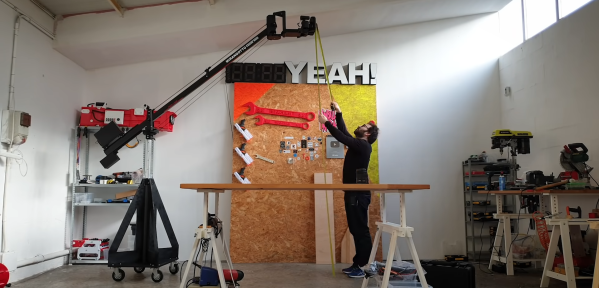
This might be a good way to fit a camera on a 3D printer, especially if the time lapse effect was desired. Otherwise, you might sync to a layer change. Now all [bitluni] needs is an orbital rig.

Continue reading “ESP32-Cam Does Time Lapse”

Add-On Makes ESP32 Camera Board Easier To Program

Don’t you just hate it when dev boards have some annoying little quirk that makes them harder to use than they should be? Take the ESP32-CAM, a board that started appearing on the market in early 2019. On paper, the thing is amazing: an ESP32 with support for a camera and an SD card, all for less than $10. The trouble is that programming it can be a bit of a pain, requiring extra equipment and a spare finger.

Not being one to take such challenges lying down, [Bitluni] has come up with a nice programming board for the ESP32-CAM that you might want to check out. The problem stems from the lack of a USB port on the ESP32-CAM. That design decision leaves users in need of a USB-to-serial adapter that has to be wired to the GPIO pins of the camera board so that programs can be uploaded from the Arduino IDE when the reset button is pressed. None of that is terribly complex, but it is inconvenient. His solution is called cam-prog, and it takes care of not only the USB conversion but also resetting the board. It does that by simply power cycling the camera, allowing sketches to be uploaded via USB. It looks to be a pretty handy board, which will be available on his Tindie store.

To demonstrate the add-on, he programmed his ESP32-CAM and connected it to his enormous ping pong ball video wall. The video quality is about what you’d expect from a 1,200 pixel display at 40 mm per pixel, but it’s still pretty smooth – smooth enough to make his interpretive dance moves in the last few minutes of the video pretty interesting.

Continue reading “Add-On Makes ESP32 Camera Board Easier To Program”

A New High-Performance Camera That Detects Single Photons

There may soon be breakthroughs in the search for dark matter. A new publication in Optics Express reveals a camera consisting of superconducting nanowires capable of detecting single photons, a useful feature for detecting light at the furthest ends of the infrared band. The high-performance camera, developed by the National Institute of Standards and Technology (NIST), boasts some of the best performing photon counters in the world in terms of speed, efficiency, and color detection. The detectors also have some of the lowest dark count rates of any photon sensor, resisting false signals from noise.

The size of the detectors comes out to 1.6mm on each side, packed with 1024 sensors for high resolution imagery and fabricated from silicon wafers cut into chips. The nanowires are made from tungsten and silicon alloy with leads made from superconducting niobium.

In order to prevent the sensors from overheating, a readout architecture was used based on a previous demonstration on a smaller camera with 64 sensors adding data from rows and columns. The research has been in collaboration with the National Aeronautics and Space Administration (NASA), which seeks to include the camera in the Origins Space Telescope project.

The eventual goal is to use the arrays to analyze chemical compositions of planets outside of our solar system. By observing the absorption spectra of light passing through an exoplanet’s atmosphere, information can be gathered on the elements in the atmosphere. Currently, large-area single-photon counting detector arrays don’t exist for measuring the mid- to far-infrared signatures, the spectrum range for elements that may indicate signs of life. While fabrication success is high, the efficiency of the detectors remains quite low, although there are plans to extend the current project into an even bigger camera with millions of sensors.

In addition to searching for chemical life on other planets, future  applications may include recording measurements to confirm the existence of dark matter.

[Thanks Qes for the tip!]

Focus Stacking For Tiny Subjects

Focus stacking is a photographic technique in which multiple exposures are taken of a subject, with the focus distance set to different lengths. These images are then composited together to create a final image with a greater depth of field than is possible with a single exposure. [Peter Lin] built a rig for accurate focus stacking with very small subjects.

The heart of the rig is a motion platform consisting of a tiny stepper motor fitted with a linear slide screw. This is connected to an Arduino or PIC with a basic stepper driver board. While the motor does not respond well to microstepping or other advanced techniques, simply driving it properly can give a resolution of 15 μm per step.

The motor/slide combination is not particularly powerful, and thus cannot readily be used to move the camera or optics. Instead, the rig is designed for photography of very small objects, in which the rail will move the subject itself.

It’s a tidy build that would serve well for anyone regularly doing macro focus stack photography. If you’ve been trying to better photograph your insect collection, this one is for you. It’s a valuable technique and one that applies to microscopy too. Video after the break.

Continue reading “Focus Stacking For Tiny Subjects”

Image Sensor From Discrete Parts Delivers Glorious 1-Kilopixel Images

Chances are pretty good that you have at least one digital image sensor somewhere close to you at this moment, likely within arm’s reach. The ubiquity of digital cameras is due to how cheap these sensors have become, and how easy they are to integrate into all sorts of devices. So why in the world would someone want to build an image sensor from discrete parts that’s 12,000 times worse than the average smartphone camera? Because, why not?

[Sean Hodgins] originally started this project as a digital pinhole camera, which is why it was called “digiObscura.” The idea was to build a 32×32 array of photosensors and focus light on it using only a pinhole, but that proved optically difficult as the small aperture greatly reduced the amount of light striking the array. The sensor, though, is where the interesting stuff is. [Sean] soldered 1,024 ALS-PT19 surface-mount phototransistors to the custom PCB along with two 32-bit analog multiplexers. The multiplexers are driven by a microcontroller to select each pixel in turn, one row and one column at a time. It takes a full five seconds to scan the array, so taking a picture hearkens back to the long exposures common in the early days of photography. And sure, it’s only a 1-kilopixel image, but it works.

[Sean] has had this project cooking for a while – in fact, the multiplexers he used for the camera came up as a separate project back in 2018. We’re glad to see that he got the rest built, even with the recycled lens he used. One wonders how a 3D-printed lens would work in front of that sensor.

Continue reading “Image Sensor From Discrete Parts Delivers Glorious 1-Kilopixel Images”

Robot Vs. Superbug

Working in a university or research laboratory on interesting, complicated problems in the sciences has a romanticized, glorified position in our culture. While the end results are certainly worth celebrating, often the process of new scientific discovery is underwhelming, if not outright tedious. That’s especially true in biology and chemistry, where scaling up sample sizes isn’t easy without a lot of human labor. A research group from Reading University was able to modify a 3D printer to take some of that labor out of the equation, though.

This 3D printer was used essentially as a base, with the printing head removed and replaced with a Raspberry Pi camera. The printer X/Y axes move the camera around to all of the different sample stored in the print bed, which allows the computer attached to the printer to do most of the work that a normal human would have had to do. This allows them to scale up massively and cheaply, presumably with less tedious inputs from a large number of graduate students.

While the group hopes that this method will have wide applicability for any research group handling large samples, their specific area of interest involves researching “superbugs” or microbes which have developed antibiotic resistance. Their recently-published paper states that any field which involves bacterial motility, colony growth, microtitre plates or microfluidic devices could benefit from this 3D printer modification.

Object Tracking Camera Slider Gets The Nice Shots

In this day and age, where all leisure activities must be duly captured and monetized online, camera sliders are hot items. Many start with a simple manual build, before graduating to something motorized for more flexibility. [Saral Tayal] took things a step further, implementing a basic tracking mode for even sweeter shots. 

The build is mechanically simple, relying on 8mm steel rods and linear bearings more typically found in 3D printers. An Arduino Uno is pressed into service to run the show, outfitted with an OLED screen to run the interface. A RoboClaw motor controller is used to control the geared DC motors used, one controlling the linear motion, the other the rotation of the camera.

With encoders fitted to the motors, the RoboClaw controller enables the Arduino to track the position and rotation of the slider as it moves. The slider then can be given the position of an object relative to itself. With a little maths, it will rotate the camera to track the object as it moves along.

It’s a simple addition to the typical slider build that greatly increases the variety of shots that can be achieved. There are plenty of ways to go about building a slider, too, as we’ve seen before. Video after the break.
Continue reading “Object Tracking Camera Slider Gets The Nice Shots”