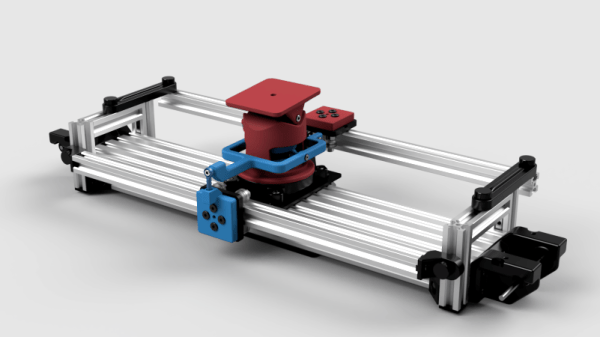
For anything involving video capture while moving, most videographers, cinematographers, and camera operators turn to a gimbal. In theory it is a simple machine, needing only three sets of bearings to allow the camera to maintain a constant position despite a shifting, moving platform. In practice it’s much more complicated, and gimbals can easily run into the thousands of dollars. While it’s possible to build one to reduce the extravagant cost, few use 100% off-the-shelf parts like [Matt]’s handheld gimbal.
[Matt]’s build was far more involved than bolting some brackets and bearings together, though. Most gimbals for filming are powered, so motors and electronics are required. Not only that, but the entire rig needs to be as balanced as possible to reduce stress on those motors. [Matt] used fishing weights to get everything calibrated, as well as an interesting PID setup.
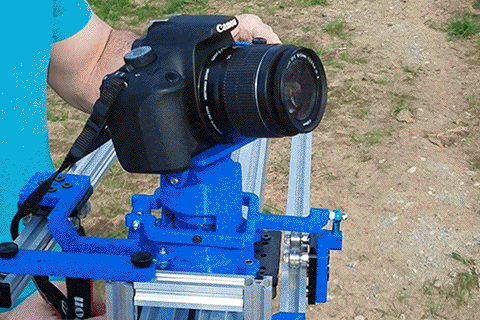
Be sure to check out the video below to see the gimbal in action. After a lot of trial-and-error, it’s hard to tell the difference between this and a consumer-grade gimbal, and all without the use of a CNC machine or a 3D printer. Of course, if you have access to those kinds of tools, there’s no limit to the types of gimbals you can build.