Monitoring Air Quality, One Sleepy Meeting At A Time

To those of us in the corporate world, the conference room is where hope goes to die. Crammed into a space too small for the number of invitees, the room soon glows with radiated body heat and the aromas of humans as the time from their last shower gradually increases. To say it’s not a recipe for productivity is an understatement at best.

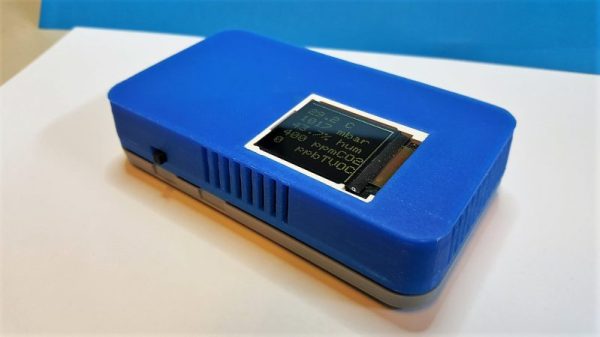
Having suffered through too many of these soporific situations, [Charles Ouweland] took matters into his own hands and built this portable air quality meter for meetings. With an OLED display on top and sensors inside, it displays not only the temperature, humidity, and barometric pressure, but also the CO₂ concentration and the levels of volatile organic compounds (VOC), noxious substances sometimes off-gassed from building materials, furniture upholstery, and coworkers alike.

The monitor quantifies his meeting misery, which we’re sure wins him points with his colleagues. For our part, though, what we find interesting is his design process. He started where many of us would, with an Arduino Uno. The sensor modules, a CCS811 for VOC and CO₂ as well as a BME280 for temperature, humidity, and pressure, both needed 3.3 volts, so he added a regulator to knock the Arduino’s 5-volt supply into range and some MOSFETs for level matching. Things were getting bulky, though, so he set about reducing the component count. The Uno went by stripping out its already programmed MCU. That killed the need for the regulator and MOSFETs, since everything would be happy with 3.3 volts. A few more rounds of optimization led to the final product, compact enough to run on a pair of AA batteries.

This is a great lesson in going from prototype to product. And it’s so compact, it could even ride on top of a Roomba to map the conference room’s floor-level air quality.

Reflow Soldering Improved With Carbon Dioxide

co2_reflow-oven

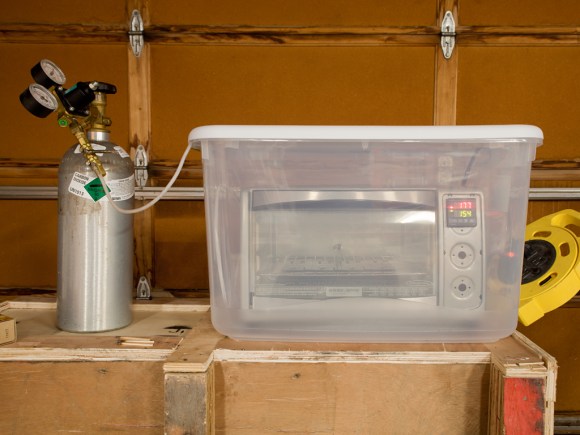
This is exactly what it looks like. [Oleg] calls it soldering in inert atmosphere, but it’s just a toaster oven reflow hack dropped into a container full of carbon dioxide.

Why go to this trouble? It’s all about solder wetting. This is the ability of the molten solder paste to flow into all of the tinned areas of a board. [Oleg] talks about the shelf life of hot air leveled PCB tinning, which is about six months. After this the tin has oxidized. It will certainly not be as bad as bare copper would have, but it can lead to bad solder joints if your PCBs are more than about six months off the production line. This is one of the reasons to use solder flux. The acid eats away at the oxidized layer, exposing tin that will have better wetting.

But there is another way. Soldering in the absence of oxygen will also help the wetting process. CO2 is heavier than air, so placing the reflow oven in a plastic container will allow you to purge air from the space. CO2 canisters are cheap and easy to acquire. If you keg your own homebrew beer you already own one!

If you’ve got everything but the reflow oven just look around for a few examples of how to build your own.

Force Carbonating Root Beer With Dry Ice

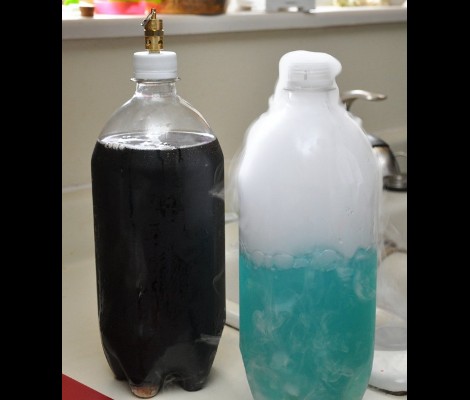
[Paul] is sick and tired of his homemade root beer being flat. He analyzed the problem with his carbonation techniques and ended up with a method of force carbonating beverages using dry ice.

He starts of by discussing the various methods that are used to carbonate beverages. There’s the old yeast and sugar trick that takes place inside of a sealed bottle. But this takes time, and if you don’t calculate the mixture correctly you could have over or under carbonated bottles (or exploding bottles in the case of glass beer bottling). [Paul] himself has tried the dry ice in a cooler full of root beer method. The problem is that the cooler isn’t pressurized so the carbonation level is very low. You need to have cold temperatures, high pressure, and the presence of carbon dioxide all at the same time in order to achieve high levels of carbonation.

His solution is to use a 60 PSI safety valve. He drilled a hole in a plastic bottle cap to receive the valve. He then drops a few chunks of dry ice in and seals it up. The valve will automatically release the gas as the pressure builds past the 60 PSI mark. What he ends up with is a highly carbonated beverage in a matter of minutes.

If you don’t mind spending some cash you can use an adjustable pressure regulator. This way you can carbonate just about anything.

[Thanks Steven]

CO2 Powered Pinewood Derby Car Is Definitely Cheating

The Pinewood Derby is a classic Cub Scout competition where dads and sons come together to build a small-scale race car. You start with a kit that includes a block of wood for the body, as well as four plastic wheels and four nails to act as axles. Most innovations in the ‘sport’ center around reducing friction between the wheels and the axles, and making the body as aerodynamic as possible.

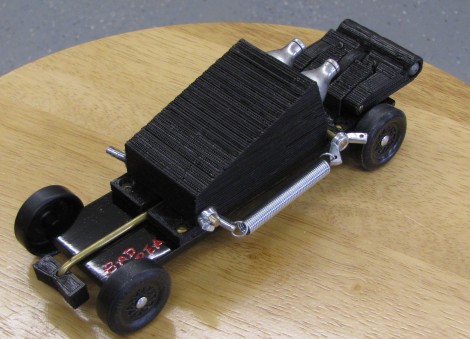
This year [Sliptronic] grabbed an extra kit and threw the rules out the window by powering the car with compressed carbon dioxide. He used a 3D printer to make a housing for two CO2 cartridges that mounts on the center of the chassis. An official Pinewood Derby race track is on an incline and has a wooden gate that keeps each car in place until it is dropped to start the race. [Sliptronic] is using this gate as the triggering mechanism. Springs on either side of the car pull against an arm at the back of the vehicle. This arm is held in place by a rod protruding out the front of the vehicle. When the start gate is dropped that rod releases the trigger, which is pulled up by the springs to pierce the CO2 cartridges. You can see an overview of how that mechanism works in the video after the break.

Continue reading “CO2 Powered Pinewood Derby Car Is Definitely Cheating”