Crossing Commodore Signal Cables On Purpose

On a Commodore 64, the computer is normally connected to a monitor with one composite video cable and to an audio device with a second, identical (although uniquely colored) cable. The signals passed through these cables are analog, each generated by a dedicated chip on the computer. Many C64 users may have accidentally swapped these cables when first setting up their machines, but [Matthias] wondered if this could be done purposefully — generating video with the audio hardware and vice versa.

Getting an audio signal from the video hardware on the Commodore is simple enough. The chips here operate at well over the needed frequency for even the best audio equipment, so it’s a relatively straightforward matter of generating an appropriate output wave. The audio hardware, on the other hand, is much less performative by comparison. The only component here capable of generating a fast enough signal to be understood by display hardware of the time is actually the volume register, although due to a filter on the chip the output is always going to be a bit blurred. But this setup is good enough to generate large text and some other features as well.

There are a few other constraints here as well, namely that loading the demos that [Matthias] has written takes so long that the audio can’t be paused while this happens and has to be bit-banged the entire time. It’s an in-depth project that shows mastery of the retro hardware, and for some other C64 demos take a look at this one which is written in just 256 bytes.

Continue reading “Crossing Commodore Signal Cables On Purpose”

Kaleidoscopico Shows Off Pi Pico’s Capabilities

In the early days of computing, and well into the era where home computers were common but not particularly powerful, programming these machines was a delicate balance of managing hardware with getting the most out of the software. Memory had to be monitored closely, clock cycles taken into account, and even video outputs had to be careful not to overwhelm the processor. This can seem foreign in the modern world where double-digit gigabytes of memory is not only common, it’s expected, but if you want to hone your programming skills there’s no better way to do it than with the limitations imposed by something like a retro computer or a Raspberry Pi Pico.

This project is called Kaleidoscopio, built by [Linus Åkesson] aka [lft] and goes deep into the hardware of the Pi Pico in order to squeeze as much out of the small, inexpensive platform as possible. The demo is written with 17,000 lines of assembly using the RISC-V instruction set. The microcontroller has two cores on it, with one core acting as the computer’s chipset and the other acts as the CPU, rendering the effects. The platform has no dedicated audio or video components, so everything here is done in software using this setup to act as a PC from the 80s might. In this case, [lft] is taking inspiration from the Amiga platform, his favorite of that era.

The only hardware involved in this project apart from the Pi Pico itself are a few resistors, an audio jack, and a VGA port, further demonstrating that the software is the workhorse in this build. It’s impressive not only for wringing out as much as possible from the platform but for using the arguably weaker RISC-V cores instead of the ARM cores, as the Pi Pico includes both. [lft] goes into every detail on the project’s page as well, for those who are still captivated by the era of computer programming where every bit mattered. For more computing demos like this, take a look at this one which is based on [lft]’s retrocomputer of choice, the Amiga.

Continue reading “Kaleidoscopico Shows Off Pi Pico’s Capabilities”

Linus Live-Codes Music On The Commodore 64

In this tremendously educational video, [Linus Åkesson] takes us through how he develops a synthesizer and a sequencer and editor for it on the Commodore 64, all in BASIC. While this sounds easy, [Linus] is doing this in hard mode: all of the audio is generated by POKE, and it gets crazier from there. If you’re one of those people out there who think that BASIC is a limited language, you need to watch this video.

[Linus] can do anything with POKE. On a simple computer like the C64, the sound chip, the screen chips, and even the interrupts that control program flow are all accessible simply by writing to the right part of memory. So the main loop here simply runs through a lot of data, POKEing it into memory and turning the sound chip on and off. There’s also a counter running inside the C64 that he uses to point into a pitch lookup table in the code.

But the inception part comes when he designs the sequencer and editor. Because C64 BASIC already has an interactive code editor, he hijacks this for his music editor. The final sequencer interface exists inside the program itself, and he writes music in the code, in real time, using things like LIST and editing. (Code is data, and data is code.) Add in a noise drum hack, and you’ve got some classic chiptuney sounds by the end.

We love [Linus]’s minimal C64 exercises, and this one gets maximal effect out of a running C64 BASIC environment. But that’s so much code in comparison to his 256-byte “A Mind is Born” demo. But to get that done, he had to use assembly.

Thanks [zogzog] for the great tip!

Continue reading “Linus Live-Codes Music On The Commodore 64”

The Clock, Another Way To Modify The Sound Of A Synth Chip

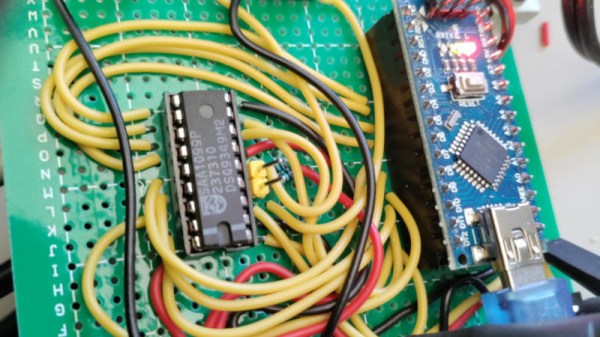
The Philips SAA1099 is perhaps one of the lesser-known among the crop of 1980s-era 8-bit sound generator chips, but with three stereo voices onboard it makes a capable instrument for chiptune experimentation. It’s attracted the attention of [Folkert van Heusden], who’s tried the novel experiment of seeing what happens when a sound chip’s clock is varied.

A quick search of the internet reveals that the chip, which appeared in early Sound Blaster cards, is intended to have an 8 MHz clock. He’s hooked it up to an Arduino as a variable clock source, which surprised us but it seems an ATmega328’s timer is faster than we expected.

There are a couple of WAV files, and as expected the clock frequency has a significant effect on the pitch. The samples just sweep up and down without much attempt at making a sound you’d want to hear, but it does raise an interesting possibility of adding a further pitch bending ability to the capabilities already in the chip. When these circuits were new we couldn’t control a clock on a whim with the 8-bit processors of the day, so of course none of us thought to try this at the time. He’s tried it, so you don’t have to.

The SAA1099 has been mentioned in these pages only once, as a chip used in peripherals for 1980s Czech computers.

Sound Generation Board Makes The Tunes

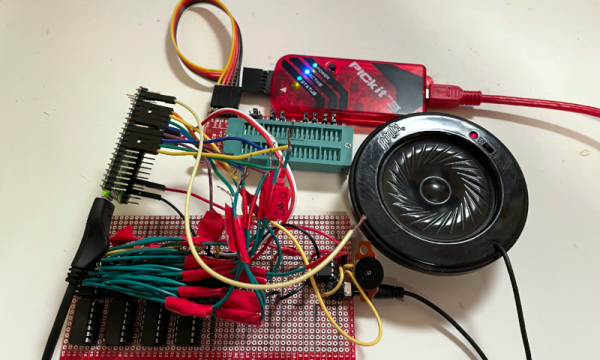
[Mcjack123] has been getting into chiptunes lately and realized that his original interest started in 2018 when he used an Arduino to turn a TI-84 calculator into a sound machine. His latest iteration is a custom-designed soundboard and he takes us through the design and construction of it in a recent post.

The work models classic sound generators like the 2A03 or the Commodore 64 SID. You have a bunch of simple waveform generators along with filters and modulators to make various effects. These boards eventually gave way to FM synthesis devices like the Yamaha OPL2 and OPL3 chips. All of these cards accepted commands and generated audio on their own. More modern boards are more likely to simply convert digital data from the computer into audio.

Continue reading “Sound Generation Board Makes The Tunes”

RCA Plug Plays Sixteen-Minute Chiptune Piece, All By Itself

Frequenters of arcades back in the golden age of video games will likely recall the mix of sounds coming from a properly full arcade, the kind where you stacked your quarters on a machine to stake your claim on being next in line to play. They were raucous places, filled with the simple but compelling sounds that accompanied the phosphor and silicon magic unfolding all around.

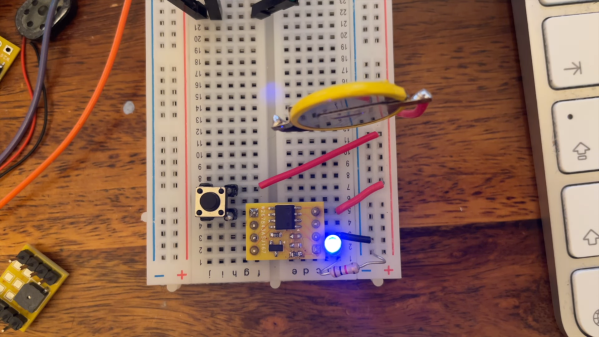
The days of such simple soundtracks may be gone, but they’re certainly not forgotten, with this chiptunes generator built into an RCA plug being both an homage to the genre and a wonderful example of optimization and miniaturization. It’s the work of [girst] and it came to life as an attempt to implement [Rob Miles]’ Bitshift Variations in C Minor algorithmically generated chiptunes composition in hardware. For the first attempt, [girst] chose an ATtiny4 as the microcontroller, put it and the SMD components needed for a low-pass filter on a flex PCB, and wrapped the whole thing around a button cell battery. Stuffed into the shell of an RCA plug, the generator detects when it has been inserted into an audio input jack and starts the 16-minute piece. [girst] built a second version, too, using the Padauk PSM150c “Three-Cent Microcontroller” chip.

This is quite an achievement in chiptunes minimization. We’ve seen chiptunes in 32 bytes, Altoids tin chiptunes, and an EP on a postage-stamp-sized PCB, but this one might beat them all on size alone.

Continue reading “RCA Plug Plays Sixteen-Minute Chiptune Piece, All By Itself”

RetroPlug Syncs Gameboy Emulators With Your DAW For Chiptunes Overload

The Gameboy is one of the biggest platforms in the chiptune scene. While it’s possible to play a show with a single handheld, many artists choose to use two or even more to fatten their sound and rock the crowd. To ease the workflow of creating songs for such a setup, [tommitytom] created Retroplug and you can see him walk through the features in the demo video after the break.

Retroplug is a VST wrapper for the Sameboy Gameboy emulator. This makes it possible to run multiple emulated Gameboy instances within digital audio software like Ableton or Fruityloops. Rather than having to juggle multiple 30-year old Gameboys and the associated batteries and link cables, instead, it can all be done within a hosted VST window.

Presently, the software works only with 64-bit Windows and VST2, however source is available for those eager to peek under the hood. It fully implements MIDI support for mGB, and works well with LSDJ and Arduinoboy setups. *.sav files are created for each emulated instance too, so when you’re done composing, you can throw your songs onto real hardware when you go out and perform!

We see no shortage of fresh projects, from Genesis chiptune players to MIDI control for Gameboys.  As its adherents always say, chiptune will never die. We’d love to see a similar project done with a C64 emulator, NES, or even the Genesis. If you happen to put it goether, drop us a line!

Continue reading “RetroPlug Syncs Gameboy Emulators With Your DAW For Chiptunes Overload”