Modified F Clamp Is Wheely Good

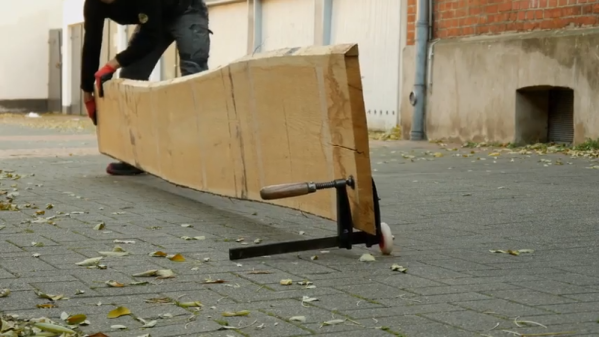
Sometimes, a job is heavy, messy, or unwieldy, and having an extra pair of hands to help out makes the job more than twice as easy. However, help isn’t always easy to find. Faced with this problem, [create] came up with an ingenious solution to help move long and heavy objects without outside assistance.

Simple, and effective.

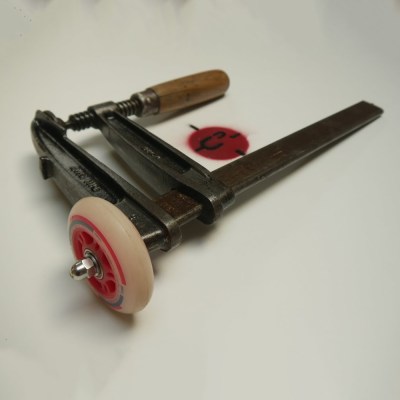
The build starts with a regular F-clamp  – a familiar tool to the home woodworker. The clamp is old and worn, making it the perfect candidate for some experimentation. First off, the handle is given a good sanding to avoid the likelihood of painful splinters. Then, the top bar is drilled and tapped, and some threaded rod fitted to act as an axle. A polyurethane wheel from a children’s scooter is then fitted, and held in place with a dome nut.

The final product is a wheel that can be clamped to just about anything, making it easier to move. [create] demonstrates using the wheelclamp to move a long piece of lumber, but we fully expect to see these on the shelf of Home Depot in 12 months for moving furniture around the house. With a few modifications to avoid marring furniture, these clamps could be a removalist’s dream.

While you’re busy hacking your tools, check out these useful bar clamps, too. Video after the break.

Continue reading “Modified F Clamp Is Wheely Good”

Scratch Built Toe Clamps Keep Your Work In Place

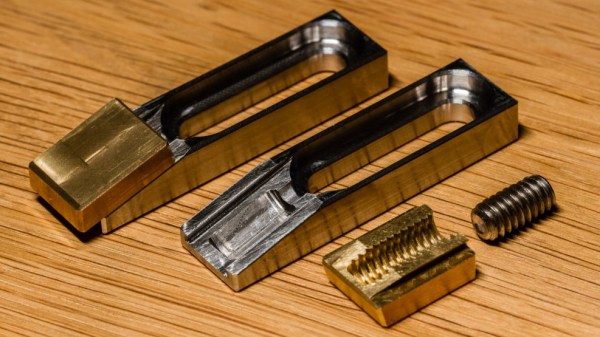
[Kevin] owns a benchtop CNC mill that has proven itself to be a capable tool, but after becoming familiar with some of its shortcomings, he has made a few modifications. In order to more efficiently hold and access workpieces on his custom fixturing table, he designed and made his own toe clamps and they look beautiful.

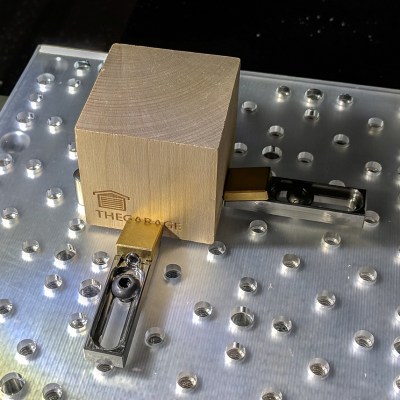
The usual way to secure a piece of stock to a fixturing table is to use top-down clamps, which hold the workpiece from the top and screw down into the table. However, this method limits how much of the stock can be accessed by the cutting tool, because the clamps are in the way. The most common way around this is to mount a vise to the table and clamp the workpiece in that. This leaves the top surface completely accessible. Unfortunately, [Kevin]’s benchtop Roland MDX-450 has a limited work area and he simply couldn’t spare the room. His solution was toe clamps, which screw down to the table and have little tabs that move inwards and downward. The tabs do the work of clamping and securing a piece of stock while maintaining a very low profile themselves.
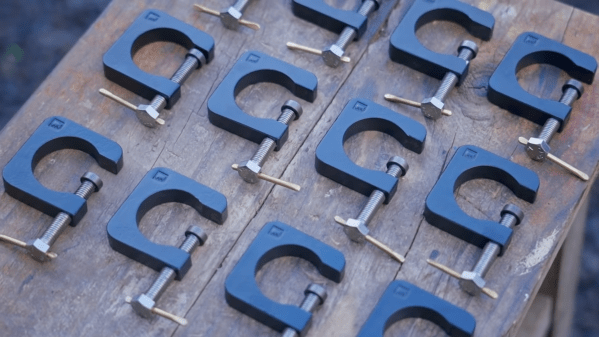
The clamp bases are machined from stainless steel and the heads are brass, and the interface between the two is a set screw. Inserting a hex wrench and turning the screw moves the head forward or back, allowing a workpiece to be clamped from the sides with minimal interference. His design was done in Fusion 360 and is shared online.

Another option for when simple clamps won’t do the job is a trick from [NYC CNC], which is to use an unexpected harmony of blue painter’s tape and superglue which yields great results in the right circumstances.

Shop-Made Pneumatic Cylinders From PVC And Plywood

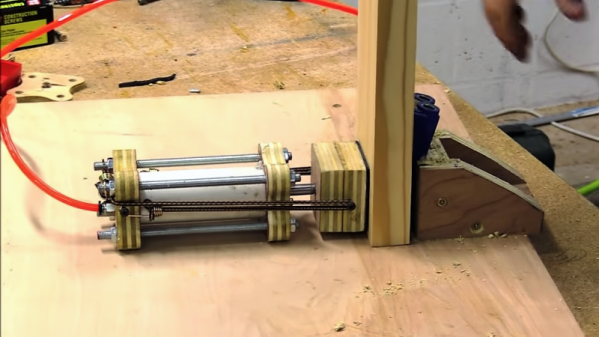
You see a lot of pneumatic actuators in industrial automation, and for good reason. They’re simple, powerful, reliable, and above all, cheap. Online sources and fluid-power suppliers carry a bewildering range of actuators, so why would anyone bother to make their own pneumatic cylinders? Because while the commercial stuff is cheap, it’s not PVC and plywood cheap.

Granted, that’s not the only reason [Izzy Swan] gives for his DIY single-acting cylinder. For him it’s more about having the flexibility to make exactly what he needs in terms of size and shape. And given how ridiculously easy these cylinders are, you can make a ton of them for pennies. The cylinder itself is common Schedule 40 PVC pipe with plywood endcaps, all held together with threaded rod. [Izzy] cut the endcaps with a CNC router, but a band saw or jig saw would do as well. The piston is a plywood plug mounted to a long bolt; [Izzy] gambled a little by cutting the groove for the O-ring with a table saw, but no fingers were lost. The cylinder uses a cheap bungee as a return spring, but an internal compression spring would work too,. Adding a second air inlet to make the cylinder double-acting would be possible as well. The video below shows the cylinder in action as a jig clamp.

True, the valves are the most expensive part of a pneumatic system, but if nothing else, being able to say you made your own cylinders is a win. And maybe you’ll get the fluid-power bug and want to work up to DIY hydraulics.

Continue reading “Shop-Made Pneumatic Cylinders From PVC And Plywood”

A Scratch-Built Drill Press Vise From Scrap

Never underestimate the importance of fixturing when you’re machining parts. No matter what the material, firmly locking it down is the key to good results, and may be the difference between a pleasant afternoon in the shop and a day in the Emergency Room. Flying parts and shattered tooling are no joke, but a lot of times quality commercial solutions are expensive and, well, commercial.  So this scratch-built drill press vise is something the thrifty metalworker may want to consider.

To be sure, [Ollari’s] vise, made as it is almost completely from scrap angle iron, is no substitute for a vise made from precision ground castings. But it’s clear that he has taken great care to keep everything as square and true as possible, and we give him full marks for maximizing his materials. And his tools — nothing more complicated than a MIG welder is used, and most of the fabrication is accomplished with simple hand tools. We like the way he built up sturdy profiles by welding strap stock across the legs of the angle iron used for the jaws, to give them a strong triangular cross-section to handle the clamping force. And using the knurled end of an old socket wrench as the handle was inspired; we’ll certainly be filing that idea away for a rainy day in the shop. Although we might use Acme rather than plain threaded rod.

We always enjoy seeing someone fabricate their own tools, and this one reminds us a bit of the full-size bench vise built up from layers of welded steel we featured a while back. It even looks a little like this 3D-printed vise, too.

Continue reading “A Scratch-Built Drill Press Vise From Scrap”

Universal Quick-Release Bar Clamps

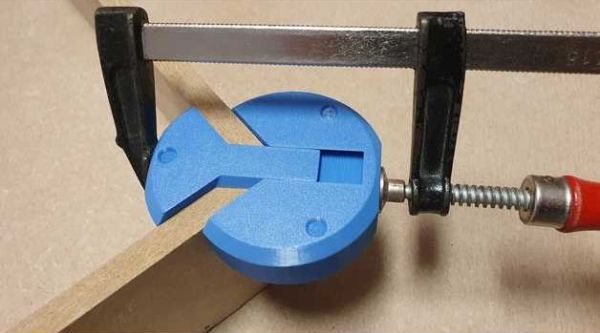
The typical hacker can never say no to more tools. And when it comes to clamps, one just can’t have enough of them. From holding small PCB’s to clamping together large sheets of plywood, you need a variety of sizes and quantities. So it would be pretty neat if we could just 3D print them whenever needed. [Mgx3d] has done that by designing 3D printable bar clamp jaws with a quick release mechanism that can be used with standard T-slot aluminum extrusion. This allows you to create ad-hoc bar clamps of any size and length quickly.

The design consists of two pieces – the jaw and its quick release lever, and does not require any additional parts or fasteners for assembly. Both pieces can be easily 3D printed without supports. The quick release lever is a simple eccentric cam design which locks the jaw in place by pushing down on the extrusion. The design is parametric and can be easily customized for different sizes, either in OpenSCAD or via the online customizer.  The online customizer supports Misumi 15 mm and 20 mm extrusion, 1″ 1010-S and 20 mm 20-2020 from 80/20 Inc., 15 mm from OpenBeam and 10 mm from MicroRax. But it ought to be easy to create fresh designs in OpenSCAD. Check out the video after the break to see the bar-clamps in action.

If you’d like to start equipping your shop with more 3D printed tools, look no further. We’ve featured many types over the years, such as the StickVise and its Gooseneck System, this 3D printed rubber band PCB Vise, and even a 3D printed Mini-Lathe.

Continue reading “Universal Quick-Release Bar Clamps”

PinJig Soldering Clamp Has Pins Seized By Airport Security

There’s an old adage that when performing a live demo, previously working hacks will mysteriously go awry. In this case, the hardware demo was doomed before it ever arrived at the conference.

PinJig is an interesting take on though-hole soldering. As its name indicates, it’s a jig which holds through-hole components in place as the board is flipped on its side (or even upside down). This is accomplished by 2000 steel pins which are locked in place after being nestled around all of the board’s components. Unfortunately, carrying this prototype onto an international flight didn’t work out. [Niall Barrett] told us that on his way from Ireland to Bay Area Maker Faire he was required to ditch the 3-inch steel pins that make up the jig, or not get on the plane.

Continue reading “PinJig Soldering Clamp Has Pins Seized By Airport Security”

Clamps, Cauls, And The Mother Of Invention

If there’s one thing you need in a woodshop, it’s more clamps. There are bar clamps, pipe clamps, spring clamps, and trigger clamps, but for one task in the workshop, no clamp does the job just right. Gluing up panels – a few wide pieces of wood joined on edge – either requires more clamps than you have or cauls, devices that press down on the boards vertically while the clamps press the board together horizontally.

[Andrew Klein] has just invented a new type of clamp for this task, proving once again that not all problems are solved, and there’s still some places where an invention can pop out of mid-air.

The new clamps are a modification to traditional bar clamps that allow for two clamps to interlock. On each of the ‘working’ ends of the clamps, there are two adjustment handles. The first screws the clamp horizontally, just like any bar or pipe clamp. The second adjustment handle moves a bearing up and down. When this bearing meshes with a riser on the mating end of another clamp, the two clamps are pressed together vertically.

The new clamps are effectively clamps and cauls, able to push material together from side to side and top to bottom. The new clamps work, too. In the video below, you can see [Andrew] gluing up a panel. When the vertical adjustment wheel is loosened, the boards come apart vertically. When the vertical adjustment wheel is tightened, the boards are perfectly in line with each other, both edge to edge and face to face.

Continue reading “Clamps, Cauls, And The Mother Of Invention”