Laser-Etching Photos On To Eggs

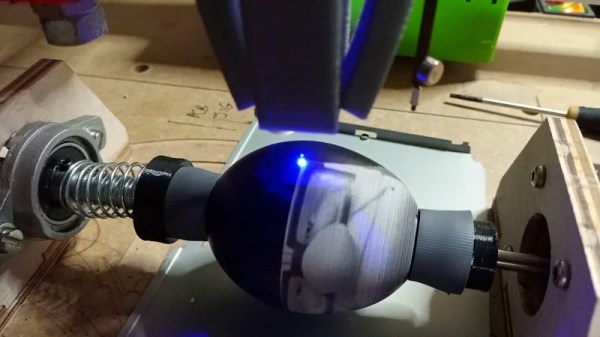
CNC machines are every maker’s dream. Capable of churning out accurate parts from CAD designs with a minimum of manual labor, they’re a great tool to have in the workshop. Alternatively, you can use them for more entertaining pursuits. [Leo]’s project is one of the latter – etching greyscale photos on to eggs.

The first thing you’ll need is an egg-compatible CNC machine. The Eggbot is a popular option, else a fourth-axis on an existing machine can also do the job as in [Leo]’s case. Coupling the egg is a delicate task, for which some rubber paper rollers are salvaged from an old printer and put to work. Then, a laser needs to be fitted to the CNC head, and the egg depth mapped with a probe to ensure the entire etching is in focus. Then it’s simply a matter of loading up an image, and turning the greyscale data into the relevant G-code to burn it onto the egg.

Using eggs coated in black ink, the results [Leo] achieves are impressive. The eggs would make an amusing Easter gift, or serve as a great cheap way to teach students about CNC techniques. Obviously, eye protection is a must, and be sure to mount your laser securely to avoid any unintentional exposures. Video after the break.

Continue reading “Laser-Etching Photos On To Eggs”

Mini CNC Mill Goes Horizontal To Reuse CD Drives

Here at Hackaday, we pride ourselves on bringing you the freshest of hacks, preferably as soon as we find out about them. Thanks to the sheer volume of cool hacks out there, though, we do miss one occasionally, like this e-waste horizontal CNC mill that we just found out about.

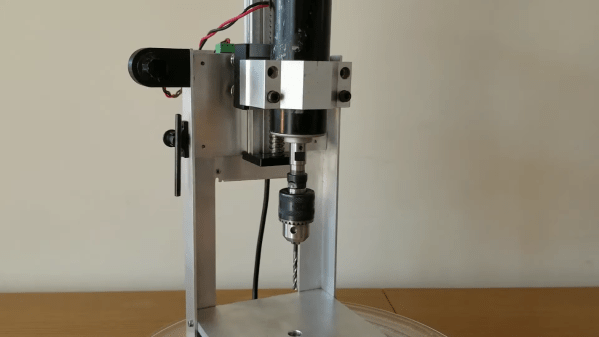
Aptly called the “CDCNC” thanks to its reliance on cast-off CD drive mechanisms for its running gear, [Paul McClay]’s creation is a great case study on what you can do without buying almost any new parts. It’s also an object lesson in not getting caught in standard design paradigms. Where most CNC mills mount the spindle vertically, [Paul] tilted the whole thing 90 degrees so the spindle lies on its side. Moving it back and forth on a pair of CD drive mechanisms is far easier than fighting gravity for control, and as a bonus the X- and Y-axes have minimal loading too. The video below shows the mill in action, and it’s easy to see how the horizontal arrangement really helps make this junk bin build into something special.

We think [Paul] did a great job of thinking around the problem with this build, and we’re glad he took the time to tip us off. Apparently it was the upcoming CNC on the Desktop Hack Chat that moved him to let us know about this build. Here’s hoping he drops by for the chat and shares his experience with us.

Continue reading “Mini CNC Mill Goes Horizontal To Reuse CD Drives”

Seeing The Skill Is Better Than Seeing The Project

Pulling off a flashy project that gets the viral-media hug of widespread approval feels great. Getting there is no easy path to walk and often times the craft that went into a finished project doesn’t even take the back seat but gets no mention at all. Often I find I’m more impressed by — or a least my attention is more strongly captured by — the skills put on display as prominently as the finished build.

Case-in-point this week comes from the model railroad work of [Diorama111]. Seeing an OLED screen in the nose of an HO scale locomotive just like the real-life version is impressive, but how many people missed the one-off soldering masterpiece that went into this one? You’ll marvel at the SMD techniques used with through-hole protoboard on this one.

Occasionally we do get to look over the shoulder of the master as decades of skills are shared for the purpose of passing them on. So was the case back in May when we watched as [Leo] walked through his tips and tricks for prototyping at the electronics bench. This included a lot of non-obvious but clever stuff; tips on working with copper tape for solder buses, using Teflon tubing with bare wire instead of stripping PVC-insulated wire, and a deep dive into copper clad prototyping.

So remember all of us hardware geeks when you look to tell the story of your project. We want to know how it was done at least as much as what was done. There was a time when electronic designers were a separate work group from electronic technicians (and wow, those technicians were in a league of their own). These days we all have that technician hat hanging on our workbenches and I’m always interested in packing in yet another unlearnt skill. Throw us a bone!

Hammer Seeks Nail

People sometimes say “when you have a hammer, everything looks like a nail” as if that were a bad thing. Hitting up Wikipedia, they’re calling it the Law of the Instrument or Maslow’s Hammer and calling it a cognitive bias. But I like hammers…

I’m working on a new tool, a four-axis hot-wire foam cutter based roughly on this design, but built out of stuff in my basement so far. I want it primarily to turn out wings for RC airplanes so that I can play around with airfoils and construction methods and so on. But halfway through building this new “hammer”, I’m already getting funny ideas of other projects that could be built with it. Classic nail-seeking behavior.

And some of these thoughts are making me reconsider the design of my hammer. I originally wanted to build it low, because it’s not likely that I’ll ever want to cut wing sections taller than 50 mm or so. But as soon as cutting out giant letters to decorate my son’s room, or maybe parts for a boat hull enter my mind, that means a significantly taller cutter, with ensuing complications.

So here I am suffering simultaneously from Maslow’s Hammer and scope creep, but I’m not sad about either of these “ills”. Playing with a couple manual prototypes for the CNC hot-wire cutter has expanded my design vocabulary; I’ve thought of a couple cool projects that I simply wouldn’t have had the mental map for before. Having tools expands the possible ways you can build, cognitive bias or not.

One person’s scope creep is another’s “fully realizing the potential of a project”. I’m pretty sure that I’ll build a version two of this machine anyway, so maybe it’s not a big deal if the first draft were height-limited, but the process of thinking through the height problem has actually lead me to a better design even for the short cutter. (Tension provided by an external bow instead of born by the vertical CNC towers. I’ll write the project up when I’m done. But that’s not the point.)

Maybe instead of lamenting Maslow’s cognitive bias, we should be celebrating the other side of the same coin: that nails are tremendously useful, and that the simple fact of having a hammer can lead you to fully appreciate them, and in turn expand what you’re capable of. As for scope creep? As long as I get the project done over my vacation next week, all’s well, right?

The Redesigned CNC Scroll Saw Rides Again

When [Andrew Consroe] tried to build a CNC scroll saw, he quickly learned how tricky of a design problem it is. With a blade that only cuts in one direction, you can’t simply move the tool in the X and Y dimensions like you can with a laser or router; either the work piece or the blade itself needs to continuously rotate towards the direction of the cut.

He’s recently shown off the third version of the machine, and while it’s still not exactly a practical tool, there’s no question it’s a brilliantly designed one, or that it works, slowly. Earlier attempts used a rotating table to spin the work piece, but [Andrew] found this to be an imperfect solution. Building a mechanism heavy duty enough to spin the material being cut while remaining accurate enough not to break the blade was a tall order, though he did get pretty close.

The earlier version used a rotating table.

This time around he’s decided to simply rotate the blade itself. This can be accomplished with a single stepper motor and some suitably sized pulleys, while maintaining an exceptionally high degree of accuracy. The whole blade assembly moves up and down on an aluminum extrusion rail with a motor and crank arrangement. By synchronizing the rotation of the blade with the vertical movement of the saw, the software can be sure that everything is where it needs to be before the cutting stroke actually happens.

Judging by the video after the break, the system works quite well. The complex rounded shapes he cuts out of the piece of plywood look essentially perfect, and it sounds like this new version of the machine isn’t breaking blades due to positional errors like the previous one did. Unfortunately, it’s also very slow. There’s so many moving parts and careful positioning required that even when the video is sped up 10x, the saw still appears to only be creeping its way through theĀ  material.

On the back half of the video, [Andrew] details another approach to rotating the blade that would reduce the amount of moving mass in the saw. This would give the machine a considerable speed boost, and we’d love to see him implement it. By the way, before anyone says it: using a spiral blade is cheating.

Continue reading “The Redesigned CNC Scroll Saw Rides Again”

Transform Kicad Design To Patchwork For Isolation Routing

Tuning a desktop router and your board designs for isolation routing can be a bit tricky, with thin traces usually being the first victim. For simple prototype boards you usually don’t need tightly packed traces, you just want to isolate the nets. To do this with a minimum amount of routing, [Michael Schembri] created kicad-laser-min, a command-line utility that takes a Kicad PCB design and expands all the tracks and pads to their maximum possible width.

Laser scribed PCB with maximum track widths

The software takes one layer of the PCB layout, converts it to black and white, and then runs a C++ Voronoi algorithm on it to dilate each track and pad until it meets another expanding region. Each region is colourised, and OpenCV edge detection is used to produce the contours that need to be milled or etched. A contour following algorithm is then used to create the G-code. The header image shows the output of each step.

Full source code is available on GitHub. [Michael] has had good results with his own boards, which are scribed using a laser cutter before etching, but welcomes testing and feedback from other users. He has found that OpenCV doesn’t always completely close all the contours, but the gaps are usually smaller than the engraving width of his laser, so no shorts are created.

This is basically “Scribble style” prototyping with CAD and CNC tools. If you prefer scribe and etch, you might consider building a simple PCB shaker for faster etching. If you have a router but want to avoid the dust, you can use a carbide scribe to scratch out the tracks without needing to etch.

The Mother(board) Of All CNC Controllers

If you’re building a CNC machine from scratch, the number of decisions you have to make is nearly boundless. Metal or wood construction? Welded or bolted? Timing belts or lead screws? And even once the mechanical bits are sorted, you still face a universe of choices in terms of control electronics. That’s where something like this modular CNC controller could really prove to be a game-changer.

The idea behind [Barton Dring]’s latest creation started with his port of GRBL to the ESP32. In fact, the current controller bears a strong family resemblance to his version 1.0 dev board, with a few conspicuous and intriguing additions. First, everything is modular — the main PCB is basically a motherboard with little more than a 5-volt power supply and some housekeeping electronics, plus a lot of headers. There’s support for up to six channels of steppers, either directly on the board with Pololu-style modules or as external drivers using pluggable screw terminal blocks. There’s also room for five IO modules; the current collection of modules includes a four-channel switch input, a relay output, an RS-485 module and a 0-10-V interface for talking to a variable frequency drive (VFD) spindle controllers, and buffered 5-V output module. The best part is that the IO module spec is completely open, so designing custom modules should be a snap.

The video below gives a quick tour of the controller. We’re really impressed with the thought that went into this, and we’ll venture a guess that having something like this available is going to kickstart a lot of stalled CNC machine projects. We can think of one shop that finally lost its last excuse for making the move.

Continue reading “The Mother(board) Of All CNC Controllers”