Honey, I Shrunk The Arduino Core

High-level programming languages do a great job of making a programmer’s job easier, but these languages often leave a lot of efficiency on the table as a compromise. While a common thought is to move into a lower-level language like assembly to improve on a program’s speed or memory use, there’s often a lot that can be done at the high level before resorting to such extremes. This, of course, is true of the Arduino platform as well, as [NerdRalph] demonstrates by shrinking the size of the Arduino core itself.

[NerdRalph] had noticed that the “blink” example program actually includes over 1 kB of extraneous code, and that more complicated programs include even more cruft. To combat this issue, he created ArduinoShrink, which seeks to make included libraries more modular and self-contained. It modifies some of the default registers and counters to use less memory and improve speed, and is also designed to improve interrupt latency as well by changing when the Arduino would otherwise disable interrupts.

While there are some limits to ArduinoShrink, such as needing to know specifics about the pins at compile time, for anyone writing programs for Arduinos that are memory-intensive or need improvements in timing, this could be a powerful new tool. If you’d prefer to go in the opposite direction to avoid ever having to learn C or assembly, though, you can always stick with running Python on your embedded devices.

Coding A Dynamic Menu For Character LCDs On Arduino

These days, there’s a huge variety of screens on the market for use with microcontrollers. OLEDs and graphic LCDs abound, while e-ink devices tempt the user with their clean look and low energy consumption. However, for many purposes, the humble HD44780 character LCD does the job just fine. If you’re using such a device, you might want to implement a simple menu system, and in that case, [MyHomeThings] has you covered.

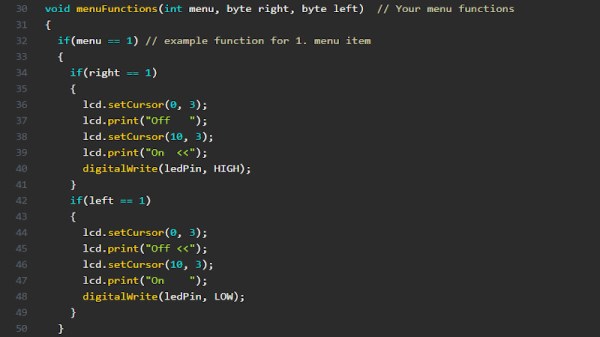
The menu code is simple to modify and implement. It allows the user to define a certain number of menu items, along with button labels and functions to be executed with button presses. By default, it’s set up to work with  left and right function buttons, with up and down buttons to toggle through the menu’s various entries. This suits the commonly available Arduino shields which combine a 16×2 character LCD with a set of four tactile buttons in a cross formation. However, modifying the code to use an alternate button scheme would be simple for those eager to tweak things to their liking.

For the absolute beginner to programming, it’s a great way to put together a simple interface for your microcontroller projects. It’s the sort of thing you might use if you’d built a do-everything Arduino handheld device, as we’ve seen built before. If you find text menus too archaic for your purposes, though, be sure to sound off with your favourite solutions in the comments.

DIY 8-Bit Computer Knows All The Tricks

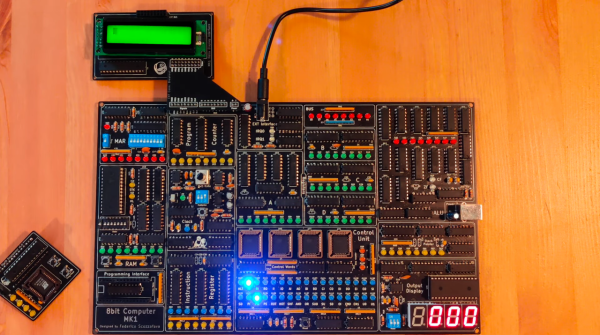
Some projects are a rite of passage within their respected fields. For computer science, building one’s own computer from scratch is certainly among those projects. Of course, we’re not talking about buying components online and snapping together a modern x86 machine. We mean building something closer to a fully-programmable 8-bit computer from the ground up, like this one from [Federico] based on 74LS logic chips.

The computer was designed and built from scratch which is impressive enough, but [Federico] completed this project in about a month as well. It can be programmed manually through DIP switches or via a USB connection to another computer, and also includes an adjustable clock which can perform steps anywhere from 1 Hz to 32 kHz. Complete with a 1024 byte memory, a capable ALU, four seven-segment LEDs and (in the second version of the computer) a 2×16 LCD disply, this 8-bit computer has it all.

Not only is this a capable machine designed by someone who clearly knows his way around a logic chip, but [Federico] has also made the code and schematics available on his GitHub page. It’s worth a read even without building your own, but if you want to go that route without printing an enormous PCB you can always follow the breadboard route.

Thanks to [killergeek] for the tip!

Continue reading “DIY 8-Bit Computer Knows All The Tricks”

Under The Hood Of Second Reality, PC Demoscene Landmark

In 1993, IBM PCs & clones were a significant but not dominant fraction of the home computer market. They were saddled with the stigma of boring business machines. Lacking Apple Macintosh’s polish, unable to match Apple II’s software library, and missing Commodore’s audio/visual capabilities. The Amiga was the default platform of choice for impressive demos, but some demoscene hackers saw the PC’s potential to blow some minds. [Future Crew] was such a team, and their Second Reality accomplished exactly that. People who remember and interested in a trip back in time should take [Fabien Sanglard]’s tour of Second Reality source code.

We recently covered another impressive PC demo executed in just 256 bytes, for which several commenters were thankful the author shared how it was done. Source for demos aren’t necessarily released: the primary objective being to put on a show, and some authors want to keep a few tricks secret. [Future Crew] didn’t release source for Second Reality until 20th anniversary of its premiere, by which time it was difficult to run on a modern PC. Technically it is supported by DOSBox but rife with glitches, as Second Reality uses so many nonstandard tricks. The easiest way to revisit nostalgia is via video captures posted to YouTube (one embedded below the break.)

A PC from 1993 is primitive by modern standards. It was well before the age of GPUs. In fact before any floating point hardware was commonplace: Intel’s 80387 math co-processor was a separate add-on to the 80386 CPU. With the kind of hardware at our disposal today it can be hard to understand what a technical achievement Second Reality was. But PC users of the time understood, sharing it and dropping jaws well beyond the demoscene community. Its spread was as close to “going viral” as possible when “high speed data” was anything faster than 2400 baud.

Many members of [Future Crew] went on to make impact elsewhere in the industry, and their influence spread far and wide. But PC graphics wasn’t done blowing minds in 1993 just yet… December 10th of that year would see the public shareware release of a little thing called Doom.

Continue reading “Under The Hood Of Second Reality, PC Demoscene Landmark”

A Jaw-Dropping Demo In Only 256 Bytes

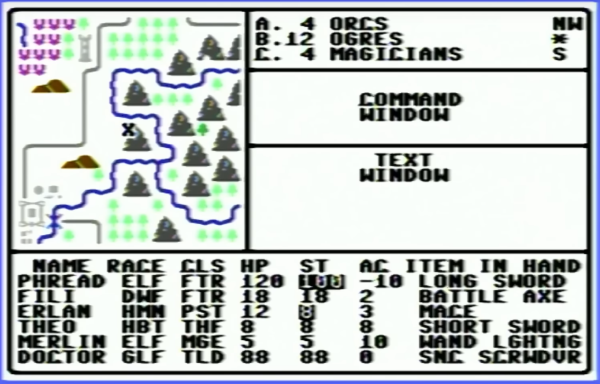
“Revision” is probably the Olympics of the demoscene. The world’s best tiny graphics coders assemble, show off their works, and learn new tricks to pack as much awesome into as few bytes as possible or make unheard-of effects on limited hardware. And of course, there’s a competition. Winning this year’s 256-byte (byte!) competition, and then taking the overall crowd favorite award, was [HellMood]’s Memories.

If you watch it in the live-stream from Revision, you’ll hear the crowd going (virtually) wild, and the announcer losing his grip and gasping for words. It’s that amazing. Not only are more effects put into 28 bytes than we thought possible, but there’s a full generative MIDI score to go with it. What?!?

But almost as amazing is [HellMood]’s generous writeup of how he pulled it off. If you’re at all interested in demos, minimal graphics effects, or just plain old sweet hacks, you have your weekend’s reading laid out for you. [HellMood] has all of his references and influences linked in as well. You’re about to go down a very deep rabbit hole.

Continue reading “A Jaw-Dropping Demo In Only 256 Bytes”

All You’ve Ever Wanted To Know About Compilers

They say that in order to understand recursion, you must first understand recursion. Once you master that concept, you might decide that it’s time to write your own compiler that can compile itself as a fun side project. According to [Warren] aka [DoctorWkt], who documented every step of writing this C compiler from scratch, a true compiler will be able to do that.

Some of the goals for the project included self-compiling, focusing on a real hardware platform, practicality, and simplicity. [Warren] outlines a lot of the theory of compilers as well, including all the lexical, grammar, and semantic analysis and then the final translation into assembly language, but really focuses on making this compiler one for practical use rather than just a theoretical implementation. He focuses on Intel x86-64 and 32-bit ARM platforms too, which are widely available.

This project is a long read and very thoroughly documented at around 100,000 words, so if you’ve ever been interested in compilers this is a great place to start. There are a lot of other great compiler tools floating around too, like the Compiler Explorer which shows you generated code as you write in a higher level language.

[via Hackaday.io]

Take Pictures Around A Corner

One of the core lessons any physics student will come to realize is that the more you know about physics, the less intuitive it seems. Take the nature of light, for example. Is it a wave? A particle? Both? Neither? Whatever the answer to the question, scientists are at least able to exploit some of its characteristics, like its ability to bend and bounce off of obstacles. This camera, for example, is able to image a room without a direct light-of-sight as a result.

The process works by pointing a camera through an opening in the room and then strobing a laser at the exposed wall. The laser light bounces off of the wall, into the room, off of the objects on the hidden side of the room, and then back to the camera. This concept isn’t new, but the interesting thing that this group has done is lift the curtain on the image processing underpinnings. Before, the process required a research team and often the backing of the university, but this project shows off the technique using just a few lines of code.

This project’s page documents everything extensively, including all of the algorithms used for reconstructing an image of the room. And by the way, it’s not a simple 2D image, but a 3D model that the camera can capture. So there should be some good information for anyone working in the 3D modeling world as well.

Thanks to [Chris] for the tip!