Convert A Curbside CRT TV Into An Arcade Monitor

While an old CRT TV may work well enough on a MAME cabinet project, the real arcade purists are quick to point out that a proper arcade monitor and a TV aren’t the same thing. A real arcade board uses RGB to connect to the monitor, that is, direct control over the red, green, and blue signals. Conversely video over coax or composite, what most people associate with old CRT TVs, combine all the video information down into an analog signal. Put simply, RGB allows for a much cleaner image than composite.

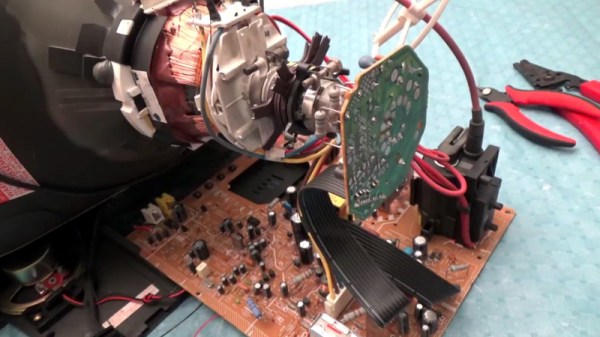
Many in the arcade restoration scene say that trying to convert a bog standard CRT TV into a RGB monitor isn’t possible, but [Arcade Jason] had his doubts. Over on his YouTube channel, he’s recently posted a tutorial on how to go from a trashed CRT TV to a monitor worthy of proper arcade gaming with relatively little work. As real arcade monitors are becoming increasingly rare, these kind of modifications are likely to get more common as coin-op gamers look to keep the old ways alive.

Now obviously every TV is going to do be different inside. All CRT TVs contain high voltages, and on some the circuit boards aren’t even mains-isolated, so take care if you try this. [Jason] certainly doesn’t claim that the method he demonstrates will work on whatever old TV you happen to have kicking around. But the general idea and some of the techniques he shows off are applicable to most modern TVs, and can help you tailor the method to your particular piece of gear. It all starts with a wet finger. Seriously.

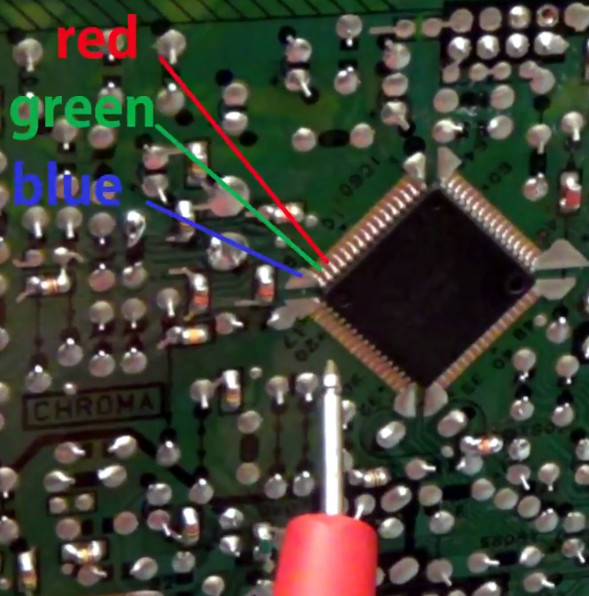
[Jason] demonstrates a rather unique way of determining which pins on the TV’s control chip are responsible for the individual color signals by wetting his finger and sliding it over the pins. When a change in color is seen on the displayed image, you know you’re getting close. We can’t say it’s the most scientific or even the safest method, but it worked for him.

He then follows up with a jumper wire and resistor to find the precise pins which are responsible for each color, and solders up his actual RGB connection for the arcade board. In addition to the three color wires, a sync signal is also needed. This is the same sync signal used in composite video, so all that’s needed is to solder to the pad for the original composite video jack. Add a ground signal, and you’ve got yourself a proper RGB monitor.

Interestingly, this one has come full circle, as [Jason] says his attempt was inspired by an old post on Hackaday. It’s the Circle of Hacker Life.

[Thanks to Seebach for the tip]

Continue reading “Convert A Curbside CRT TV Into An Arcade Monitor”

Restoring A 1930s Oscilloscope – Without Supplying Power

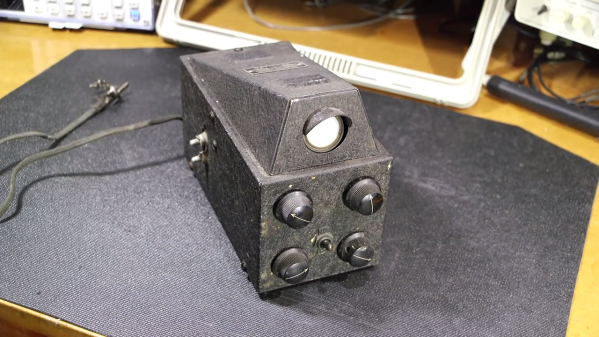
We’ve all done it: after happening across a vintage piece of equipment and bounding to the test bench, eager to see if it works, it gets plugged in, the power switch flipped, but… nothing. [Mr Carlson] explains why this is such a bad idea, and accompanies it with more key knowledge for a successful restoration – this time revitalising a tiny oscilloscope from the 1930s.

Resisting the temptation to immediately power on old equipment is often essential to any hope of seeing it work again. [Mr Carlson] explains why you should ensure any degraded components are fixed or replaced before flipping the switch, knowing that a shorted/leaking capacitor is more than likely to damage other components if power is applied.

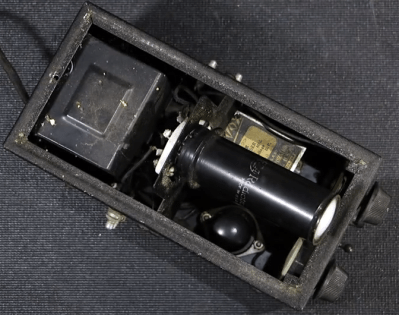
The oscilloscope he is restoring is a beautiful find. Originally used by radio operators to monitor the audio they were transmitting, it features a one inch CRT and tube rectification, in a tight form factor.

[Mr Carlson] uses his capacitor leakage tester to determine if the main filter capacitor needs replacing – it does, no surprises there – as well as confirming the presence of capacitors potted into the power transformer itself. These have the potential to not only derail the restoration, but also cause a safety hazard through leakage to the chassis.

After replacing and rewiring everything that’s relevant, the scope is hooked up to an isolation transformer, and it works first time – showing the value of a full investigation before power-up. [Mr Carlson] quips, “It really doesn’t have a choice; when it’s on this bench, it’s going to work again”, a quote which will no doubt resonate with Hackaday readers.

[Mr Carlson] promises to integrate the scope into a new piece of test equipment in the near future, but in the meantime you can read about his soldering station VFD mod, or his walk-in AM radio transmitter.

Continue reading “Restoring A 1930s Oscilloscope – Without Supplying Power”

From Cop Car Data Terminal, To Retro Computer

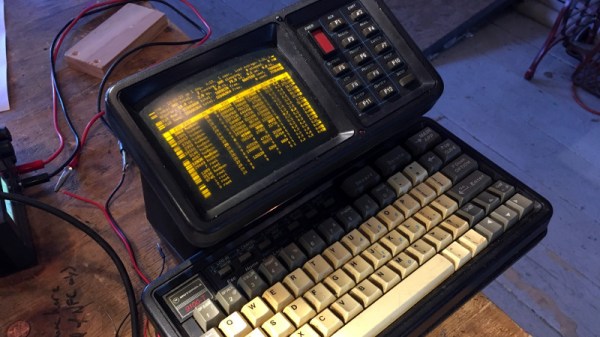
It is possible that you will have lived your life without ever coming into contact with a Motorola MDT9100-T. The data terminal of choice for use in police cars across the globe was a computer with a full-sized QWERTY keyboard, a small CRT display, a mainboard sporting an Intel 386SX processor, and a custom version of Windows 3.1. [Trammell Hudson] and some friends from NYC Resistor scored some MDT9100s in an online auction and found them to be just too good an opportunity not to crack them open and see what could be done.

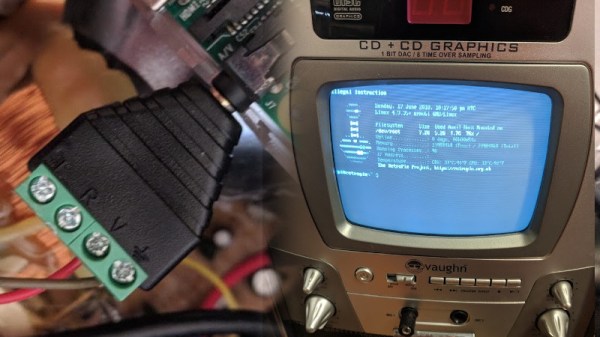
The custom Windows install could be bypassed with a DOS prompt for some period demoscene action, but [Trammell] wanted more. The 386SX wasn’t even quick when it was new, and this computer deserved the power of a BeagleBone! A custom cape was created on a prototyping cape to interface with the MDT9100 header carrying both keyboard and video. A bit of detective work revealed the display to be a 640×480 pixel mono VGA. The ‘Bone’s LVDS output can drive VGA through a resistor ladder DAC with the aid of an appropriate device tree overlay. The keyboard was then taken care of with a Teensy working as a USB device, resulting in a working Linux computer in the shell of an MDT9100.

It’s always good to see old technology brought up to date. Amusingly a couple of years ago we reported on the death of VGA, but retro projects like this one mean it’ll be a long time before we’ve heard the last of it.

Hijacking A Sony Watchman For Pong

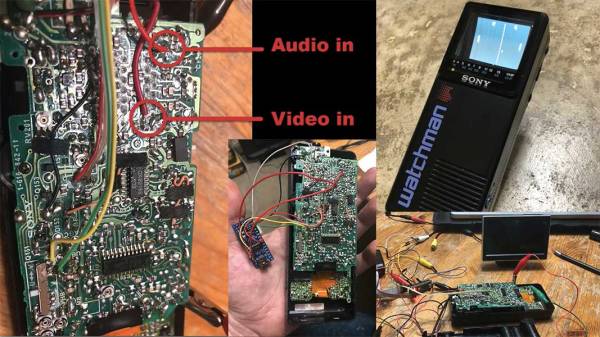
The era of the vintage television was a great one, and one of the transitional by-products was the Sony Watchman. It was a portable TV which Sony started selling in 1982, and the amazing thing about it was that it had an actual 4-inch cathode ray tube or CRT. [Sideburn] just posted a video in which he hijacks the internals of a Watchman to make it into a portable game of Pong.

The hack begins with removing the TV tuner module inside to make some room for the new residents. Next comes the M51364P which is VIF video decoder chip, and for which surprisingly there is not a lot of info on the web. They were able to find a part of the schematic, which though it was in Russian may still be useful for enthusiasts. Removing the VIF revealed the audio and video pins that needed the appropriate signals for the hack to be successful. In an age of multilayer boards it is amazing how a two-layer PCB makes life so easier for the tinkerer.

For the new brains an Arduino Nano clone was selected, and instead of adding modern buttons the existing volume and band select switches were convinced to be the paddle control and play/pause button. Getting everything to fit was easy with the absence of the tuner module, and voila! New(ish) hardware. For the firmware, [Sideburn] turns to Hackvision firmware which has a host of games such as Space Invaders, Asteroids, and even Tetris.

We covered Hackvision a few years ago as a hardware/firmware bundle, and if you are more into CRTs then check out the Arduino driven 6845 CRT controller.

Continue reading “Hijacking A Sony Watchman For Pong”

Whatever Happened To The Desktop Computer?

If you buy a computer today, you’re probably going to end up with a laptop. Corporate drones have towers stuffed under their desks. The cool creative types have iMacs littering their open-plan offices. Look around on the online catalogs of any computer manufacturer, and you’ll see there are exactly three styles of computer: laptops, towers, and all-in-ones. A quick perusal of Newegg reveals an immense variety of towers; you can buy an ATX full tower, an ATX mid-tower, micro-ATX towers, and even Mini-ITX towers.

It wasn’t always this way. Nerds of a sufficient vintage will remember the desktop computer. This was, effectively, a tower tilted on its side. You could put your monitor on top, negating the need for a stack of textbooks bringing your desktop up to eye level. The ports, your CD drive, and even your fancy Zip drive were right there in front of you. Now, those days of desktop computers are long gone, and the desktop computer is relegated to history. What happened to the desktop computer, and why is a case specifically designed for a horizontal orientation so hard to find?

Continue reading “Whatever Happened To The Desktop Computer?”

Chasing The Electron Beam At 380,000 FPS

Analog TV is dead, but that doesn’t make it any less awesome. [Gavin and Dan], aka The Slow Mo Guys recently posted a video about television screens. Since they have some incredible high-speed cameras at their disposal, we get to see the screens being drawn, both on CRT and more modern LCD televisions.

Now we all know that CRTs draw one pixel at a time, drawing from left to right, top to bottom. You can capture this with a regular still camera at a high shutter speed. The light from a TV screen comes from a phosphor coating painted on the inside of the glass screen. Phosphor glows for some time after it is excited, but how long exactly? [Gavin and Dan’s] high framerate camera let them observe the phosphor staying illuminated for only about 6 lines before it started to fade away. You can see this effect at a relatively mundane 2500 FPS.

Cranking things up to 380,117 FPS, the highest speed ever recorded by the duo, we see even more amazing results. Even at this speed, quite a few “pixels” are drawn each frame. [Gavin] illustrates that by showing how Super Mario’s mustache is drawn in less than one frame of slow-mo footage. You would have to go several times faster to actually freeze the electron beam. We think it’s amazing that such high-speed analog electronics were invented and perfected decades ago.

Continue reading “Chasing The Electron Beam At 380,000 FPS”

Why Sony’s Trinitron Tubes Were The Best

If you’re old enough to remember Cathode Ray Tube (CRT) Televisions, you probably remember that Sony sold the top products. Their Trinitron tubes always made the best TVs and Computer Monitors. [Alec Watson] dives into the history of the Sony Trinitron tube.

Sony Color TVs didn’t start with Trinitron — for several years, Sony sold Chromatron tubes. Chromatron tubes used individually charged wires placed just behind the phosphor screen. The tubes worked, but they were expensive and didn’t offer any advantage over common shadow mask tubes. It was clear the company had to innovate, and thanks to some creative engineering, the Trinitron was born.

Closeup of a Trinitron tube shows unbroken vertical stripes which led to a brighter picture.

All color TV’s shoot three electron guns at a phosphor screen. Typical color TVs use a shadow mask — a metal sheet with tiny holes cut out. The holes ensure that the electron guns hit only the red, green and blue dots of phosphor. Trinitrons use vertical bars of single phosphor color and a picket fence like aperture grille. The aperture grill blocks less of the electron beam than a shadow mask, which results in a much brighter image. Trinitrons also use a single electron gun, with three separate cathodes.

[Alec] is doing some amazing work describing early TV systems and retro consumer electronics over on his YouTube channel, Technology Connections. We’ve added him to our Must watch subscription list.

Interested in retro CRTs? Check out Dan’s article on cleaning up the fogged plastic safety screen on the front of many CRTs.

Continue reading “Why Sony’s Trinitron Tubes Were The Best”