Intentional Filament Stringing Helps Santa Soar

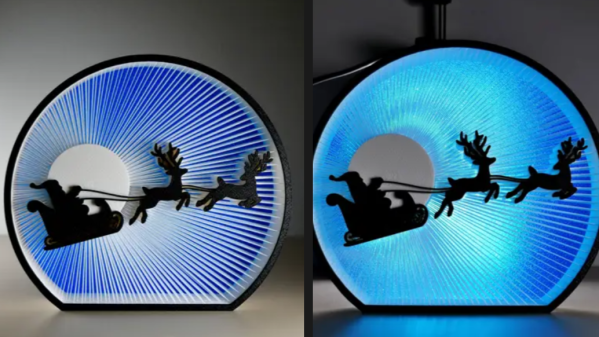
Stringing is when a 3D printer’s hot end moves through open air and drags a wisp of melted plastic along with it. This is normally undesirable, but has in the past been done intentionally to create some unconventional prints. Moonlight Santa from [3dprintbunny] shows considerable refinement in the technique, complete with color changes that really make the result pop.

Using a 3D printer’s stringing in a constructive way is something that has been leveraged really well. We remember seeing a lion with a fantastic mane by combining this method with a little post-processing and a blast from a heat gun. The technique has also been applied to make brush bristles (the printer strings filament across two handles, and after printing it is cut in half to make two brushes.)

This isn’t [3dprintbunny]’s first rodeo, either. We loved seeing her show what kind of objects were possible by using clever design, with no reliance on custom G-code or weird slicer tricks. The color changes by filament swaps really make this new one stand out.

Christmas Lithophanes Make Neat Decorations

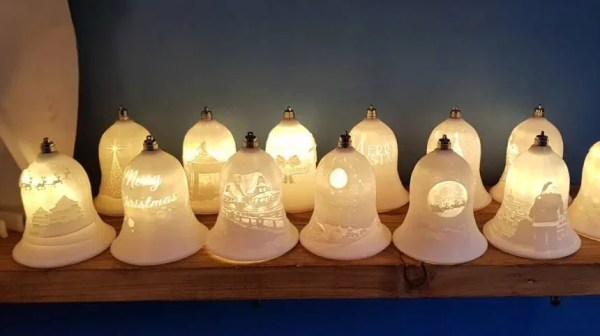
Lithophanes are neat little artistic creations that use variations in the thickness of a material to reveal an image when lit from behind. 3D printing is a great way to make lithophanes, and they can make for beautiful Christmas decorations, too!

It’s easy to make lithophane decorations for your Christmas tree with the help of the ItsLitho tool. The online application takes any image you upload, and can generate lithophane geometry that you can 3D print at home. Print your custom bell or bauble, add the printed hooks, and then the final decoration can be backlit to reveal its image by inserting an LED from a string of Christmas lights.

The result is a beautiful, glowing decoration that displays a detailed image when lit up. All you need is a few images and a 3D printer to produce decorations as unique gifts for your family and friends.

We’ve seen the technique put to other uses too, such as in this convincing lamp designed after our very own Moon. Video after the break.

Continue reading “Christmas Lithophanes Make Neat Decorations”

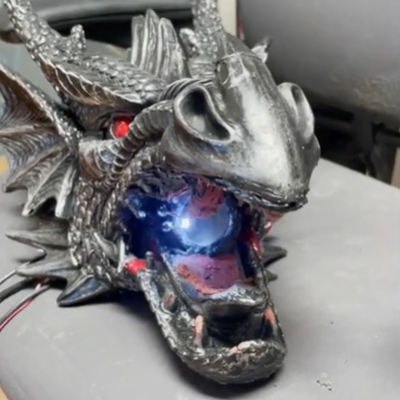
Fire-breathing dragon head, side view

Flame-Spitting Dragon Head Heats Up Halloween

Halloween is looming, and [Jonathan Gleich] decided that an ideal centerpiece would be a flame-spitting dragon’s head. It started with an economical wall-mount dragon’s head, combined with a variety of off-the-shelf components to become something greater.

Dragon head with arc ignitor lit
Spark from high-voltage ignitor, right at the torch opening.

The fire comes from a kind of propane torch sold as a weed killer set, which looks a little like a miniature tiger torch. The flow of propane is limited by a regulator (which keeps the flame short and fixed), and controlled with a gas-rated 12 V solenoid valve. Ignition is done with the help of a spark igniter that fires up on demand, fed by a high-voltage ignition coil. The two combine at the Dragon’s mouth, where the flame originates, but the electrical components are otherwise isolated from the gas elements as much as possible.

The dragon head is made of acrylic, and if exposed to enough heat acrylic will first melt, then burn. To help avoid a meltdown, the dragon breathes fire only intermittently.  [Jonathan] also gave the mouth area a heat-resistant barrier made from generous layers of flame-blocking mortar and sealants from the hardware store. The finishing touch comes in the form of bright red LEDs in the eyes, which give the head a bit more life.

Watch the ignitor in action and see the head spewing flames in the two short videos embedded below. The head should make for some good pictures come Halloween, and is a good example of how repurposing off-the-shelf items can sometimes be just what is needed for a project.

Interested in something smaller, but still fiery? Check out this pet fire-breathing dragon project for all your robotic animal companion needs. Continue reading “Flame-Spitting Dragon Head Heats Up Halloween”

Foam Board, Old Electronics, And Imagination Make Movie Magic

When it comes to building sets and props for movies and TV, it’s so easy to get science fiction wrong – particularly with low-budget productions. It must be tempting for the set department to fall back on the “get a bunch of stuff and paint it silver” model, which can make for a tedious experience for the technically savvy in the audience.

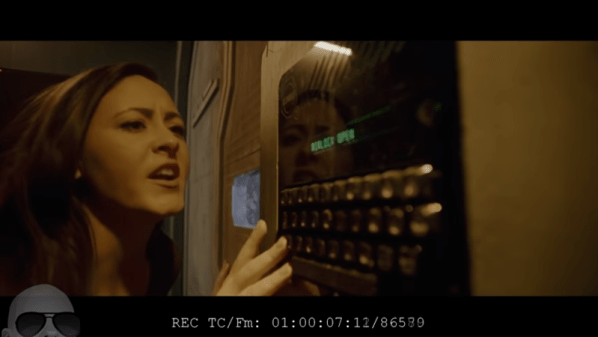
But low-budget does not necessarily mean low production values if the right people are involved. Take [Joel Hartlaub]’s recent work building sets for a crowdfunded sci-fi film called Infinitus. It’s a post-apocalyptic story that needed an underground bunker with a Fallout vibe to it, and [Joel] jumped at the chance to hack the sets together. Using mainly vintage electronic gear and foam insulation boards CNC-routed into convincing panels, he built nicely detailed control consoles for the bunker. A voice communicator was built from an old tube-type table radio case with some seven-segment displays, and the chassis of an old LCD projector made a convincing portable computer terminal. The nicest hack was for the control panel of the airlock door. That used an old TDD, or telecommunications device for the deaf. With a keyboard and a VFD display, it fit right into the feel of the set. But [Joel] went the extra mile to make it a practical piece, by recording the modulated tones from the acoustic coupler and playing them back, to make it look as if a message was coming in. The airlock door looks great too.

Like many hacks, it’s pretty impressive what you can accomplish with a deep junk pile and a little imagination. But if you’ve got a bigger budget and you need some computer displays created, we know just the person for the job.

Continue reading “Foam Board, Old Electronics, And Imagination Make Movie Magic”

Custom LED Signage From Household Items

We’ll admit it: sometimes we overthink things. We imagine some of you are the same way; there seems to be something in the hacker mentality that drives us to occasionally over-engineer ideas to the point of unrecognizability. There’s nothing inherently wrong with this, but sometimes it does keep us from seeing easier solutions.

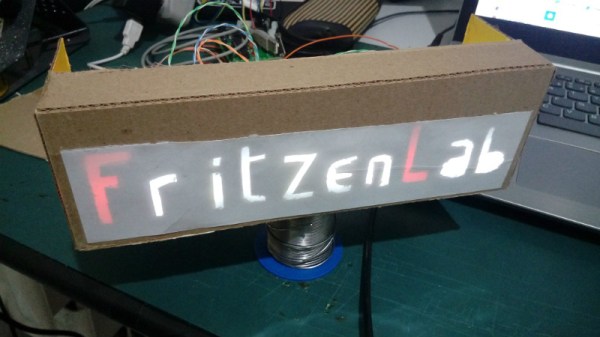
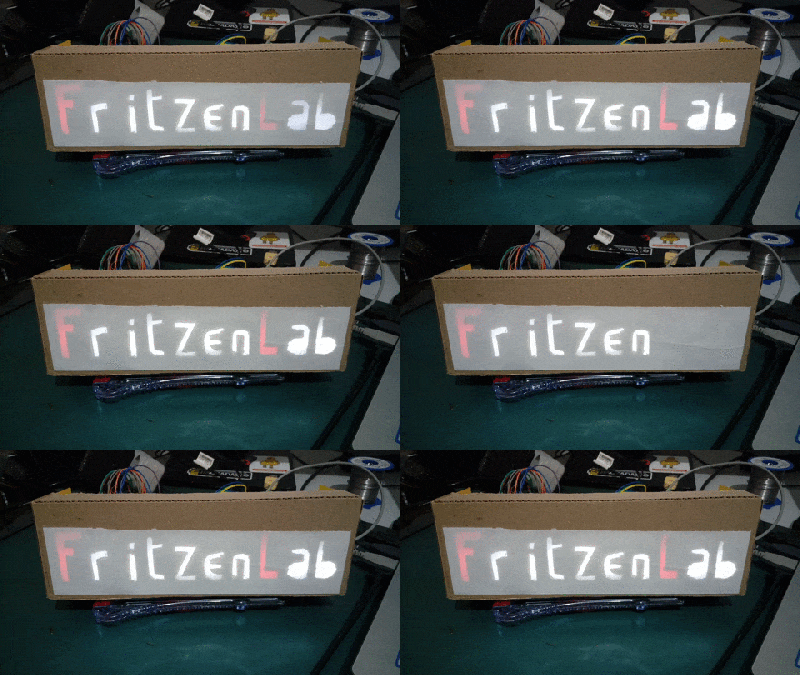
For example, the very slick looking personalized LED sign (Google Translate) that [Clovis Fritzen] recently wrote in to share with us. If we were tasked with creating something like this there would certainly have been a 3D printer and likely a CNC involved before all was said and done, and a few days later we’d still be working out the bugs in our OpenSCAD code. But his approach is very different. Fantastically simple and constructed largely from household items, this is a good project to keep the Junior Hackers entertained on a rainy weekend.

The first step of the process is to draw out the characters you want onto a piece of cardboard, and then carefully cut it out. If you’re worried that you’re not particularly artistic, this step will go a bit better if you print out the design and tape the paper over the cardboard to serve as a template. Once you’ve got your design cut out, you glue or tape a piece of standard printer paper over it. This is the face of the display; it just needs to be lit from behind.

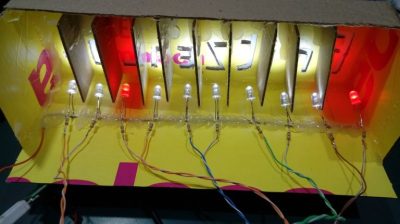
If you wanted to make a sign that was just a single color and didn’t have individually addressable elements, then it would be enough to illuminate the whole cutout with a single light source. But where’s the appeal in that? As [Clovis] shows, you can get much better results by constructing a segmented box, with one LED in each cell. By wiring each LED to a pin on an Arduino or other microcontroller, you’ll have control over the color and brightness of each section of the sign.

Of course, if you’re not big on the whole cardboard aesthetic, you could even recreate this design with the aforementioned CNC and 3D printer. [Clovis] shows how the basic concept works, and that it can be scaled pretty easily depending on the kind of materials you have access to.

Laser Projected Christmas Lights

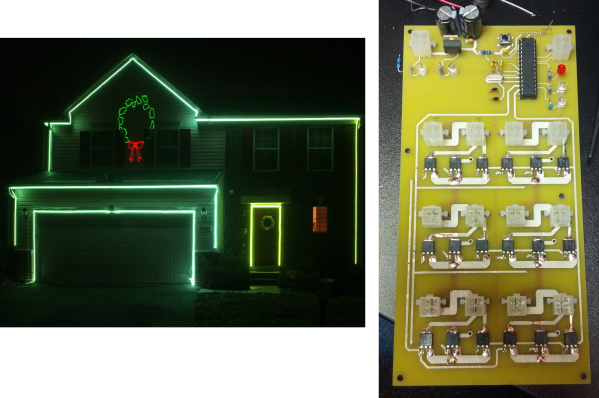
It’s August, and of course that means that it’s time for retail stores to put up their Christmas decorations! But seriously, if you’re going to do better than the neighbors you need to start now. [Joey] already has his early start on the decorations, with a house-sized light show using LED strips and a laser projector that he built last Christmas.

What started off as a thought that it would be nice to hang a wreath over the garage soon turned into a laser projector that shows holiday-themed animations on the front of the house. The project also includes a few RGB LED strips which can match the colors displayed by the projector. The LEDs are powered from a custom-built supply that is controlled by a laptop, and the program that runs on the computer averages the colors from the video signal going to the projector which lights up the LED strips to match the projected image. This creates an interesting effect similar to some projects that feature home theater ambient lighting.

The only major problem [Joey] came across was having to account for the lasers’ motion in the projected patterns, which was causing the computer to read false values. This and a few other laser-related quirks were taken care of with a bit of programming to make sure the system was functioning properly. After that it was a simple matter of attaching the projector to the roof and zip-tying the LED strips to the eaves of the house.

The projector is weatherproof, has survived one harsh winter already, and can be up and running for any holiday. With Halloween right around the corner, this could be a great way to spice up some trick-or-treating. Check out the video after the break to see this setup in action.

Continue reading “Laser Projected Christmas Lights”

Singing House Lights Up Halloween Again This Year

[KJ92508] is flooding the neighborhood with light again this year. Everyone knows of that one house in town that really goes all out, but few put on a show anything like this one. The four Jack-o’-lantern faces lead the way with the opening sequence from A Nightmare Before Christmas. Each has at least four different mouth poses, and two eye orientations which are surprisingly well synchronized with the audio. The image above shows mostly orange lighting, but the home is outfitted with addressable RGB LEDs for a full color performance. In fact, it has seen an upgrade this year, increasing the channels by eight-fold to 1144! Don’t miss the performance which we’ve embedded after the break.

We had considered not featuring this, since we looked in on the same home last year. But the number of tips that rolled in made us think that a lot of you missed it, or are just delighted by the multitude of blinky lights. Either way, it’s worth the four minutes out of your day– it will either put a smile on your face, or make you glad not to live across the street from this guy.

Continue reading “Singing House Lights Up Halloween Again This Year”