Retro Calculator Build Proves The Space Age Isn’t What It Used To Be

The common wisdom these days is that even if we wanted to get back to the Moon the way we did in the 1960s, we’d never be able to do it. Most of the blame for that usually falls on the loss of institutional knowledge thanks to skilled minds and hands that have been stilled by the passage of time, but the real kicker would be finding replacements for all the parts that we used back then that just aren’t made anymore. A similar problem exists for those seeking to recreate the circuits that graced the pages of the many magazines that catered to electronics hobbyists back in the day.

Take this “Space Age Decimal Computer” reproduction that [Bob Alexander] undertook. Smitten with the circuit after seeing our story about a 1966 article detailing its construction, he decided to roll one of his own. That proved to be far harder than he thought it would be. The original circuit, really little more than an adding machine using a rotary telephone dial as an input device, used neon lamp ring buffers for counting, The trouble is, while NE-2 neon lamps are still made, they aren’t made very precisely. That makes it difficult to build a working ring buffer, which relies on precise on and off voltages. That was even a problem back then; the author suggested buying 100 lamps and carefully characterizing them after aging them in to get the 60 lamps needed.

In the end, [Bob] settled for modifying the circuit while making the build look as close as possible to the original. He managed to track down the exact model of enclosure used in the original. The front panel is populated with a rotary dial just like the original, and the same neon lamps are used too, but as indicators rather than in ring buffers. Behind the scenes, [Bob] relied on 7400-series counters and decoders to make it all work — kudos for sticking with 1970s tech and not taking the easy way out with an Arduino.

The video below goes into more detail on the build and the somewhat kludgy operation of the machine, with a few excellent [Tom Lehrer] references and a nice Cybertruck dunk to boot.

Continue reading “Retro Calculator Build Proves The Space Age Isn’t What It Used To Be”

A Dashboard Outside The Car

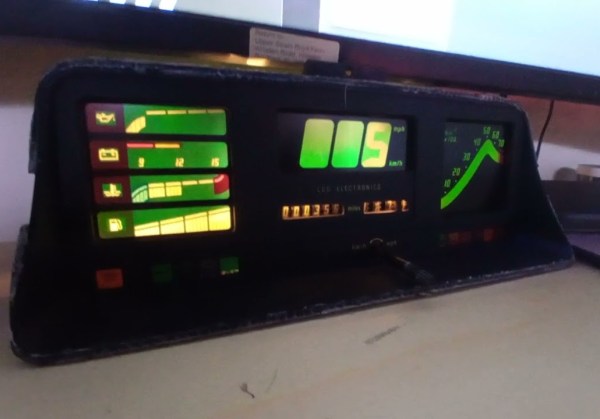
One of the biggest upsides of open communications standards such as CAN or SPI is that a whole world of vehicle hacking becomes available, from simple projects like adding sensors or computers to a car or even building a complete engine control unit from the ground up. The reverse is true as well; sensors and gauges using one of these protocols can be removed from a car and put to work in other projects. That’s the idea that [John] had when he set about using a vehicle’s dashboard as a information cluster for his home.

The core of the build is an Astra GTE dashboard cluster, removed from its host vehicle, and wired to an Arduino-compatible board, in this case an ESP32. The code that [John] wrote bit-bangs an SPI bus and after some probing is able to address all of the instrument gauges on the dashboard. For his own use at home, he’s also configured it to work with Home Assistant, where each of the gauges is configured to represent something his home automation system is monitoring using a bit mask to send data to specific dials.

While this specific gauge cluster has a lot of vehicle-specific instrumentation and needs a legend or good memory to tie into a home automation system without any other modification, plenty of vehicle gauges are more intuitive and as long as they have SPI they’d be perfect targets for builds that use this underlying software. This project takes a similar tack and repurposes a few analog voltmeters for home automation, adding a paper background to the meters to make them easier to read.

Continue reading “A Dashboard Outside The Car”

Rotary Dial Number Pad Is The Perfect Prank For Retro-Phone Enthusiast

We’re not sure about the rest of you, but to us, a keyboard without a number pad all the way over to the right just seems kind of — naked? We might not be accountants, but there’s something comforting about having the keypad right there, ready for those few occasions when you need to enter numbers more rapidly than would be possible with the row of number keys along the top of the keyboard.

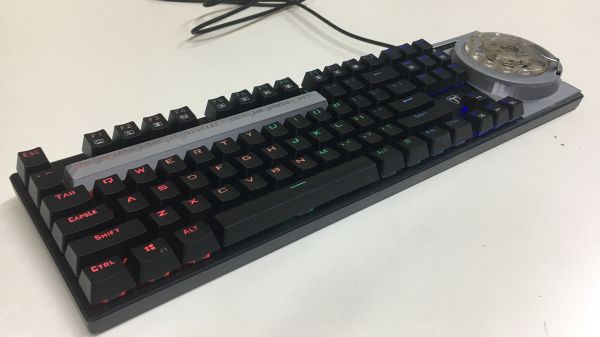
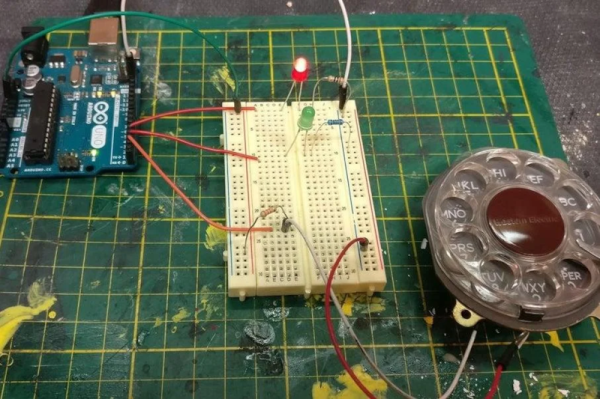
What we are sure about, though, is that rapid numeric keying is not what this rotary dial numpad keyboard is all about. In fact, it’s actually an April Fool’s prank [Squidgeefish] played on a retro-phone-obsessed coworker, and it worked out pretty well. Starting with an old telephone dial from what must be an exceptionally well-stocked parts bin, [Squidgeefish] first worked out the electrical aspects of interfacing the dial with a cheapo mechanical keyboard. It turns out that there’s a lot of contact bounce in those old dials, leading to some software hacks to keep the Arduino happy.

There was also a little hackery needed to stuff a USB hub into the keyboard, as well as literal hacking of the keyboard’s PCB. A 3D printed enclosure allows the rotary dial to nestle into the place where the regular numpad would be, and it looks pretty good. We also like forcing the issue by replacing the entire row of number keys with a single massive prank key.

While this was all for fun, there are a couple of cool tips here, like chucking a bit of printer filament in a Dremel tool to stir-weld parts together. And even though we’ve seen that parametric keycap generator before, it is pretty cool to see it in action.

Rŏ̽ta: Counting, With Style

Rǒta counts things. That’s it, really — what a cheap little mechanical counter does with a thumb press, or what you can do by counting on your fingers and toes, that’s pretty much all that Rǒta does. But it does it with style.

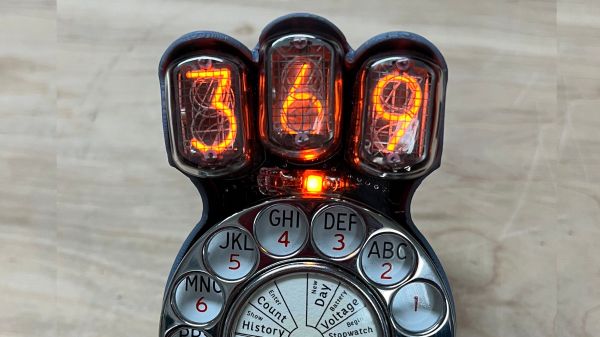
OK, that’s being a bit unfair to [Kevin Santo Cappuccio] — Rǒta has a few more tricks up its sleeve than simple counting. But really, those functions are just icing on the cake of how this little gadget looks. Rǒta was built around the unbeatable combination of a rotary telephone dial mechanism and a trio of Nixie tubes. The dial looks like it might have come from an old pay phone, all shiny and chrome and super robust looking. The Nixies sit atop the dial on a custom PCB, and everything, including the high-voltage supply for the tubes, is enclosed in a 3D printed case with a little bit of a Fallout vibe.

But what does this thing do? Actually, quite a lot. It’ll count up and down, using whatever number you dial into it. You can either increment from zero, or enter any three-digit number as the starting count. It keeps track of the score of your golf game, if that’s your thing, and it’s also got a stopwatch function. You can even dial up a display of the current battery voltage. It takes some ingenuity to use just the dial for all these functions, but that’s as easy as dialing the operator used to be — dialing 0 puts it in menu mode, allowing you to access any of the functions printed on the card in the center of the dial. It’s pretty clever — check out the video below.

Is it particularly useful? Perhaps not. But when has that ever been a measure of the worth of a project? Something like this rotary cellphone might be more useful, but sometimes looking great is good enough.

Continue reading “Rŏ̽ta: Counting, With Style”

Dial A For Arduino

A lot of phrases surrounding phones don’t make sense anymore. With a modern cellphone, you don’t really “hang up” and there’s certainly no “dial” to be had. However, with [jakeofalltrades’] project, you can read an old-fashioned phone dial using an Arduino.

The idea behind a phone dial is actually pretty simple. When you pull the dial back to the stop using one of the numbered holes and release it, it causes a switch to open and close the same number of times as the hole you selected. That is, if you pull back the 5 hole, you should get 5 switch closures. The duration of each switch event and the time between switch events is a function of the speed the dial moves because of its internal spring. The zero hole actually produces ten pulses.

There are standards for how precise the timing has to be, but — honestly — it’s pretty loose since these were not made to be read by precise microcontroller timers. In the United States, for example, the dial was supposed to produce between 9.5 and 10.5 pulses per second, but the equipment on the other end would tolerate anything from 8 to 11.

Even if you don’t want a rotary dial in your next project, the code has some good examples of using ATmega328 timers that you might find useful in another context. However, a dial would add a nice retro touch to any numeric input you might happen to need.

If you need project inspiration, how about a volume control? Or, why not a numeric keypad?

Simplify Your Life With This Pocket Rotary Cellphone

With its constant siren song of distraction and endless opportunity for dopamine hits, a smartphone can cause more problems than it solves. The simple solution would be a no-nonsense flip phone, but that offers zero points for style. So why not build your own rotary dial pocket cellphone?

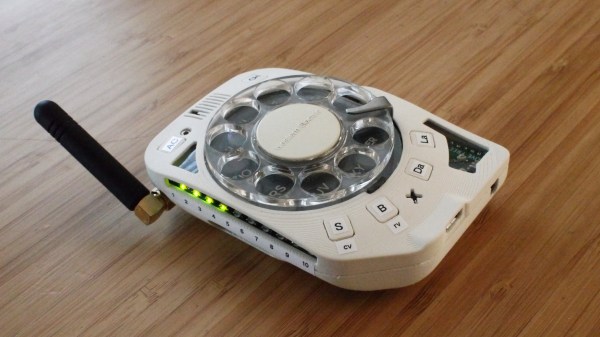
Of course, what style points accrue to [Justine Haupt] take a hit in terms of practicality, but that was never really the point of this build. And even then, the phone appears to be surprisingly useful. It’s based on the rotary dial from a Trimline phone, which itself was an epic hack back in 1965 when it was introduced. The 3D-printed case contains an ATmega2560V microcontroller and an Adafruit FONA 3G cell module, while a flexible mono eInk display adorns the outside. Some buttons, a folding SMA antenna, and some LEDs for signal strength and battery level complete the build, which easily slips into a pocket. The dial can be used not only to dial the phone but to control the speaker volume; in practice, [Justine] mainly uses the speed dial buttons to make calls, though.

We’ve seen rotary phones converted to cell before, but this one is a next-level integration of the retro and the modern. It’s simple, intuitive, and distraction-free, and best of all, it’s a great excuse not to return a text.

Thanks to [J. Peterson] for the tip.

Rotary Dial Becomes USB Keyboard

[Max] had a rotary dial from an old telephone and — unsurprisingly — had nothing in particular to do with it. The simple answer? Use an Arduino Leonardo to turn it into a USB keyboard device.

Of course, the Leonardo can easily impersonate a USB keyboard, so that’s the easy part of the project. Interfacing to the dial requires an understanding of how the phone system works.

While today, TouchTone phones are most common, they were quite uncommon for many years. Early phones required you to have an operator connect your circuit to another person’s circuit. Unfortunately for the operators, the system was inherently unscalable and also cost prohibitive.

There were a variety of schemes tried and — supposedly — an undertaker who was angry that the operator was connecting his customers to her husband’s competing mortuary invented the dial telephone.

The details are pretty simple. A typical dial has two contacts. There’s a normally open contact that closes when you spin the dial to any position. It says closed until the spring returns the dial to the home position.

The other contact is normally closed and makes or breaks the phone line. Each time the dial rewinds past a position, the contact opens briefly. Of course, this is a mechanical system, so the software has to debounce the inputs, but that’s easy enough.

If you don’t have access to a dial, you could always print one. Sort of.