If necessity is the mother of invention, then inconvenience is its frustrating co-conspirator. Faced with a finicky dryer that would shut down mid-cycle with a barely audible beep if its load was uneven (leaving a soggy mass of laundry), [] decided to add the dryer to the Internet of Things so it could send them an email whenever it shut itself down.
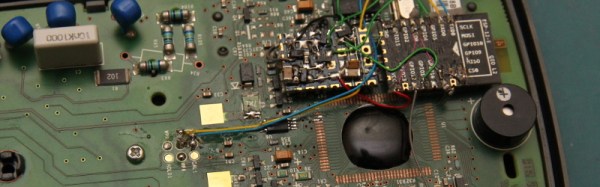
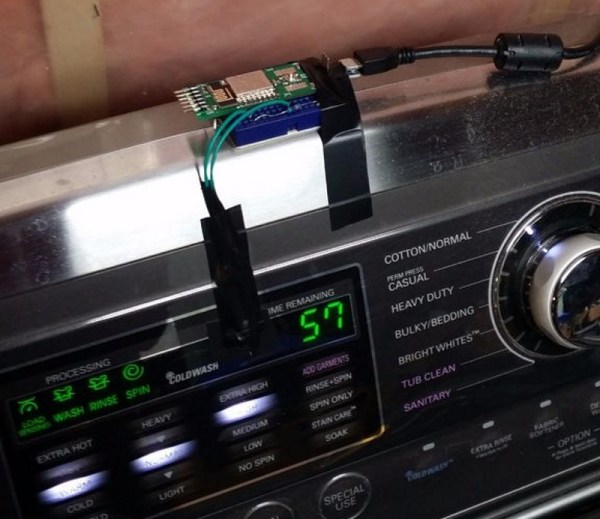
After opening a thinger.io account, adding the soon-to-be device, and setting up the email notification process, [the0ry] combined the ESP8266 Development Board, a photosensitive resistor, and a 5V power supply on a mini breadboard. All that was left was to mount it on the dryer and direct the LDR (light-dependent resistor) to the machine’s door lock LED to trigger an email when it turned off — indicating the cycle had finished or terminated prematurely. A little tape ensured the LDR would only be tripped by the desired light source.
If you’re an apartment-dweller have WiFi in the wash area it would be awesome to see a battery-powered version you take with you. But in general this is a great hardware blueprint as many device have status LEDs that can be monitored in a similar way. If you want to keep the server in-house (literally in this case) check out the Minimal MQTT series [Elliot Williams] recently finished up. It uses a Raspberry Pi as the center server and an ESP8266 is one of the limitless examples of hardware that plays nicely with the protocol.
We love seeing hacks like this because not only does it conserve water and energy by reducing instances of rewashing, but it’s also a clever way to extend the life of an appliance and potentially save hundreds of dollars in replacing it. Add this to the bevvy of hacks that add convenience to one’s home — some of which produce delicious results.