Network Controlled Decorative LED Matrix Frame

LED-Pixel-FrameThere is nothing better than a project that you can put on display for all to see. [Tristan’s] most recent project, a Decorative LED Matrix Frame, containing 12×10 big square pixels that can display any color, is really cool.

Having been built around a cheap IKEA photo frame this project is very doable, at least for those of you with a 3D printer. The 3D printer is needed to create the pixel grid, which ends up looking very clean in the final frame. From an electronics perspective, the main components are a set of Adafruit Neopixel LED strips, and an Arduino Uno with an Ethernet shield. The main controller even contains a battery backup for the real time clock (RTC) when the frame is unplugged; a nice touch. Given that the frame is connected to the local network, [Tristan] designed the frame to be controlled by a simple HTML5 interface (code available on GitHub). This allows any locally connected device to control the frame.

Be sure to check out the build details, they are very well done. If you are still not convinced how cool this project is, be sure to check out a video of it in action after the break! It makes us wish that you could play Tetris on this frame. Very nice job [Tristan]!

Continue reading “Network Controlled Decorative LED Matrix Frame”

I2S Audio And SPI Display With An Ethernet Module

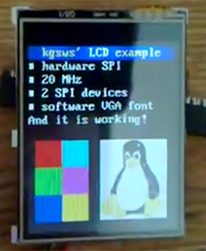
LCD[kgsws] is working on a small project that requires some audio and a display of some sort. While this project can be easily completed with a bigish microcontroller or ARM board, he’s taking a much simpler route: the entire project is built around a cheap router module, giving this project amazing expandability for a very meager price.
The router module in question is the HLK-RM04 from Hi-Link, commonly found via the usual Chinese resellers for about $25. On board this module is a UART, Ethernet, and a WiFi adapter along with a few GPIO pins for interfacing with the outside world.

[kgsws] is using the native SPI pins on this module to control the clock and data lines for the tiny LCD, with a GPIO pin toggling the chip select. I2S audio is also implemented, decoded with an 8-bit DAC, the MCP4801.

It’s an extremely inexpensive solution for putting audio and video in a project, and since this board has Ethernet, WiFi, and a few more GPIO pins, it’s can do much more than whatever [kgsws] is planning next.

Building A Network Controllable RGB LED Lamp From An Old Scanner

EthernetLamp

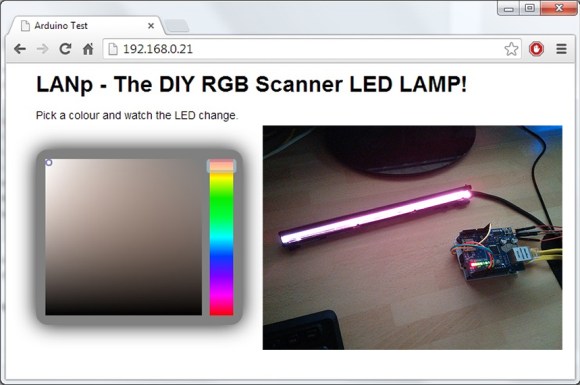
Being able to use one of your old projects to make a new one better can be quite satisfying. [Steve] from Hackshed did just this: he integrated an Arduino based webserver into a new network controllable RGB lamp.

What makes this lamp unique is that the RGB LED bar comes from an old Epson scanner. Recycling leftover parts from old projects or derelict electronics is truly the hacker way. After determining the pinout and correct voltage to run the LEDs at, the fun began. With the LED bar working correctly, the next step was to integrate an Arduino based webserver. Using an SD card to host the website and an Ethernet Arduino shield, the LEDs become network controllable. Without missing a beat, [Steve] integrated a Javascript based color picker that supports multiple web browsers. This allows the interface to look quite professional. Be sure to watch the lamp in action after the break!

The overall result is an amazing color changing lamp that works perfectly. All that is left to do is create a case for it, or integrate it into an existing lamp. This is a great way to use an LED strip that would have otherwise gone to waste. If you can’t find a scanner with a color wand like this one, you can always start with an RGB strip.

Continue reading “Building A Network Controllable RGB LED Lamp From An Old Scanner”

New Version Of Energia Supports Wolverine And Connected

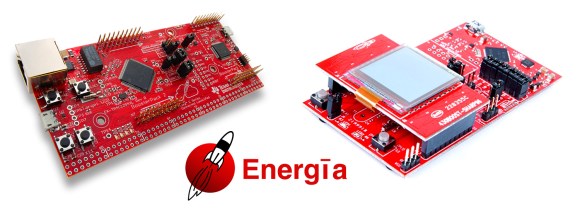
Energia UpdateThere is something to be said about how easy it is to write Arduino code. For those of who you are big fans of the MSP430 and Texas Instrument’s LaunchPad series, an upcoming release of Energia brings Arduino style coding to the two newest member of the LaunchPad family: the TivaC Connected LaunchPad EK-TM4C1294XL and Wolverine FRAM LaunchPad MSP-EXP430FR5969LP.

“Energia is an open-source electronics prototyping platform … with the goal to bring the Wiring and Arduino framework to the Texas Instruments MSP430 based LaunchPad.” The newest release of Energia is exciting for the sole reason that the new TivaC Connected LaunchPad and Wolverine FRAM LaunchPad are supported. The TivaC Connected LaunchPad is a $20 development board for TI’s low-power ARM processors that has Ethernet connectivity. The MSP430 at the heart of the Wolverine FRAM LaunchPad uses up to 250x less power than flash based MCUs at low speeds in addition to many other cool benefits.

Be sure to keep an eye out for the new version of Energia, it should be arriving sometime next week. Now is a better time than ever to try out the Tiva C or the MSP430 MCUs!

TI Launches “Connected LaunchPad”

TI’s LaunchPad boards have a history of being both low cost and fully featured. There’s a board for each of TI’s major processor lines, and all of them support the same “BoosterPack” interface for additional functionality. Today, TI has announced a new LaunchPad based on their new Tiva C ARM processors, which is designed for connectivity.

The Tiva C Series Connected LaunchPad is based on the TM4C129x processor family. These provide an ethernet MAC and PHY on chip, so the only external parts required are magnetics and a jack. This makes the Connected LaunchPad an easy way to hop onto ethernet and build designs that require internet connections.

This development board is focused on the “Internet of Things,” which it seems like every silicon manufacturer is focusing on nowadays. However, the real news here is a low cost board with tons of connectivity, including ethernet, two CANs, 8 UARTs, 10 I2Cs, and 4 QSPIs. This is enough IO to allow for two BoosterPack connectors that are fully independent.

Connected Launchpad Details

For the launch, TI has partnered with Exosite to provide easy access to the LaunchPad from the internet. A pre-loaded demo application will allow you to toggle LEDs, read button states, and measure temperature over the internet using Exosite. Unlike some past LaunchPads, this one is designed for easy breadboarding, with all MCU pins broken out to a breadboard compatible header.

Finally, the price is very right. The board will be release at $19.99 USD. This is less than half the price of other ethernet-ready development boards out there. This makes it an attractive solution for hackers who want to put a device on a wired network, or need a gateway between various devices and a network. 

Your Mouse Is A Terrible Webcam

camera

It should come as no surprise your optical mouse contains a very tiny, very low resolution camera. [Franci] decided to take apart one of his old mice and turn that tiny optical sensor into a webcam.

Inside [Franci]’s Logitech RX 250 is an ADNS-5020 optical sensor. This three wire SPI device stuffed into an 8-pin package is a 15×15 pixel grayscale image sensor. [Franci] started this project by bringing out the Arduino and Ethernet shield. After soldering a pull-up resistor to the image sensor’s reset pin, connecting the rest of the circuit was as simple as soldering a few wires to the Arduino.

The Arduino sketch sends the image data for each pixel to a computer over a serial connection. A bit of javascript and a touch of HTML takes this pixel data and turns it into a webpage with a live view of whatever is directly under [Franci]’s mouse.

Video of the mousewebcam in action below.

Continue reading “Your Mouse Is A Terrible Webcam”

Build An In Line Network Bandwidth Monitor

[Kurt] likes to know what’s going on with his network. He already uses bandwidth checking software on his DD-WRT capable router, but he wanted a second opinion. So he built his own network monitor. [Kurt] started by building a passive Ethernet tap. He then needed a network interface chip that would serve his purposes. The common Wiznet chips used with Arduinos didn’t allow enough manipulation of raw packet data, so he switched to a Microchip ENC624J600 (PDF). The Microchip controller allowed him to count the bytes in the raw Ethernet packets.

With the Ethernet interface complete, [Kurt] turned his attention to a microcontroller to run the show. He started with an Arduino, but the lack of debugging quickly sent him to an Atmega128 in Atmel Studio. After getting the basic circuit working, [Kurt] switched over to a PIC24F chip. With data finally coming out of the circuit, he was able to tell that his original back-of-the-napkin calculations for bandwidth were wrong. [Kurt] created a PCB to hold the microcontroller, then wrote a Python program to plot the data output from his circuit. The bandwidth plot matched up well with the plot from DD-WRT. Now he just needs a giant LED matrix to show off his current network stats!