3D Printing Toothpaste In The Name Of Science

While we don’t often see them in the hobbyist community, 3D printers that can extrude gels and viscous liquids have existed commercially for years, and are increasingly used for biological research. [Ahron Wayne] has recently been working with such a printer as part of a project to develop a printed wound dressing made of honey and blood clotting proteins, but for practice purposes, wanted to find a cheaper and more common material that had similar extrusion properties.
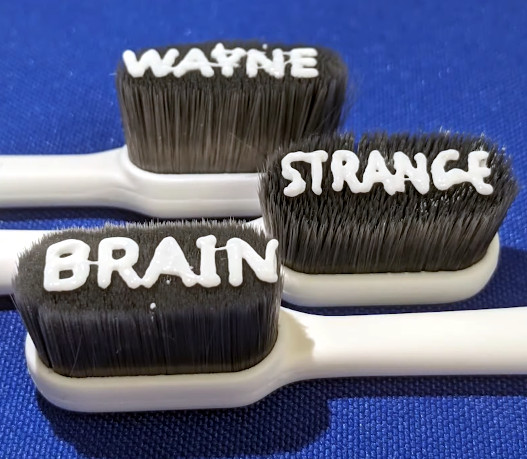
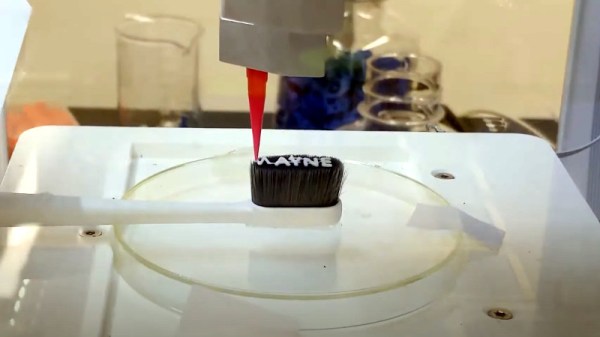
The material he settled on ended up being common toothpaste. In the video below you can see him loading up the cartridge of a CELLINK INKREDIBLE+ bioprinter with the minty goop, which is then extruded through a thin blunt-tip needle by compressed air. After printing out various shapes and words using the material, often times directly onto the bristles of a toothbrush, he’s come up with a list of tips for printing similarly viscous substances.

First and foremost, go slow. [Ahron] says the material needs a moment to contract after being extruded if it’s going to have any hope of supporting the next layer of the print. Thick layer heights are a necessity, as is avoiding sharp curves in your design. He also notes that overhangs must be avoided, and though it probably goes without saying, clarifies that an object printed from toothpaste will never be able to support anything more than its own weight.

In addition to the handful of legitimate DIY bioprinters that have graced these pages over the years, we’ve seen the occasional chocolate 3D printer that operated on a similar principle to produce bespoke treats, so the lessons learned by [Ahron] aren’t completely lost on the hacker and maker crowd. Who knows? Perhaps you’ll one day find yourself consulting this video when trying to get a modified 3D printer to lay down some soldering paste.

Continue reading “3D Printing Toothpaste In The Name Of Science”
Retrotechtacular: The Drama Of Metal Forming

It may seem overwrought, but The Drama of Metal Forming actually is pretty dramatic.

This film is another classic of mid-century corporate communications that was typically shown in schools, which the sponsor — in this case Shell Oil — seeks to make a point about the inevitable march of progress, and succeeds mainly in showing children and young adults what lay in store for them as they entered a working world that needed strong backs more than anything.

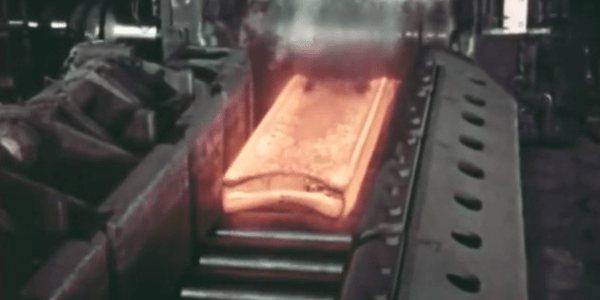
Despite the narrator’s accent, the factories shown appear to be in England, and the work performed therein is a brutal yet beautiful ballet of carefully coordinated moves. The sheer power of the slabbing mills at the start of the film is staggering, especially when we’re told that the ingots the mill is slinging about effortlessly weigh in at 14 tons apiece. Seeing metal from the same ingots shooting through the last section of a roller mill at high speed before being rolled into coils gives one pause, too; the catastrophe that would result if that razor-sharp and red-hot metal somehow escaped the mill doesn’t bear imagining. Similarly, the wire drawing process that’s shown later even sounds dangerous, with the sound increasing in pitch to a malignant whine as the die diameter steps down and the velocity of the wire increases.

There are the usual charming anachronisms, such as the complete lack of safety gear and the wanton disregard for any of a hundred things that could instantly kill you. One thing that impressed us was the lack of hearing protection, which no doubt led to widespread hearing damage. Those were simpler times, though, and the march of progress couldn’t stop for safety gear. Continue reading “Retrotechtacular: The Drama Of Metal Forming”

Getting Started With Aluminum Extrusions

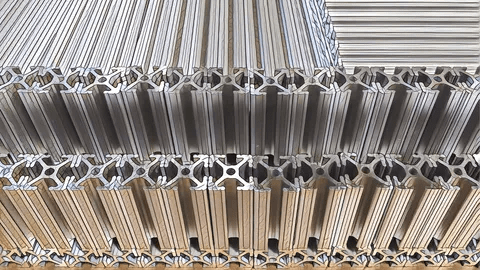
T-slot extrusions used to be somewhat mysterious, but today they are quite common thanks to their use in many 3D printers. However, it is one thing to assemble a kit with some extrusions and another thing to design your own creations with the material. If you ever had a Play-Doh Fun Factory as a kid, then you know about extrusions. You push some material out through a die to make a shape. Of course, aluminum extrusions aren’t made from modeling clay, but usually 6105-T5 aluminum. Oddly, there doesn’t seem to be an official standard, but it is so common that there’s usually not much variation between different vendors.

We use extrusions to create frames for 3D printers, laser cutters, and CNC machines. But you can use it anywhere you need a sturdy and versatile frame. There seems to be a lot of people using them, for example, to build custom fixtures inside vans. If you need a custom workbench, a light fixture, or even a picture frame, you can build anything you like using extrusions. Continue reading “Getting Started With Aluminum Extrusions”

Fail Of The Week: How Not To Build A Filament Extruder

It would be great if you could create your own filament. On the face of it, it seems easy to do, but as [Thomas Sanladerer] found out when he was a student, there are a lot of details that can bedevil your design. His extruder sort of works, but he wouldn’t suggest duplicating his effort. In fact, he hopes you can learn what not to do if you try to do it yourself.

In all fairness, [Thomas] was a low-budget student and was trying to economize. For example, he tried using a drill to drive the auger. Why not? It looks like a drill bit. But he found out that wasn’t satisfactory and moved to a pair of wiper motors with their built-in gear train.

Continue reading “Fail Of The Week: How Not To Build A Filament Extruder”

Under Pressure: How Aluminum Extrusions Are Made

At any given time I’m likely to have multiple projects in-flight, by which of course I mean in various stages of neglect. My current big project is one where I finally feel like I have a chance to use some materials with real hacker street cred, like T-slot extruded aluminum profiles. We’ve all seen the stuff, the “Industrial Erector Set” as 80/20 likes to call their version of it. And we’ve all seen the cool projects made with it, from CNC machines to trade show displays, and in these pandemic times, even occasionally as sneeze guards in retail shops.

Aluminum T-slot profiles are wonderful to work with — strong, lightweight, easily connected with a wide range of fasteners, and infinitely configurable and reconfigurable as needs change. It’s not cheap by any means, but when you factor in the fabrication time saved, it may well be a net benefit to spec the stuff for a project. Still, with the projected hit to my wallet, I’ve been looking for more affordable alternatives.

My exploration led me into the bewilderingly rich world of aluminum extrusions. Even excluding mundane items like beer and soda cans, you’re probably surrounded by extruded aluminum products right now. Everything from computer heatsinks to window frames to the parts that make up screen doors are made from extruded aluminum. So how exactly is this ubiquitous stuff made?

Continue reading “Under Pressure: How Aluminum Extrusions Are Made”

This Four-Axis Stencil Printer Is The Ultimate In SMD Alignment Tools

Here at Hackaday we love all kinds of builds, and we celebrate anytime anyone puts parts together into something else. And while we love the quick and dirty builds, there’s just something about the fit and finish of this four-axis SMD stencil printer that really pushes our buttons.

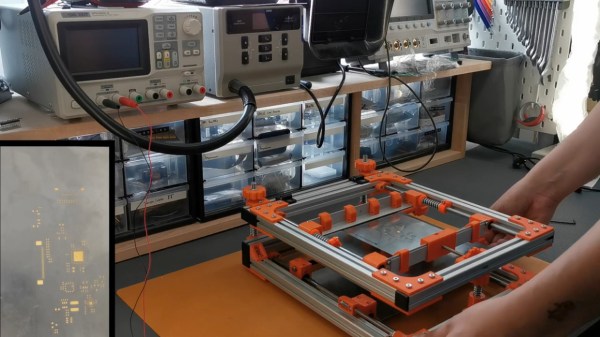
This build comes to us from [Phillip], who like many surface-mount users was sick of the various tape-and-PCB methods that are commonly used to align the solder stencil with the PCB traces. His solution is this fully adjustable stencil holder made from aluminum extrusions joined by 3D-printed parts. The flip-up frame of the device has a pair of clamps for securely holding the stainless steel stencil. Springs on the clamp guide rods provide some preload to keep the stencil taut as well as protection from overtensioning.

The stencil can move in the X-, Y-, and Z-axes to line up with a PCB held with 3D-printed standoffs on a bed below the top frame. The bed itself rotates slightly to overcome any skew in alignment of the PCB. [Phillip] was aghast at the price of an off-the-shelf slew-ring bearing for that axis, but luckily was able to print up some parts and just use simple roller bearing to do the same thing for a fraction of the cost. The frame is shown in use below; the moment when the pads line up perfectly through the stencil holds is oddly satisfying.

This puts us in mind of a recent, similar stencil printer we covered. That one was far simpler, but either one of these beats the expedient alignment methods hands down.

Continue reading “This Four-Axis Stencil Printer Is The Ultimate In SMD Alignment Tools”

Make Your Own Filament

According to [Alex] it is easy to make your own rolls of 3D printing filament, even though existing off-the-shelf solutions don’t work very well. His explanation for this is economics. He built a filament extruder using a high torque induction motor and gearbox that was locally sourced. He argues that shipping heavy gear around would make a similar extruder commercially unattractive. He sunk about $600 into the device but estimates that a company would need to charge at least $1,500 or more for the same thing. That may seem steep but as [Alex] points out, a 1 kg roll of filament really only has about 750 grams for filament and plastic pellets cost $2 to $3 per kilogram.

There are other costs, of course, like the electricity required to heat and move the plastic. Still, the system appears to use about $1 of electricity for every 10 kg of filament. You can see the process in the video below.

Continue reading “Make Your Own Filament”