A SPIF-fy Way Of Forming Metal

Thanks to 3D printing, most of us are familiar with the concept of additive manufacturing, and by extension, subtractive manufacturing. But what is it when you’re neither adding material nor taking it away to create something? Generally speaking, that’s called forming, and while there are tons of ways to do it, one you might not have heard of is single-point incremental forming (SPIF), and it’s pretty cool.

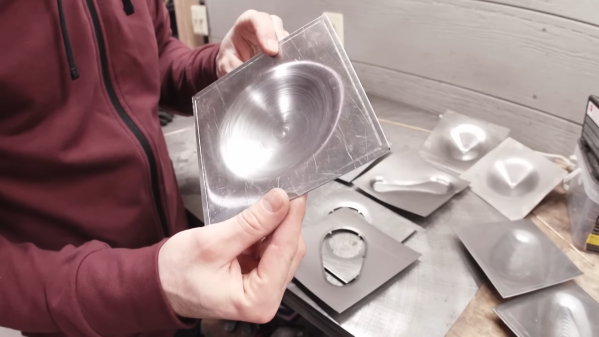
To explore SPIF as a method for making small parts, [Russell Makes] gave it a go on a small CNC mill. The idea is pretty simple, and the video below makes it pretty clear what’s going on. A forming tool is moved over a sheet metal blank that’s held very securely to the mill’s table. The tool has no cutting edges, just a smooth, hard, spherical tip — [Russell] made his own by brazing a carbide ball to a piece of drill rod. The tool is driven slightly into the blank along the Z-axis, while simultaneously tracing out a tool path in the XY plane. The tool spins, but very slowly; ideally, the spindle speed is controlled to keep a single point of contact with the metal as the tool works around its tool path. The tool steps downward incrementally, drawing the metal down with it as it forms the desired shape.

[Russell]’s experiments were pretty promising. He started with titanium sheet, which behaved pretty well except for some galling thanks to lack of lubrication. Aluminum and stainless worked pretty well too, at least for simple hemispherical and cone shapes. More complex shapes proved trickier, but with time he was able to figure out the correct speeds and feeds to keep the metal intact. The amount of tension built up in the metal is impressive, though, and is especially evident when cutting the finished part free from the blank.

Could this work with a hobbyist-grade machine? Possibly, but we’d be afraid that the forces involved might be a bit much for light-duty machines, especially in the Z-axis. And it’s a slow process, so it’s probably only good for one-offs and low-volume work. Once you’ve got a prototype, die stamping might be a more efficient way to go.

Continue reading “A SPIF-fy Way Of Forming Metal”

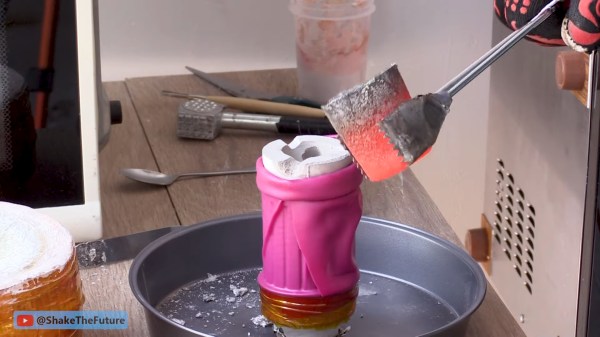
A red hot crucible is held with metal tongs above a white plaster mold. The mold is held in a bright pink silicone sleve atop a metal pan on a wooden workbench. Red cheese wax holds the sleeve to a metal funnel connected to a vacuum cleaner.

Lost Print Vacuum Casting In A Microwave

Hacks are rough around the edges by their nature, so we love it when we get updates from makers about how they’ve improved their process. [Denny] from Shake the Future has just provided an update on his microwave casting process.

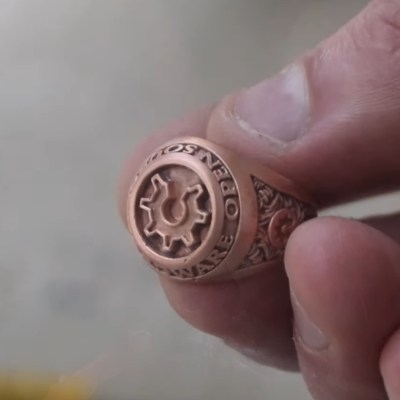
Sticking metal in a microwave certainly seems like it would be a bad idea at first, but with the right equipment it can work quite nicely to develop a compact foundry. [Denny] walks us through the process start to finish in this video, including how to build the kilns, what materials to use, and how he made several different investment castings using the process. The video might be worth watching just for all the 3D printed tools he’s built to aid in the process — it’s a great example of useful 3D prints to accompany your fleet of little plastic boats.A hand holds a very detailed copper ring. It is inscribed with the words "Open Source Hardware" and the open gear logo associated with open source hardware. It looks kinda like a class ring.

A lot of the magic happens with a one minute on and six minutes off cycle set by a simple plug timer. This allows a more gradual ramp to burn out the PLA or resin than running the microwave at full blast which can cause some issues with the kiln, although nothing catastrophic as demonstrated. Vacuum is applied to the mold with a silicone sleeve cut from a swimming cap while pouring the molten metal into the mold to draw the metal into the cavities and reduce imperfections.

We appreciate the shout out to respirators while casting or cutting the ceramic fiber mat. Given boric acid’s effects, [PDF] you might want to use safety equipment when handling it as well or just use water as that seems like a valid option.

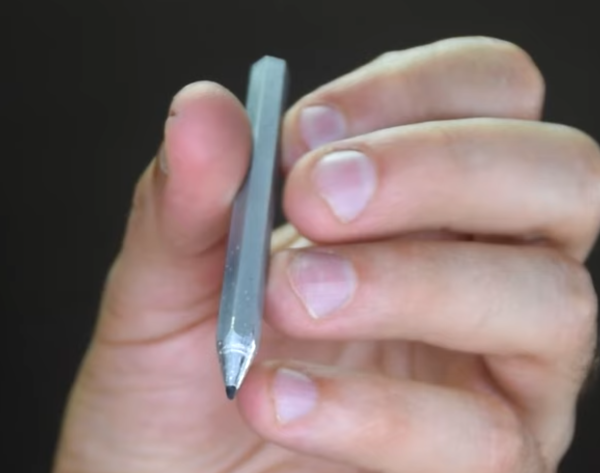
If you want to see where he started check out this earlier version of the microwave kiln and how he used it to make an aluminum pencil.

Continue reading “Lost Print Vacuum Casting In A Microwave”

Casting Metal With A Microwave And Vacuum Cleaner

Metalworking might conjure images of large furnaces powered by coal, wood, or electricity, with molten metal sloshing around and visible in its crucible. But metalworking from home doesn’t need to use anything more fancy than a microwave, at least according to [Denny] a.k.a. [Shake the Future]. He has a number of metalworking tools designed to melt metal using a microwave, and in this video he uses them to make a usable aluminum pencil with a graphite core.

Before getting to the microwave kiln, the pencil mold needs to be prepared. A 3D-printed pencil is first created with the graphite core, and then [Denny] uses a plaster of Paris mixture to create the mold for the pencil. The 3D printed plastic is left inside the mold and placed in the first microwave kiln, which is turned on just enough to melt the plastic out of the mold, leaving behind the graphite core. From there a second kiln goes into the microwave to melt the aluminum.

Once the molten aluminum is ready, it is removed from the kiln and poured in the still-warm pencil mold. This is where [Denny] has another trick up his sleeve. He’s using a household vacuum cleaner to suck the metal into place before it cools, creating a rudimentary but effective vacuum forming machine. The result is a working pencil, at least after he wears down a few razor blades attempting to sharpen the metal pencil. For more information about how [Denny] makes these microwave kilns, take a look at some of his earlier projects.

Continue reading “Casting Metal With A Microwave And Vacuum Cleaner”

Extreme Canine Mask For Protection From Foxtails

Our canine partners are fortunately not affected by the current global pandemic, but it turns out there are other dangers that might necessitate them to wearing masks: Foxtail seeds. After getting a $400 vet bill for extracting a foxtail from his dog, [Hildeguard]’s ear, [Amos Dudley] decided to take the threat seriously and made her a form-fitting 3D printed mask.

The only commercial solution [Amos] could find was the “OutFox Field Guard”, which is a $50 vinyl-coated mesh bag that covers the dog’s entire head. It had the unfortunate side effects of causing some other dogs to try and rip it off and does not allow easy access to the mouth for treats or balls. [Hilde]’s custom mask was designed in CAD after creating a rough 3D scan of her head with an iPhone app. The bottom is open to allow [Hilde] to freely use her mouth, while the nose and ears holes are covered with mesh. Custom heat-formed polycarbonate lenses cover the eye holes. The mask itself was printed using Draft resin, and the inside was padded with a thin layer of foam. It might also be possible to create a silicone version using a 3D-printed mold. The top features an integrated GoPro mount, and we can’t help but wonder what other electronic upgrades could be fitted to this sci-fi-looking mask.

In the field, the mask worked well and did not seem to bother [Hilde]. Unfortunately, it did not solve the problem of other dogs trying to rip it off at the park, so for the moment [Amos] is only using it for more solitary activities like hiking.

It doesn’t look like [Amos] is struggling in that department, but if you need some help burning of your dog’s energy, you can always built them a 3D printed automatic ball launcher.


Retrotechtacular: The Drama Of Metal Forming

It may seem overwrought, but The Drama of Metal Forming actually is pretty dramatic.

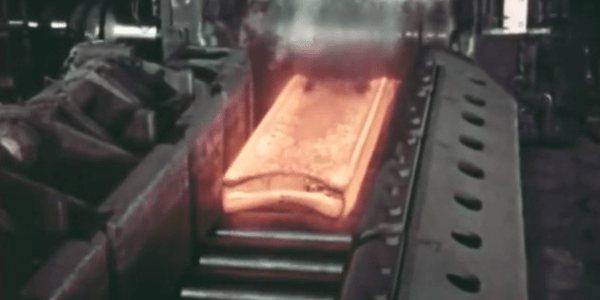
This film is another classic of mid-century corporate communications that was typically shown in schools, which the sponsor — in this case Shell Oil — seeks to make a point about the inevitable march of progress, and succeeds mainly in showing children and young adults what lay in store for them as they entered a working world that needed strong backs more than anything.

Despite the narrator’s accent, the factories shown appear to be in England, and the work performed therein is a brutal yet beautiful ballet of carefully coordinated moves. The sheer power of the slabbing mills at the start of the film is staggering, especially when we’re told that the ingots the mill is slinging about effortlessly weigh in at 14 tons apiece. Seeing metal from the same ingots shooting through the last section of a roller mill at high speed before being rolled into coils gives one pause, too; the catastrophe that would result if that razor-sharp and red-hot metal somehow escaped the mill doesn’t bear imagining. Similarly, the wire drawing process that’s shown later even sounds dangerous, with the sound increasing in pitch to a malignant whine as the die diameter steps down and the velocity of the wire increases.

There are the usual charming anachronisms, such as the complete lack of safety gear and the wanton disregard for any of a hundred things that could instantly kill you. One thing that impressed us was the lack of hearing protection, which no doubt led to widespread hearing damage. Those were simpler times, though, and the march of progress couldn’t stop for safety gear. Continue reading “Retrotechtacular: The Drama Of Metal Forming”

3D-Printed Press-Forming Tools Dos And Don’ts

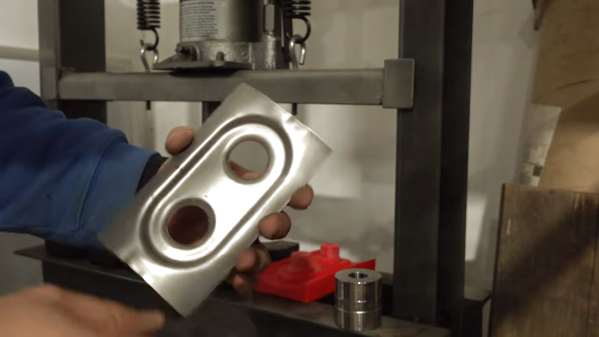
Press-forming is a versatile metal forming technique that can quickly and easily turn sheet metal into finished parts. But there’s a lot of time and money tied up in the tooling needed, which can make it hard for the home-gamer to get into. Unless you 3D-print your press-form tooling, of course.

Observant readers will no doubt recall our previous coverage of press-forming attempts with plastic tooling, which were met with varying degrees of success. But [Dave]’s effort stands apart for a number of reasons, not least of which is his relative newbishness when it comes to hot-squirt manufacturing. Even so, he still came up with an interesting gradient infill technique that put most of the plastic at the working face of the dies. That kept print times in the reasonable range, at least compared to the days of printing that would have been needed for 100% infill through the whole tool profile.

The other innovation that we liked was the idea to use epoxy resin to reinforce the tools. Filling the infill spaces on the tools’ undersides with resin resulted in a solid, strong block that was better able to withstand pressing forces. [Dave] didn’t fully account for the exothermic natures of the polymerization reaction, though, and slightly warped the tools. But as the video below shows, even suboptimal tools can perform, bending everything he threw at them, including the hydraulic press to some extent.

It sure seems like this is one technique to keep in mind for a rainy day. And hats off to [Dave] for sharing what didn’t work, since it points the way to improvements.

Continue reading “3D-Printed Press-Forming Tools Dos And Don’ts”

3D-Printed Punch And Die Stand Up To Steel

When you think of machine tooling, what comes to mind might be an endmill made of tungsten carbide or a punch and die made of high-speed steel. But surely there’s no room in the machine tool world for 3D-printed plastic tools, especially for the demanding needs of punching parts from sheet metal.

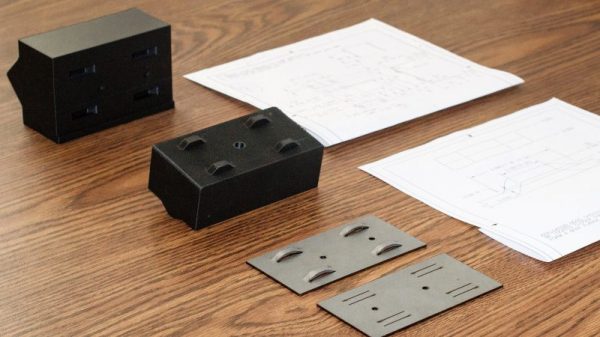
As it turns out, it is possible to make a 3D-printed punch and die set that will stand up to repeated use in a press brake. [Phil Vickery] decided to push the tooling envelope to test this, and came away pleasantly surprised by the results. In fairness, the die he used ended up being more of a composite between the carbon-fiber nylon filament and some embedded metal to reinforce stress points in the die block. It looks like the punch is just plastic, though, and both were printed on a Markforged Mark 2, a printer specifically designed for high-strength parts. The punch and die set were strong enough to form 14-gauge sheet steel in a press brake, which is pretty impressive. The tool wasn’t used to cut the metal; the blanks were precut with a laser before heading to the press. But still, having any 3D-printed tool stand up to metal opens up possibilities for rapid prototyping and short production runs.

No matter what material you make your tooling out of, there’s a lot to know about bending metal. Check out the basics in our guide to the art and science of bending metal.

Continue reading “3D-Printed Punch And Die Stand Up To Steel”