This $0 Filament Drybox Needs Nearly No Parts

All 3D printer filament benefits from being kept as dry as possible, but some are more sensitive to humidity than others. The best solution is a drybox; a sealed filament container, usually with some desiccant inside. But in a pinch, [Spacefan]’s quick and dirty $0 drybox solution is at least inspiring in terms of simplicity.

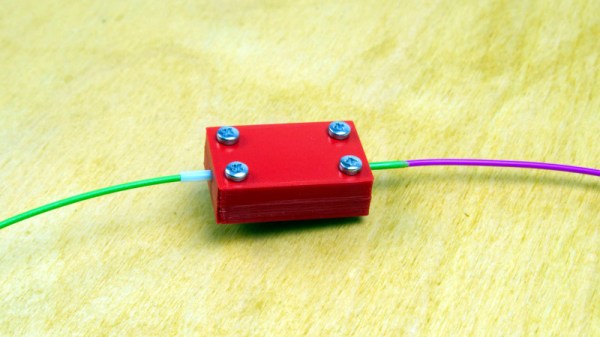
The only added part is this 3D-printed fitting.

[Spacefan]’s solution uses a filament roll’s own packing materials and a single 3D-printed part to create a sealed environment for a single roll. The roll lives inside a plastic bag (potentially the same one it was sealed in) and filament exits through a small hole and 3D-printed fitting that also uses a bit of spare PTFE tubing. The box doubles as a convenient container for it all. It doesn’t have as much to offer as this other DIY drybox solution, but sure is simple.

While we appreciate the idea, this design is sure to put a lot of friction on the spool itself. It will be a lot of extra work to pull filament off the spool, which needs to turn inside a bag, inside a box, and that extra work will be done by the 3D printer’s extruder, a part that should ideally be working as little as possible. The re-use of materials is a great idea, but it does look to us like the idea could use some improvement.

What do you think? Useful in a pinch, or needs changes? Would adding a spindle to support the spool help? Let us know what you think in the comments.

Deceptively Simple Process Turns Bottles Into Filament

If you know that most soda bottles are made from PET plastic, you’ve probably thought about how you could make filament from them and have an endless supply of cheap printing material. [Mr3DPrint] says he has a method and shares a few videos that make it look easy. We wonder if the quality of the filament is up to par with commercial products, but assuming the videos are accurate, it appears that the resulting filament gets the job done.

The details are a little sketchy, but it looks simple enough. THe first step is to get any indentations out of the bottle. He has several demonstrations of this some using pressurized air in the bottle and some without. In each case, though, a drill holds the bottle through the cap and spins it over a flame until the surface is smooth.

Continue reading “Deceptively Simple Process Turns Bottles Into Filament”

Simple Sensor Makes Filament Measurements A Snap

Just how tight are the manufacturing tolerances of modern FDM printer filament. Inquiring minds want to know, and when such minds are attached to handy fellows like [Thomas Sanladerer], you end up with something like this home-brew filament measurement rig to gather the data you seek.

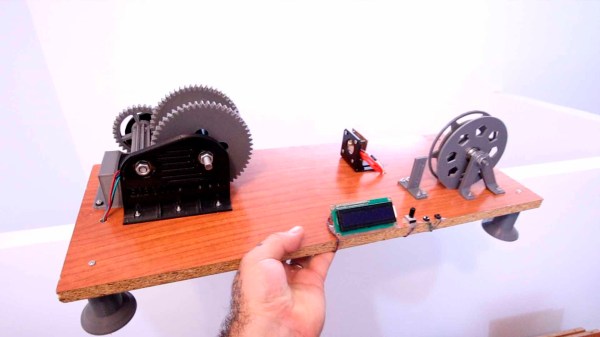
The heart of this build is not, as one might assume, some exotic laser device to measure the diameter of filament optically. Those exist, but they are expensive bits of kit that are best left to the manufacturers, who use them on their production lines to make sure filament meets their specs. Rather, [Thomas] used a very clever homemade device, which relies on a Hall effect sensor and a magnet on a lever to do the job. The lever is attached to a roller bearing that rides on the filament as it spools through the sensor; variations in diameter are amplified by the lever arm, which wiggles a magnet over the Hall sensor, resulting in a signal proportional to filament diameter.

The full test rig has a motor-driven feed and takeup spools, and three sensors measuring across the filament in three different spots around the radius; the measurements are averaged together to account for any small-scale irregularities. [Thomas] ran several different spools representing different manufacturers and materials through the machine; we won’t spoil the results in the video below, but suffice it to say you probably have little to worry about if you buy from a reputable vendor.

When we see a filament sensor, it’s generally more of the “there/not there” variety to prevent a printer from blindly carrying on once the reel is spent. We’ve seen a few of those before, but this is a neat twist on that concept.

Continue reading “Simple Sensor Makes Filament Measurements A Snap”

Programmable Filament For Multicolor Printing

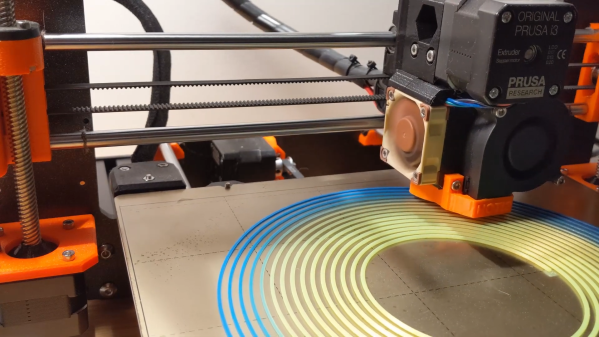
A recent research paper shows a way to create multicolor 3D prints using a single extruder if you are too lazy to babysit the machine and switch filament. The concept: print your own “programmable” filament that has the right colors in the right place. This is the same idea as manually splicing filament but presumably is more efficient since the process works with one color at a time and doesn’t repeat. In other words, to print the 64 squares of a chessboard you’d swap filament at least 64 times on each layer. Using programmable filament, you’d load one spool, print half of the filament, load another spool, print the other half, and then finally load the newly created filament and print the chessboard. Notice that the first two operations aren’t printing the chessboard. They are printing the spool of filament you feed through on the third pass.

There are machines made to do this, of course, although they generally just splice lengths of filament together for you automatically. Using one filament solves the problems of keeping multiple heads in alignment as well as the added cost and complexity. However, you now have different problems such as the transition between materials and knowing exactly how much material will be at each point in the print.

Continue reading “Programmable Filament For Multicolor Printing”

Heat Turns 3D Printer Filament Into Springs

The next time you find yourself in need of some large-ish plastic springs, maybe consider [PattysLab]’s method for making plastic springs out of spare filament. The basic process is simple: tightly wind some 3D printer filament around a steel rod, secure it and wrap it in kapton tape, then heat it up. After cooling, one is left with a reasonably functional spring, apparently with all the advantages of annealed plastic.

The basic process may be simple, but [PattysLab] has a number of tips for getting best results. The first is to use a 3D-printed fixture to help anchor one end of filament to the steel rod, then use the help of an electric drill to wind the filament tightly. After wrapping the plastic with kapton tape (wrap counter to the direction of the spring winding, so that peeling the tape later doesn’t pull the spring apart), he suspends it in a pre-heated oven at 120 C for PLA and 160 C for PETG. How long does it stay in there? [PattysLab] uses the following method: when the spring is wound, he leaves a couple inches of filament sticking out to act as a visual indicator. When this segment of filament sags down, that’s his cue to begin the retrieval process. After cooling, the result is a compression or extension spring, depending on how it was wound before being heated.

[PattysLab] shared a short video on this Reddit post that shows both springs in action, and the process is all covered in the video, embedded below.

Continue reading “Heat Turns 3D Printer Filament Into Springs”

Fancy Filament Joiner Has Promise, But Ultimately Fails

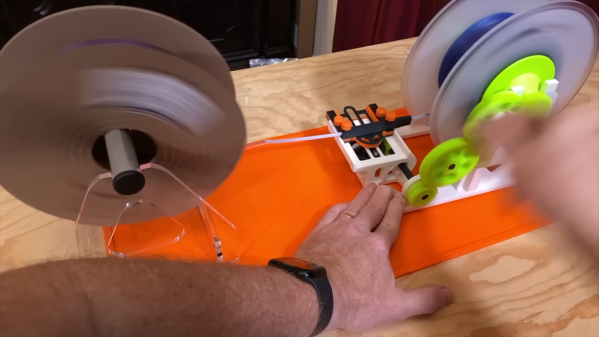
[Proper Printing] has been trying to 3D print rims for his car for quite some time. However, the size of the print has led to problems with filament spools running out prior to completion. This led to endless headaches trying to join several smaller lengths of filament in order to make a single larger spool. After his initial attempts by hand failed, a rig was built to try and bring some consistency to the process. (Video, embedded below.)

The rig consists of a heater block intended to melt the ends of two pieces of filament so that they can be fused together. A cheap set of brass calipers was modified with a tube in order to form a guide for the filament, ensuring that it gets bonded neatly without flaring out to a larger size. Fan coolers are then placed either side of the heating area to avoid turning the whole filament into a hot mess.

Unfortunately, the rig simply didn’t work. The initial design simply never got the filament hot enough, with the suspicion being that heat was instead being dumped into the calipers instead of the filament itself. Modifications to reduce this sadly didn’t help, and in the end, more success was had by simply holding a lighter below a length of brass tube.

While the project wasn’t a success, there’s still value in the learning along the way. We can’t see any fundamental reason why such a rig couldn’t be made to work, so if you’ve got ideas on how it could be improved, sound off in the comments. We’ve seen other successful builds using hair straighteners in a relatively simple setup, too.

Continue reading “Fancy Filament Joiner Has Promise, But Ultimately Fails”

3D Printing With VHS Tape Filament

If you have a pile of old VHS tapes collecting dust in your attic or basement that you know you’ll never watch again, either because all of those movies are available on DVD or a streaming service, or because you haven’t had a working VCR since 2003, there might be a way of putting them to good use in another way. With the miles of tape available in just a few cassettes, [brtv-z] shows us how to use that tape as filament for a 3D printer.

The first step of the build is to actually create the filament. He uses a purpose-built homemade press to spin several tapes into one filament similar to how cotton or flax is spun into yarn. From there the filament is simply fed into the 3D printer and put to work. The tape filament needs to be heated higher than a standard 3D printer filament so he prints at a much slower rate, but the resulting product is indistinguishable from a normal print except for the color. It has some other interesting properties as well, such as retaining its magnetism from the magnetic tape, and being a little more brittle than PET plastic although it seems to be a little stronger.

While the VHS filament might not be a replacement for all plastic 3D prints, it’s still a great use for something that would likely otherwise head straight to the landfill. There are some other uses for this magnetic tape as well, like if you wanted to build a DIY particle accelerator.

Continue reading “3D Printing With VHS Tape Filament”