Fish Tank Dosing Pump Built Using Pi Pico

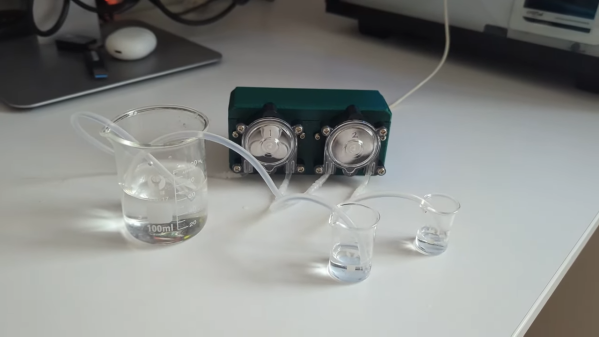
When you’re maintaining a fish tank, it’s actually quite important to get all your basic chemistry right. Mismanage things, and you’ll kill all the helpful bacteria in the tank, or kill your fish when things get too alkaline or too acidic. To help him get things just right, [yojoebosolo] built a custom dosing pump to maintain his fishtank.

The pumps themselves are small peristaltic pumps sourced from AliExpress. They can be had for under $10 if you look hard enough. Two of these are assembled into a PLA housing. Meanwhile, the brains of the operation is a Raspberry Pi Pico. It’s charged with running the pumps to a regular schedule, ensuring that just the right amount of chemicals are delivered when they are needed. It delivers 2 mL of Kalkwasser solution into [yojoebosolo’s] reef tank every ten minutes.  The pumps are switched on and off with a simple 5V relay.

If you’ve got a delicate and complex fish tank that demands only the best, building your own dosing pump may be the way to go. Off-the-shelf versions can be expensive, after all, so sometimes it makes sense to roll your own. Video after the break.

Continue reading “Fish Tank Dosing Pump Built Using Pi Pico”

Aquarium Controller Starring Arduino Gets A Long Video Description

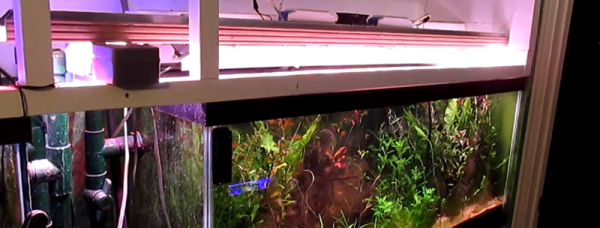
There’s an old saying that the cobbler’s children have no shoes. Sometimes we feel that way because we stay busy designing things for other people or for demos that we don’t have time to just build something we want. [Blue Blade Fish] wanted to build an Arduino-based aquarium controller. He’s detailed the system in (so far) 14 videos and it looks solid.

This isn’t just a simple controller, either. It is a modular design with an Arduino Mega and a lot of I/O for a serious fish tank. There are controls for heaters, fans, lights, wave makers and even top-off valves. The system can simulate moonlight at night and has an LCD display and keys. There’s also an Ethernet port and a Raspberry Pi component that creates a web interface, data storage, and configures the system. Even fail safes have been designed into the system, so you don’t boil or freeze expensive fishes. No wonder it took 14 videos!

Continue reading “Aquarium Controller Starring Arduino Gets A Long Video Description”

Etching A PCB In Ten Minutes.

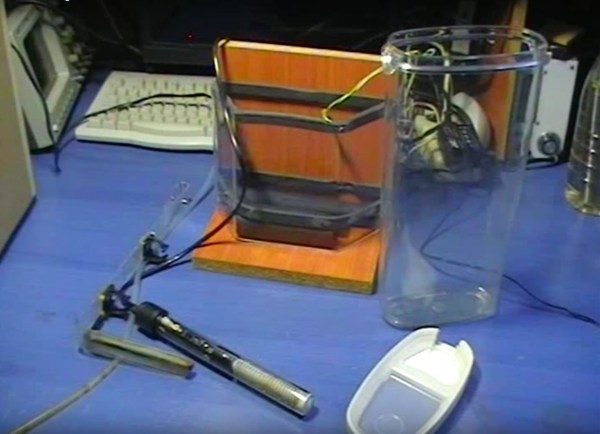
Most circuit boards any maker could need for their projects can be acquired online at modest cost, but what if you need something specific? [Giorgos Lazaridis] of pcbheaven.com has designed his own etching bath complete with a heater and agitator to sped up the process of creating your own custom circuit boards.

[Lazaridis] started by building a circuit to control — in a display of resourcefulness — a fish tank heater he would later modify. The circuit uses a PIC 16F526 microcontroller and two thermristors to keep the temperature of the etching bath between 38 and 41 degrees Celsius. The fish tank heater was gingerly pried from its glass housing, and its bimetallic strip thermostat removed and replaced with a wire to prevent it shutting off at its default 32 degrees. All of it is mounted on a small portable stand and once heated up, can etch a board in less than 10 minutes.

Continue reading “Etching A PCB In Ten Minutes.”

Add A Slide Show To Your Fish Tank

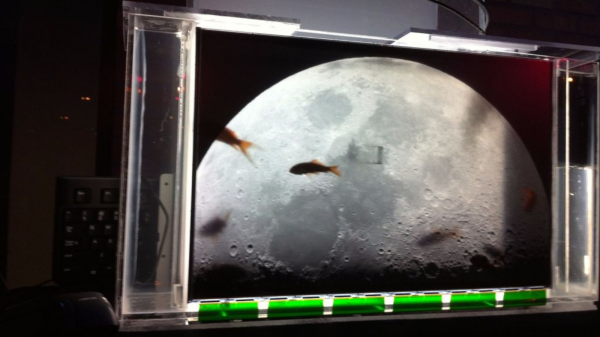
Once in a way we get a hack that makes us wonder – why didn’t we think of that ? [hydronics] tore apart an old LCD monitor and built a fish tank around it. Not sure if the fish notice that they are swimming on the Moon, but it sure makes for an interesting fish tank display.

He starts by ripping apart an old 19″ LCD monitor and built an acrylic fish tank around the display. The backlight of the panel is fixed at the rear side of the fish tank, along with the rest of the electronics from the old monitor.

For an earlier version, he built his own back light, but the second version with the original back light turned out much better. The fish tank pieces were joined together using acrylic glue and left over night to dry, although he still needed to use some silicone to plug leaks.

A Raspberry Pi connected to the monitor’s HDMI input provides the background slide show. [Tony Rieker] helped add bubble animations via some OpenCV code running on the Pi. A live feed of the fish is overlaid on the slide show, adding a level of inception to this tricked up fish tank. The project was recently shown off at the Portland Winter Light Festival.

Continue reading “Add A Slide Show To Your Fish Tank”

Training Fish To Feed Themselves

We’ve featured quite a few aquarium and fish feeder hacks on our blog. [RoboPandaPDX] thought of taking it up a notch and make an interactive fish feeder. He built a Fish feeder that train’s them to feed themselves.

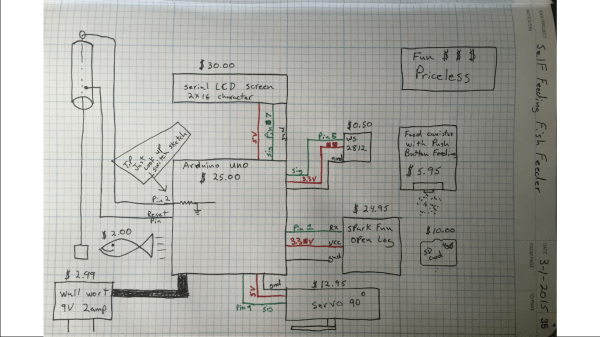
A copper bar hangs from the middle of a metal cylinder – much like a bell. The end of the bar has a fish lure. When a fish pushes the lure, the copper bar touches the metal cylinder and  closes the circuit. This signal goes to an Arduino. To catch the attention of the fishes and to “teach” them, an RGB LED is used. The fish need to figure out that the feeder will dispense food only when the LED is ON and the Lure is pushed. If the fish figure that out, and push the lure when the LED is on, a servo is activated which pushes the feeder to deliver 1 unit of fish food. While at it, he added a couple of bells and whistles. A buzzer to indicate when the Lure switch is closed and a 2 line LCD shows how many times the switch has been activated and how long the program has been running.

A Sparkfun  open logger stores the hit count and the minutes and seconds of the hit for data analysis later on. The good news is that it seems to be working. The current code activates the feeder for 30 to 60 minutes every day, which is indicated by the LED. At the end of 9 days,  [RoboPandaPDX] found that the goldfish would hit the Lure when the LED turned on, and then turn around to face where the feeder would dispense food in to the tank. His next plan is to put up some obstacles along the path to see if the fish learn some new tricks. His schematic looks a little iffy (the Lure switch is connected to the RST pin of the Arduino), and it seems he cannot remember why he ever did that. He’s happy that it works though, but we’re sure that’s not the right way to wire it up.

[RoboPandaPDX] is looking for suggestions on improving his interactive feeder, so if you have any, do add them in the comments below.

If you need some more fish feeder ideas, check out this and this that we blogged about earlier.

Fish Feeder

3D Printed Fish Feeder

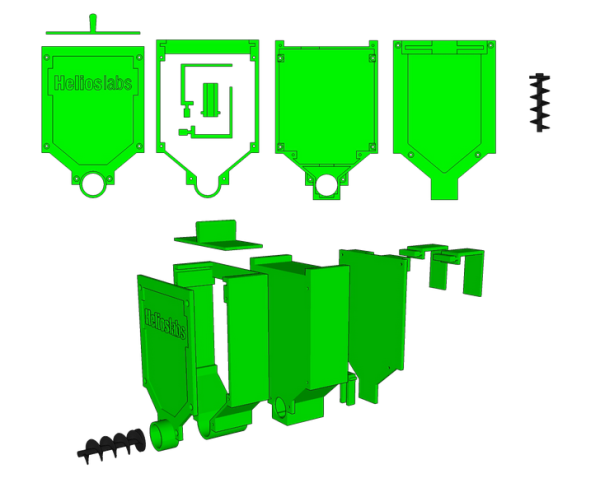
[Helios Labs] recently published version two of their 3D printed fish feeder. The system is designed to feed their fish twice a day. The design consists of nine separate STL files and can be mounted to a planter hanging above a fish tank in an aquaponics system. It probably wouldn’t take much to modify the design to work with a regular fish tank, though.

The system is very simple. The unit is primarily a box, or hopper, that holds the fish food. Towards the bottom is a 3D printed auger. The auger is super glued to the gear of a servo. The 9g servo is small and comes with internal limiters that only allow it to rotate about 180 degrees. The servo must be opened up and the limiters must be removed in order to enable a full 360 degree rotation. The servo is controlled by an Arduino, which can be mounted directly to the 3D printed case. The auger is designed in such a way as to prevent the fish food from accidentally entering the electronics compartment.

You might think that this project would use a real-time clock chip, or possibly interface with a computer to keep the time. Instead, the code simply feeds the fish one time as soon as it’s plugged in. Then it uses the “delay” function in order to wait a set period of time before feeding the fish a second time. In the example code this is set to 28,800,000 milliseconds, or eight hours. After feeding the fish a second time, the delay function is called again in order to wait until the original starting time.

A betta fish swims in an MFC.

Microbial Fuel Cell With A Side Of Betta Fish

Move over, potato batteries: DIY microbial fuel cells are here to stay! A microbial fuel cell (MFC) is a device that uses bacteria in an anaerobic (oxygen-poor) environment to convert chemical energy into electricity. [drdan152] posted steps on how to make a soil-based MFC  with a neat twist: it’s also a fishbowl for a betta fish.

[drdan152] used soil from the wetlands, referred to as “muck.” This nutrient-rich soil provided a hearty supply of bacteria, especially Geobacter species, known for their uncanny ability to transport electrons outside their cells using bacterial nanowires. The proton exchange membrane (PEM) was made up of salt, water, and agar. After some initial runs, [drdan152] determined that flat char cloth made the best anode, while red copper wire served as the cathode. Assembling the MFC was as simple as surrounding the anode with a thick layer of muck on all sides, adding the PEM on top, followed by water. The cathode was situated halfway out of the water.

After a couple of days, the voltage increased in proportion to the amount of bacteria growing on the anode. The betta fish can happily live in this habitat for a short period of time(it still has to be fed, of course), and the bacteria certainly won’t mind – the fish’s excrement provides an additional food supply. As a bonus, the water is kept clean. However, like any aquarium, the water will need to be changed periodically as carbon dioxide byproduct accumulates from the fish’s respiration and the MFC (high carbon dioxide levels = dead betta fish).

The MFC generates 725 mV. [drdan152] is not satisfied with that number, and is testing out charge pump circuits to generate as much as 3V. We are looking forward to seeing the results. We also wonder if a small aquatic plant could help make it a more self-sustaining environment for the fish. In the meantime, [drdan152] is encouraging others to try larger-scale versions of this MFC. Perhaps MFC-powered carnivorous robots doubling as mobile aquariums are in our near future.