When you hear the name “Tesla”, chances are good that thoughts turn instantly to the company that’s trying to reinvent the motor vehicle and every industry that makes it possible. While we applaud the effort, it’s a shame that they chose to appropriate the surname of a Serbian polymath as their corporate brand, because old [Nikola] did so many interesting things in his time, and deserves to be remembered in his own right.
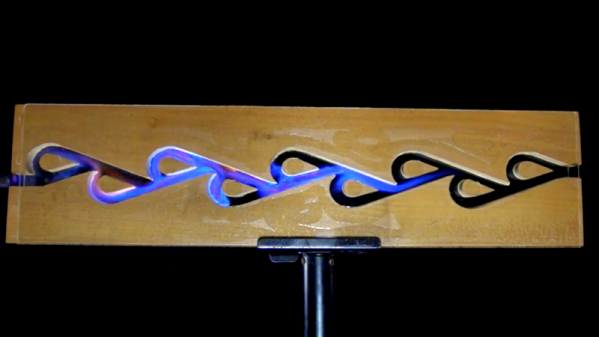
Take the Tesla valve. In essence a diode for fluids, the Tesla valve uses a tortuous path to allow flow in one direction but severely restrict it in the other. Understanding how it works isn’t necessarily intuitive, though, which is why [NightHawkInLight] chose to demonstrate the Tesla valve principle with exploding propane. It’s not new territory to him; we’ve covered his propane-powered rifle in the past.
The swirling blue and green flame front in those experiments make burning propane the perfect working fluid to demonstrate how the Tesla valve works. The video below tells the tale, with high-speed footage showing the turbulence that restricts the reverse flow. The surprise discovery is that in the forward direction, the burning gas actually seems to accelerate as it moves down the valve; hypersonic Tesla plasma cannon, anyone?
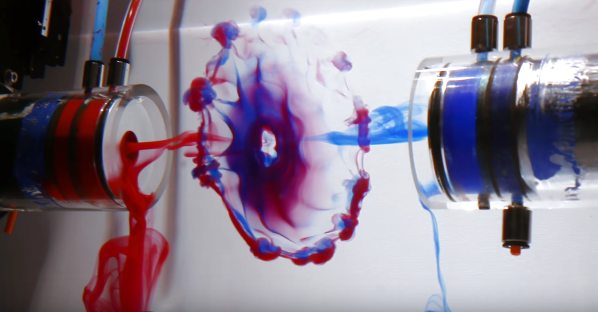
We’ve seen Tesla valves before, including one made from a “Shrinky Dink”. That did a pretty good job of visualizing the flow patterns that make the valve work, but there’s a huge showmanship gap between tiny channels filled with colored water and the explosive decomposition of a fuel-air mix. It’s a bit riskier, and standard “don’t try this at home” disclaimers apply, but luckily [NightHawkInLight] still has his eyebrows, so he must be doing something right.
Continue reading “Burning Propane Beautifully Illustrates How A Tesla Valve Works”