The eternal enemy of [James Puderer]’s pockets is anything that isn’t his smartphone. When the apartment building he resides in added a garage door, the forces of evil gained another ally in the form of a garage door opener. So, he dealt with the insult by rigging up a Raspberry Pi to act as a relay between the opener and his phone.
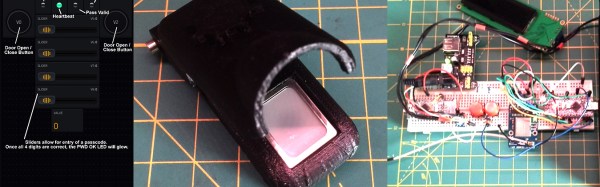
The crux of the setup is Firebase Cloud Messaging (FCM) — a Google service that allows messages to be sent to devices that generally have dynamic IP addresses, as well as the capacity to send messages upstream, in this case from [Puderer]’s cell phone to his Raspberry Pi. After whipping up an app — functionally a button widget — that sends the command to open the door over FCM, he set up the Pi in a storage locker near the garage door and was able to fish a cable with both ethernet and power to it. A script running on the Pi triggers the garage door opener when it receives the FCM message and — presto — open sesame.
Continue reading “Open Your Garage Door With Your Smartphone”