Today’s story is one of victory and defeat, of mystery and adventure… It’s time to automate the garage door. Connecting the garage door to the internet was a must on my list of smart home features. Our opener has internet connection capabilities built-in. As you might guess, I’m very skeptical of connecting a device to the internet when I have no control over the software running on it.
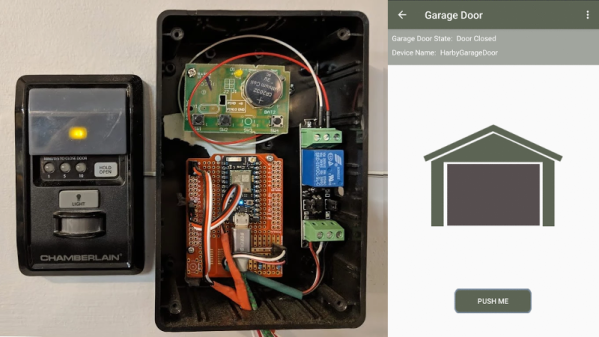
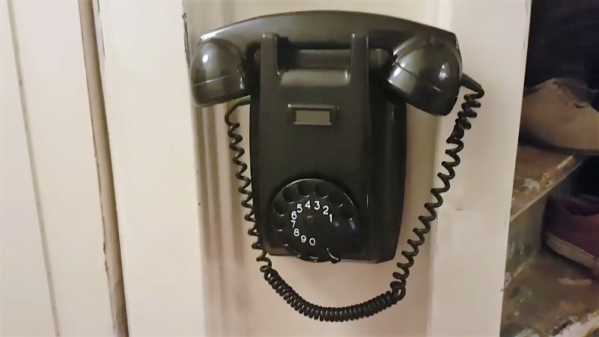
The garage door is controlled by a button hung on the garage wall. There is only a pair of wires, so a simple relay should be all that is needed to simulate the button press from a Raspberry Pi. I wired a relay module to a GPIO on the Pi mounted in the garage ceiling, and wrote a quick and dirty test program in Python. Sure enough, the little relay was clicking happily– but the garage door wasn’t budging. Time to troubleshoot. Does the push button still work? *raises the garage door* yep. How about the relay now? *click…click* nope.
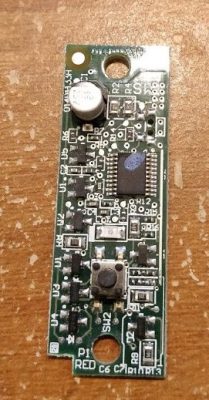
You may have figured out by now, but this garage door opener isn’t just a simple momentary contact push button. Yes, that’s a microcontroller, in a garage door button. This sort of scenario calls for forensic equipment more capable than a simple multimeter, and so I turned to Amazon for a USB oscilloscope that could do some limited signal analysis. A device with Linux support was a must, and Pico Technology fit the bill nicely.
Searching for a Secret We Don’t Actually Need
My 2 channel Picotech oscilloscope, the 2204A, finally arrived, and it was time to see what sort of alien technology was in this garage door opener. There are two leads to the button, a ground and a five volt line. When the button is pressed, the microcontroller sends data back over that line by pulling the 5 V line to ground. If this isn’t an implementation of Dallas 1-wire, it’s a very similar concept.
Continue reading “Hack My House: Garage Door Cryptography Meets Raspberry Pi”