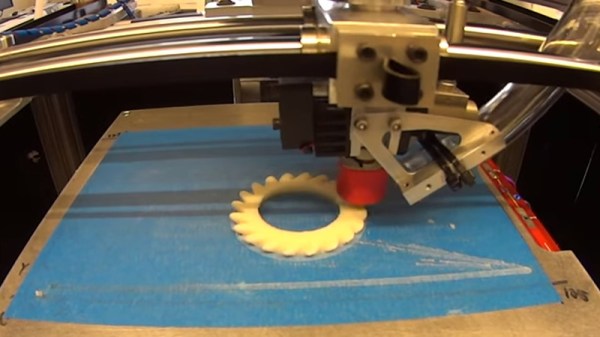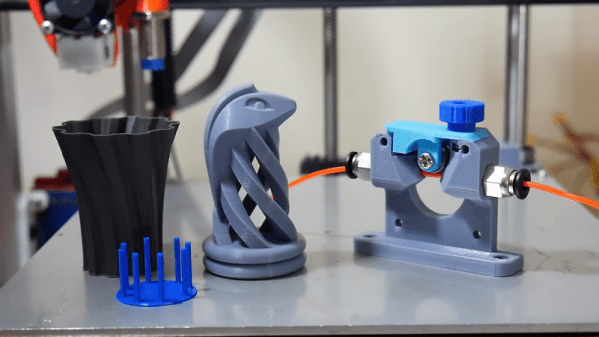
You might not think to use the word “rigid” to describe most 3D-printer filaments, but most plastic filaments are actually pretty stiff over a short length, stiff enough to be pushed into an extruder. Try the same thing with a softer plastic like TPE, though, and you might find yourself looking at this modified Bowden drive for elastomeric filaments.
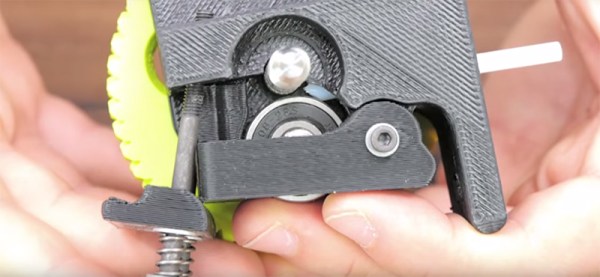
The idea behind the Bowden drive favored by some 3D-printer designers is simple: clamp the filament between a motor-driven wheel and an idler to push it up a pipe into the hot end of the extruder. But with TPE and similar elastomeric filaments, [Tech2C] found that the Bowden drive on his Hypercube printer was causing jams and under-extrusion artifacts in finished prints. A careful analysis of the stock drive showed a few weaknesses, such as how much of the filament is not supported on the output side of the wheel. [Tech2C] reworked the drive to close that gap and also to move the output tube opening closer to the drive. The stock drive wheel was also replaced with a smaller diameter wheel with more aggressive knurling. Bolted to the stepper, the new drive gave remarkably improved results – a TPE vase was almost flawless with the new drive, while the old drive had blobs and artifacts galore. And a retraction test print showed no stringing at all with PLA, meaning the new drive isn’t just good for the soft stuff.
All in all, a great upgrade for this versatile and hackable little printer. We’ve seen the Hypercube before, of course – this bed height probe using SMD resistors as strain gauges connects to the other end of the Bowden drive.
Continue reading “A Better Bowden Drive For Floppy Filaments”