The Death Of Industrial Design And The Era Of Dull Electronics

It’s often said that what’s inside matters more than one’s looks, but it’s hard to argue that a product’s looks and its physical user experience are what makes it instantly recognizable. When you think of something like a Walkman, an iPod music player, a desktop computer, a car or a TV, the first thing that comes to mind is the way  that it looks along with its user interface. This is the domain of industrial design, where circuit boards, mechanisms, displays and buttons are put into a shell that ultimately defines what users see and experience.

Thus industrial design is perhaps the most important aspect of product development as far as the user is concerned, right along with the feature list. It’s also no secret that marketing departments love to lean into the styling and ergonomics of a product. In light of this it is very disconcerting that the past years industrial design for consumer electronics in particular seems to have wilted and is now practically on the verge of death.

Devices like cellphones and TVs are now mostly flat plastic-and-glass rectangles with no distinguishing features. Laptops and PCs are identified either by being flat, small, having RGB lighting, or a combination of these. At the same time buttons and other physical user interface elements are vanishing along with prominent styling, leaving us in a world of basic geometric shapes and flat, evenly colored surfaces. Exactly how did we get to this point, and what does this mean for our own hardware projects?

Continue reading “The Death Of Industrial Design And The Era Of Dull Electronics”

Two white, cylindrical speakers are shown. The sides and most of the tops of the speakers are covered in holes, and at the center of the top of each, there is a circular LCD display. The top of the speaker is marked “Braun.”

A Modern Take On Iconic Industrial Design

The Functionalist design philosophy that Dieter Rams brought to Braun from the 50s to the 90s still inspires the look of a few devices, including Apple’s iPod, Teenage Engineer’s synthesizers and recorders – and [2dom]’s IR7 streaming radio.

The streaming radio was inspired by Braun’s portable radios, particularly the SK2, TP1, and the T3 pocket radio. [2dom] started with the T3’s circular pattern of holes and experimented with several variations, finally settling on a cylindrical shape with a central display; a prototype with a low-power monochrome rectangular display was eventually rejected in favor of a circular LCD. The housing consists of four 3D-printed components: an upper and lower shell, a resonator for the speaker, and a knob for a rotary encoder.

Electronics-wise, an ESP32 handles the computing requirements, while the LCD and rotary encoder provide a user interface. For audio, it uses a VS1053 MP3 decoder, PAM8403 amplifier, and a wideband speaker, with an audio isolation transformer to clean up the audio. To reduce power consumption, a MOSFET cuts power to the peripheral components whenever the device is in sleep mode. The full design is available on GitHub.

The end result of this effort is a quite authentic-looking 21st-century adaptation of Rams’s original designs. If you’re interested in more Braun designs, check out this replica of one of their desk fans. We’ve also seen a restoration of one of Braun’s larger radios, the TS2.

Illustrated Kristina with an IBM Model M keyboard floating between her hands.

Keebin’ With Kristina: The One With The H.R. Giger Keyboard

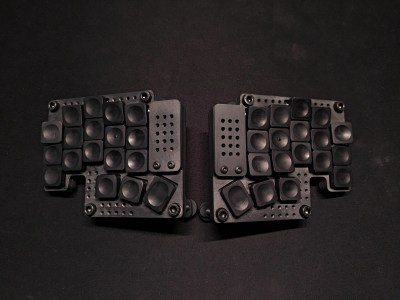
I had to bust out Brain Salad Surgery to write this one, folks. It was that, or put on some Ministry or something. Just look at all the industrial-ness dripping from [heinn_dev]’s creation.

An incredibly industrial-looking split keyboard. Like, almost H.R. Geiger-esque.
Image by [heinn_dev] via reddit
Apparently [heinn_dev] wasn’t completely satisfied with his Chocofi case, and instead of requesting a full refund, just went ahead and made a prettier one. It took a lot of printing and even more sanding, but here we are. And it looks fantastic.

The only downside, if you can call it one, is that adjusting the tenting is a slow operatiJKon. But then again that’s one of those things that you usually set and forget.

Oh, and those keycaps are printed, too. As one commenter said, those homing nipples look painful, but I think it’s part of the charm. I just hope that hand grime doesn’t end up clogging the holes under the palm area. Clean your keyboards, people. Continue reading “Keebin’ With Kristina: The One With The H.R. Giger Keyboard”

A New Gaming Shell For A Mouse

For some gamers, having a light fast polling mouse is key. [Ali] of [Optimum Tech] loved his 23-gram mouse but disliked the cord. Not seeing any options for a comparable wireless mouse, he decided to make one himself.

Trying to shortcut the process, he started with an existing wireless mouse from Razer weighing in at a hefty 58 grams. The PCB on its own weighed in at 11 grams and after swapping to a smaller battery, [Ali] had a budget of 10 to 15 grams for the shell. Here is where the meat of this project lives. The everyday objects in your life like the poles that hold up traffic signals or the device you’re reading this article on are looked at and used without much thought into why they are what they are. The design of everyday things is a surprisingly deep field and designing a curvy mouse is no exception. With a 3d version of the PCB, he went through several iterations of how to lay out the mouse triggers. The scroll wheel was removed as he didn’t need it for the game he was playing.

The shell was printed in resin and came out great. [Ali] found himself with an ultralight 4000hz wireless mouse that was thoroughly enjoyable. It’s a great example of someone diving in and designing something for their personal use. Whether it’s a mouse or a chair, we love anyone taking on a design challenge. Video after the break.

Continue reading “A New Gaming Shell For A Mouse”

Industrial Design Hack Chat

Join us on Wednesday, September 8 at noon Pacific for the Industrial Design Hack Chat with Eric Strebel!

At Hackaday, we celebrate all kinds of hardware hacks, and we try not to judge based on appearance. After all, every product starts out on the breadboard, or as a prototype built with hot glue and tape. What’s important is getting it to work, at least at first. But there comes a time when you’ve got to think about how to make your project look like something people want to use, how to position controls and displays in a logical and attractive way, and how to make sure your thing can actually be built.

Turning a project into a product is the job of an industrial designer. Pretty much everything you use, from the toothbrush by your sink to the car you drive to work in bears the marks of industrial design, some more successfully than others. Eric Strebel has been doing industrial design for years, and he keeps feeding us a steady diet of design tips and tricks through his popular YouTube channel. He’ll stop by the Hack Chat to get a little more in-depth on industrial design principles, and how you can make your projects look as good as they work.

join-hack-chatOur Hack Chats are live community events in the Hackaday.io Hack Chat group messaging. This week we’ll be sitting down on Wednesday, September 8 at 12:00 PM Pacific time. If time zones have you tied up, we have a handy time zone converter.

Cardboard Models Trace Design Process Of Vintage Tektronix Miniscopes

There aren’t many brands that inspire the kind of passion and fervency among its customers as Tektronix does. The venerable Oregon-based manufacturer of top-end test equipment has produced more collectible gear over the last 75 years than just about anyone else.

Over that time they have had plenty of innovations, and in the 1970s they started looking into miniaturizing their flagship oscilloscopes. The vintageTEK museum, run by current and former employees, has a review of the design process of the 200 series of portable oscilloscopes that’s really interesting. At a time when scopes were portable in the way a packed suitcase is portable, making a useful instrument in a pocketable form factor was quite a challenge — even for big pockets.

The article goes into great detail on the back-and-forth between the industrial designers, with their endless stream of models, and the engineers who would actually have to stuff a working scope into whatever case they came up with. The models from the museum’s collection are wonderful bits of history and show where the industrial designers really pushed for some innovative designs.

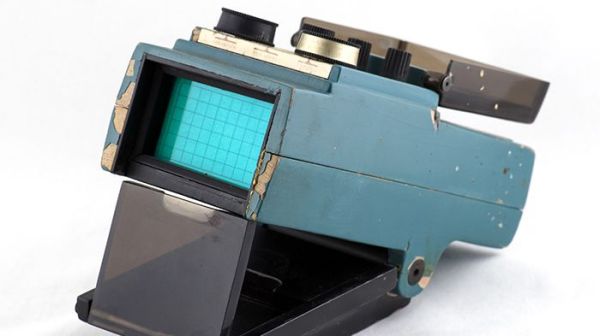
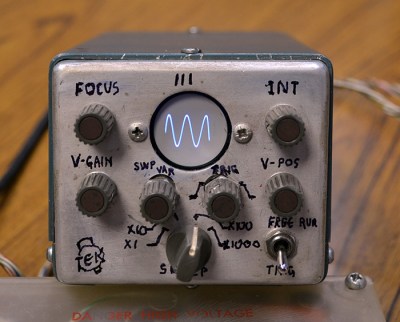
Some of the models are clearly derived from the design of the big bench scopes, but some have innovative flip-down covers and other interesting elements that never made it to production. Most of the models are cardboard, but some were made of aluminum in the machine shop and sport the familiar “Tek blue” livery. But the pièce de résistance of the collection is a working engineering model of what would become the 200-series of miniscopes, a handmade prototype with a tiny round CRT and crudely labeled controls.

The vintageTEK museum sounds like another bucket-list stop for computer and technology history buffs. Tek has been doing things their own way for a long time, and stopping by the museum is sure to be a treat.

Thanks to [Tanner Bass] for the tip.

Making Models With Lasers

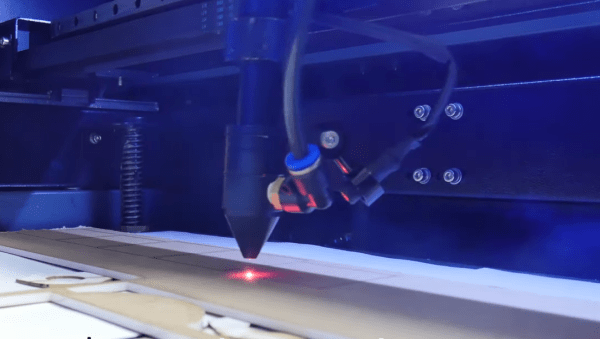
Good design starts with a good idea, and being able to flesh that idea out with a model. In the electronics world, we would build a model on a breadboard before soldering everything together. In much the same way that the industrial designer [Eric Strebel] makes models of his creations before creating the final version. In his latest video, he demonstrates the use of a CO2 laser for model making.

While this video could be considered a primer for using a laser cutter, watching some of the fine detail work that [Eric] employs is interesting in the way that watching any master craftsman is. He builds several cubes out of various materials, demonstrating the operation of the laser cutter and showing how best to assemble the “models”. [Eric] starts with acrylic before moving to wood, cardboard, and finally his preferred material: foam core. The final model has beveled edges and an interior cylinder, demonstrating many “tricks of the trade” of model building.

Of course, you may wish to build models of more complex objects than cubes. If you have never had the opportunity to use a laser cutter, you will quickly realize how much simpler the design process is with high-quality tools like this one. It doesn’t hurt to have [Eric]’s experience and mastery of industrial design to help out, either.

Continue reading “Making Models With Lasers”