PinJig Soldering Clamp Has Pins Seized By Airport Security

There’s an old adage that when performing a live demo, previously working hacks will mysteriously go awry. In this case, the hardware demo was doomed before it ever arrived at the conference.

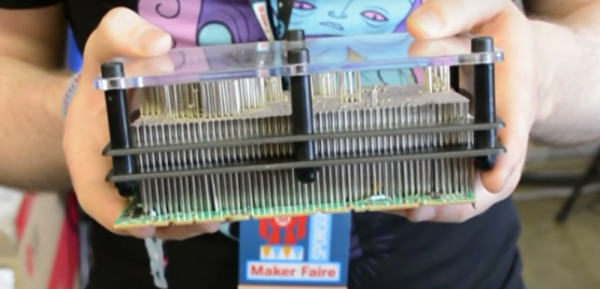
PinJig is an interesting take on though-hole soldering. As its name indicates, it’s a jig which holds through-hole components in place as the board is flipped on its side (or even upside down). This is accomplished by 2000 steel pins which are locked in place after being nestled around all of the board’s components. Unfortunately, carrying this prototype onto an international flight didn’t work out. [Niall Barrett] told us that on his way from Ireland to Bay Area Maker Faire he was required to ditch the 3-inch steel pins that make up the jig, or not get on the plane.

Continue reading “PinJig Soldering Clamp Has Pins Seized By Airport Security”

Engineering Meets Craftsmanship In This Guitar Fretting Jig

178-440
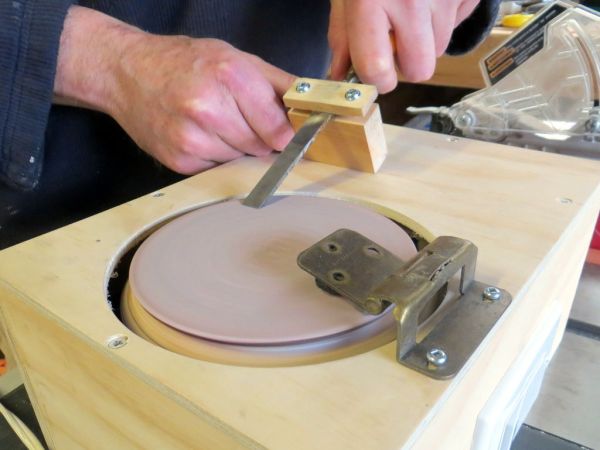
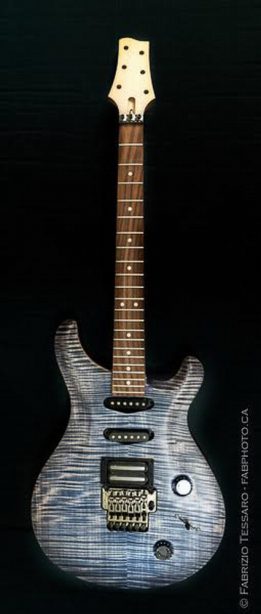
Cutting the slots in a guitar’s neck for the frets requires special tooling, and [Gord]’s contribution to his friend’s recent dive into lutherie was this lovingly engineered and crafted fret mitering jig. We’d love to have a friend like [Gord].

We’ve covered a number of [Gord]’s builds before, and craftsmanship is the first thing that comes to mind whether the project is a man-cave clock or artisanal soaps. For this build, he stepped up the quality a notch – after all, if you’re going to build something you could buy for less than $200, you might as well make it a thing to behold.

There’s plenty to feast the eyes on here – an oak bed with custom logo, the aluminum jig body with brass accents, and the precision bearings that guide the pricey backsaw. Functionality abounds too – everything is adjustable, from the depth of cut to the width of the saw blade. There’s even a place to store the adjustment tool.

The result? Well, let’s just say that [Gord] and his friend [Fabrizio] are kindred spirits in the craftsmanship department. And [Fab]’s not a bad axeman either, as the video below shows.

Continue reading “Engineering Meets Craftsmanship In This Guitar Fretting Jig”

Broken Bread Maker Rises Again, Drives Tool-Sharpening Turntable

Poor [makendo] had seven broken bread makers lying around, all with failed paddle drivers. Since they also all have big motors and other useful parts in them, he decided to turn one of them into a powered tool-sharpening turntable.

First, [makendo]  salvaged the motor, the gear, and the thick circular glass window from one of the bread makers. He cut a platter from plywood the size of the glass window, chamfering the edge to fit the gear. Next, he built a housing from scrap plywood, separating the motor from the platter with a crosspiece to keep the motor free from dust. A large magnet on a hinge collects metal powder from the system quite effectively. The sharpener spins at about 200RPM: fast enough to do the job and slow enough not to get hot.

According to [makendo], the sharpener restores bevels nicely but doesn’t make edges”scary sharp”. To that end, he used a toaster oven door as a base for a series of micro-abrasive grits of sandpaper as a finishing rig. In order to sharpen his chisels uniformly, he made a jig to hold them firmly in place against either the powered turntable or the fine sandpapers.

[Thanks for the tip, Scott]


Automated Programming And Testing Jig Built With Raspberry Pi

[Doug Jackson] makes word clocks, and he must be doing quite a bit of business. We say that because he put together a programming and test bed for the clock circuit boards.

This is a great example to follow if you’re doing any kind of volume assembly. The jig lets the populated PCB snap into place, making all the necessary electrical connections. This was made possible by a package of goods he picked up on eBay which included rubber spacers to separate the board from the acrylic mounting plate, pogo pins to make the electrical connections, and a spring-loaded board clamp seen to the left in this image.

The switch in the lower right connects power to the board and pulls a Raspberry Pi GPIO pin high. The Python script running on the RPi polls that pin, executing a bash script which programs the ATmega169 microcontroller using the GPIO version of AVRdude. We looked through his Python script and didn’t see code for testing the boards. But the image above shows a “Passed” message on the screen that isn’t in his script. We would wager he has another version that takes the hardware through a self test routine.

We first saw one of [Doug’s] word clocks back in 2009 and then again a few months later. The look of the clock is fantastic and it’s nice to see the project is still going strong.

Router Jig For A Perfect Circle

router-jig-for-cutting-circles

We once enlisted a contractor to cut a plywood circle for a cat condo we were building. Now we’re embarrassed that we couldn’t come up with a solution as eloquent and easy to use as this circle cutting router jig which [Grays42] built.

He’s using a small trim router for the job. The jig is made up of two thick-walled pieces of PVC pipe. We don’t think the router is attached to jig. Instead you hold it against the wooden spacer which is on the outside edge of the cut. He doesn’t mention how he made the spacers, but we’d recommend cutting a hole the size of the pipes and then ripping down the middle to remove some of the material (tape the two spacers together during fabrication to ensure proper alignment). It just takes some nuts and bolts from the hardware store to assemble everything.

[Grays42] is using this to cut rings for his telescope build. We have our eye on it for making our own wooden Bulbdial clock.

[via Reddit]

Simple Solution Makes Rocket Fin Alignment A Breeze

If you’re building model rockets you want to make sure they fly straight, and most of that is dependent on the stabilizer fins. It has long been a problem come assembly time. How can you make sure that they’re being aligned without any variation? [Rrix] mentioned that one technique is to use a square to position them perfectly perpendicular to the bench on which the rocket is being assembled. But this is still prone to error. His method uses a couple of precision jigs made out of cardboard.

He designed this pair of jigs in Inkscape, then used the files to fabricate them out on a laser cutter. It worked like a charm, but led him to another issue that can be solved in a similar way. Model rockets have rail guides that travel along a rod attached to the launch pad as the craft accelerates to a point where the fins have enough effect to keep it going in a straight line. If those guides aren’t straight, your fin alignment will be all for naught. His second version of the jigs includes a cut out for these guides.

CNC Table Saw Jig

table saw jig

[Woodgears.ca] seems to be a wealth of clever hacks, and this CNC box joint jig is no exception.  Although one has to manually move the jig to make the actual cut, it still gives the user a lot of extra functionality. One only has to click the mouse button to advance the workpiece.  One drawback to using a table saw, even with this jig is that some internal parts still may have to be cut. Check out the video after the break to see this device in action, or skip to around 3:08 to see what hand operations still have to be done.

Besides just being a cool build, we loved the box-jointed project enclosure for the electronics. As this was made in 2003, it’s nice to see that the idea of “self-replication” (at least in part) didn’t start with the [Rep-Rap]. The 10 year old (as of 2003) Thinkpad notebook computer running QBasic in DOS is a nice “hacker” touch as is using 100 Watt light bulbs as power resistors. Pretty clever electronics, especially for someone that’s known more for his excellent woodworking skills than his obvious electrical engineering knowledge! Continue reading “CNC Table Saw Jig”