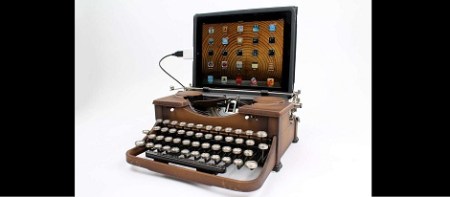
Typewriter Is USB Keyboard, Also Awesome

If you’re a brooding author putting the finishing touches on the next Great American Novel™ while sipping a latte in Starbucks, a MacBook is far too common to impress uncultured proles guzzling caramel macchiatos. No, to impress the next [Joyce] or [T. S. Eliot] sitting at the table next to you, you’ll need something much more hip, like a kit to turn a typewriter into a USB keyboard.

This kit to turn an old Underwood into a USB keyboard comes from the drawing board of [Jack Zylkin], member of Philly hackerspace Hive 76. [Jack] managed to make the process of turning an old typewriter into a keyboard a relatively painless process.

[Jack] created a sensor board loaded up with 74HC595 shift registers that easily mounts to the frame of just about any typewriter. When a key on the typewriter is struck, the mechanical levers strike metal strips soldered to the sensor board. An ATMega microcontroller records these keypresses and sends them over a USB port just like any other USB keyboard.

Modifying a typewriter into a USB keyboard is one of those projects we’d dread; you’d think there would be far too much futzing about with a lot of small electrical contacts and dirty mechanical devices. [Jack] actually managed to put together a very nice kit to turn a typewriter into a keyboard here.

You can pick up a kit over at [Jack]’s etsy store, but doing the same thing with a bit of perf board isn’t out of the question. Awesome video after the break.
Continue reading “Typewriter Is USB Keyboard, Also Awesome”

ProtoSynth, The Prototyping Synthesizer

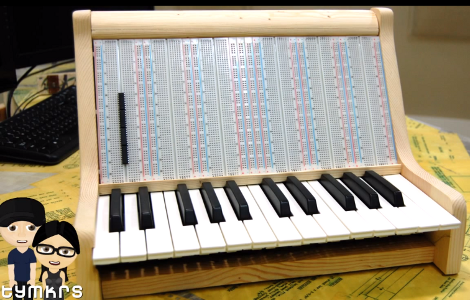
This project isn’t really a prototype, but a tool for prototyping. [Tymkrs] came up with a unique way to build this synthesizer prototyping tool. They actually patched into the underside of the breadboards in order to keep all of the permanent bits nice and tidy.

In the clip after the break you’ll see all of the build photos that lead up to this point. After cutting out and assembling the wooden pieces for the case they grab a soldering iron and get to work. Two octaves worth of keys were pulled out of an electric keyboard. Ribbon cable is soldered onto each key’s electrical connection, with an SIL pin header as a connector. This mates with another ribbon cable with a SIL socket on one end, and an IDC connector on the other. The real trick is getting that IDC connected to the breadboard. They cut back the adhesive tape on the underside of the board and soldered a surface mount pin header onto it. This way the inputs from the keys, as well as a few 1/4″ jacks from the back of the case are always available in a tidy way on the breadboards. The video goes on to show preliminary synthesizer work on the device.

Continue reading “ProtoSynth, The Prototyping Synthesizer”

Turning A Keyboard Into A Computer With A Raspberry Pi

Only 80s kids will get this: remember when computers had built-in keyboards, like the Apple II line, or the Commodore 64? That’s a form factor duplicated by case modders many times over the years, but [preamp]’s project is the first time its been done using a Raspi (German, Google translation).

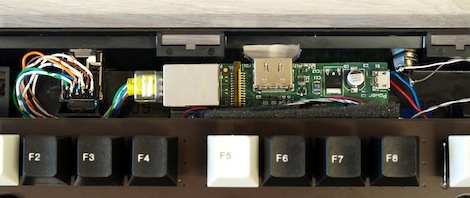
For his build, [preamp] used what he considers the best keyboard in the world, the Cherry G80-3000. Except for the HDMI port, just about every plug was moved to the back side of the keyboard with the help of an Ethernet jack, a USB hub, and RCA jack. Audio is missing, but for an extremely portable system [preamp]’s RaspCherry Pi is at the top of its class.

We were wondering when someone would shove a Raspi into a keyboard, and we couldn’t be happier that [preamp] chose a Cherry keyboard for his build; they’re wonderful input devices second only to the 8 pound behemeoth used to write this post.

Turning An Old Keyboard Into A Work Of Art


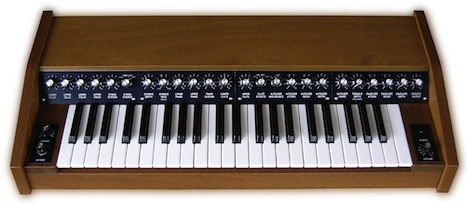
The 1970s were the glory days for analog synthesizers, and for [Stefan] listening to huge modular Moogs and ARPs resulted in a wondrous seething jealousy. In 2009, wanting to relive just a little bit of his childhood, [Stefan] picked up a PAiA Stringz’n’Things from eBay. It’s a great little keyboard, but [Stefan] his new purchase to look little classier than a tolex-covered flight case. After getting rid of the old tolex case, [Stefan] made a new enclosure and added some extra circuitry to expand the capabilities of this classic synth.

After replacing the electrolytic capacitors and fixing a voltage regulator issue, [Stefan] made a new enclosure for his keyboard out of beautifully lacquered mahogany. A new key bed stolen from an old Yamaha organ was brought in, and new control panels above the keys provide a more sensible organization than the keyboard’s previous incarnation.

The original Stringz’n’Things was laid out more like an organ than a synthesizer, a reflection of its polyphonic nature. This meant there wasn’t a very diverse tonal palette, but [Stefan] remedied that with a wave folder to generate extra harmonics, a tremolo, and an envelope generator to provide attack and decay for each note.

Now [Stefan] has a lovely polyphonic synth that has found its place on top of an old Hammond organ. As a bonus, the synth sounds really good. Not bad for an instrument generally regarded as being very limited.


Key-covered Textiles

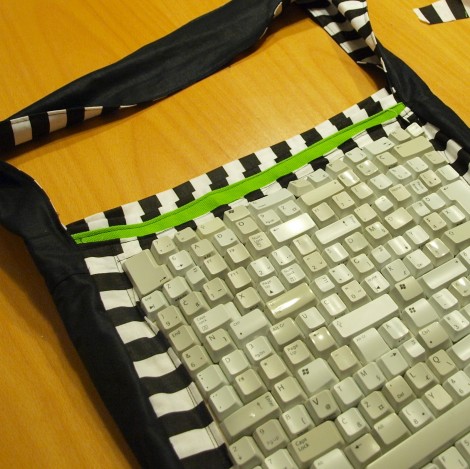
[Karolina] has been hard at work adding a little flair to her bag. Well, a lot of flair actually. She rolled several keyboards worth of keys into one of the panels for this bag. She had seen the idea in a magazine and decided to give it a try. The secret is to use staples.

The first issues is gather enough keys, so if you give this a try make sure to let your friends know you’re looking for old keyboards. Next she wanted each of the keys to lay flat on the fabric panel, which meant cutting away the plastic pegs that extend past the edges of the key. From there [Karolina] laid out her design with each key face down. Notice how careful she was to make sure there were no gaps between them. Now it was time to link them all together. She used heavy-duty staples as connecting brackets. They were bent to provide a large gluing surface on the underside of the face of each key. With the staples in place, each can be sewn to the fabric with a loop of thread. Although she started the project in the fall she’s just now showing off the finished bag.

Chorded Keyboard For Touchscreens

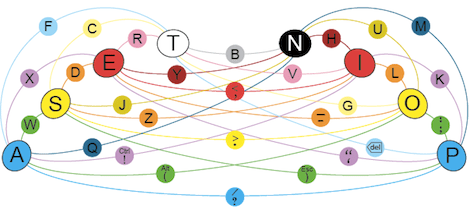
For over a hundred years, good typists didn’t ‘hunt and peck’ but instead relied on keeping their fingers on the home row. This technique relies on physical buttons, but with on-screen keyboards used on tablets and other touch screen devices touch typists have a very hard time. [Zach] is working on a new project to bring a chorded keyboard to these devices called ASETNIOP.

Instead of training a typist where to place their finger – the technique used in most other keyboard replacements, ASETNIOP trains the typist which fingers to press. For example, typing ‘H’ requires the typist to press the index and middle fingers of their right hand against the touchscreen. In addition to touchscreens, ASETNIOP can be used with projection systems, Nintendo Power Glove replicas, and extremely large touchpads that include repurposed nooks and Kindles.

If you’d like to try out ASENTNIOP, there’s a tutorial that allows you to try it out on a physical keyboard as well as one for the iPad. It’s a little weird to try out but surely no more difficult to learn than a Dvorak keyboard.

Custom Starcraft Controller

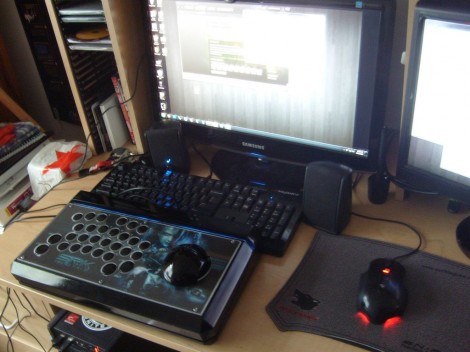
This Starcraft controller was designed as a contest entry. The goal of the contest was to provide a custom controller for the Starcraft Real-Time-Strategy game that shared some of the features seen in First Person Shooter controllers.

The design started as rough sketches. From the there button layout was prototyped before actually building a virtual model of the entire controller. A rendering of the model was submitted as a contest entry, and we’re glad it was also seen through to a physical device. This involved sending the design files off for 3D printing. What came back was painted and assembled to achieve the beautiful look seen above.

On the right is a stick that acts as the mouse controller. The buttons on the left are just the most necessary of Starcraft control keys. They all map to the appropriate keyboard keys and the device enumerates as an HID keyboard so no button mapping is necessary. That being said, a player does have the option of remapping if the layout doesn’t suit.

[Via Reddit with more info at Shoryuken]