A violet laser beam is shown expanding outward from a diode in a darkened room and illuminating the back of a man's hand.

Driving A Laser At 200 Volts For Nanoseconds

If there’s one lesson to be learned from [Aled Cuda]’s pulsed laser driver, it’s that you can treat the current limits on electronic components as a suggestion if the current duration is measured in nanoseconds.

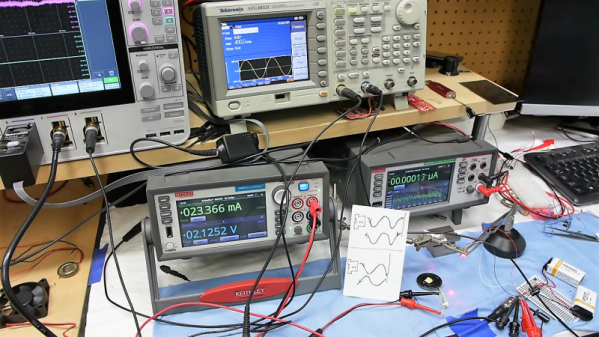
The components in question are a laser diode and an NPN transistor, the latter of which operates in avalanche mode to drive nanosecond-range pulses of high current through the former. A buck-boost converter brings a 12 volt power supply up to 200 volts, which then passes through a diode and into the avalanche transistor, which is triggered by an external pulse generator. On the other side of the transistor is a pulse-shaping network of resistors and capacitors, the laser diode, and a parallel array of low-value resistors, which provide a current monitor by measuring the voltage across them. There is an optoisolator to protect the pulse generator from the 200 volt lines on the circuit board, but for simplicity’s sake it was omitted from this iteration; there is some slight irony in designing your own laser driver for the sake of the budget, then controlling it with “a pulse generator we don’t mind blowing up.” We can only assume that [Aled] was confident in his work.

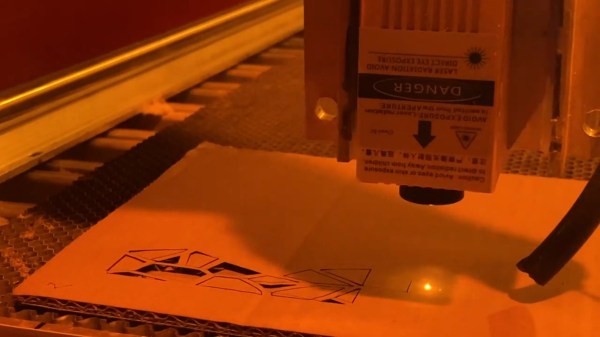
The video below details the assembly of the circuit board, which features some interesting details, such as the use of a transparent solder mask which makes the circuit layout clear while still helping to align components during reflow. The circuit did eventually drive the diode without destroying anything, even though the pulses were probably 30 to 40 watts. A pulse frequency of 360 hertz gave a nice visual beating effect due to small mismatches between the pulse frequency of the driver and the frame rate of the camera.

This isn’t the first laser driver to use avalanche breakdown for short, high-power pulses, but it’s always good to see new implementations. If you’re interested in further high-speed electronics, we’ve covered them in more detail before.

Continue reading “Driving A Laser At 200 Volts For Nanoseconds”

A 3D-printed case encloses a number of electronic components. In the top left of the case, a laser diode is mounted. In the top right, the laser beam is shining into a cuvette, which is glowing red from scattered light. In the bottom right, a small breadboard has an integrated circuit and a few parts mounted. In the bottom left is a large red circuit board marked “Rich UNO R3.”

Measuring Nanoparticles By Scattering A Laser

A fundamental difficulty of working with nanoparticles is that your objects of study are too small for an optical microscope to resolve, and thus measuring their size can be quite a challenge. Of course, if you have a scanning electron microscope, measuring particle size is straightforward. But for less well-equipped labs, a dynamic light scattering system, such as [Etienne]’s OpenDLS, fits the bill.

Dynamic light scattering works by shining a laser beam into a suspension of fine particles, then using a light sensor to measure the intensity of light scattered onto a certain point. As the particles undergo Brownian motion, the intensity of the scattered light changes. Based on the speed with which the scattered light varies, it’s possible to calculate the speed of the moving particles, and thus their size.

The OpenDLS uses a 3D printed and laser-cut frame to hold a small laser diode, which shines into a cuvette, on the side of which is the light sensor. [Etienne] tried a few different options, including a photoresistor and a light sensor designed for Arduino, but eventually chose a photodiode with a two-stage transimpedance amplifier. An Arduino samples the data at 67 kHz, then sends it over serial to a host computer, which uses SciPy and NumPy to analyse the data. Unfortunately, we were about six years late in getting to this story, and the Python program is a bit out of date by now (it was written in Python 2). It shouldn’t, however, be too hard for a motivated hacker to update.

With a standard 188 nm polystyrene dispersion, the OpenDLS calculated a size of 167 nm. Such underestimation seemed to be a persistent issue, probably caused by light being scattered multiple times. More dilution of the suspension would help, but it would also make the signal harder to measure, and the system’s already running near the limits of the hardware.

This isn’t the only creative way to measure the size of small particles, nor even the only way to investigate small particles optically. Of course, if you do have an electron microscope, nanoparticles make a good test target.

Trying To Build A Communications Device With A 1-Pound Laser And A 7805

You can get a red laser diode pretty cheap these days—as cheap as £1 in fact. [Beamer] had purchased one himself, but quickly grew bored with just pointing it at the walls. He decided to figure out if he could use it for some kind of communication, and whipped up a circuit to test it out.

To do the job, he designed a modulator circuit that could drive the laser without damaging it. The build is based around the common 7805 regulator and the venerable 555 timer IC. The 555 is set to pulse at a given rate with the usual array of capacitors and resistors. Its output directly drives the input of a 7805 regulator. It’s set up as a constant current source in order to deliver the correct amount of current to run the laser. The receiver is based around a photodiode, which should prove fairly straightforward.

[Beamer]’s still working on the full setup, but plans to use the laser’s pulses to drive a varying analog meter or something similar. Not every communications method has to send digital data, and it’s good to remember that! Video after the break.

Continue reading “Trying To Build A Communications Device With A 1-Pound Laser And A 7805”

Stack of Si3N4-LiNbO3 forming the integrated laser and integrated into test setup (d). (Credit: Snigirev et al., 2023)

Fast Adjustable Lasers Using Lithium Niobate Integrated Photonics

Making lasers smaller and more capable of rapidly alternating between frequencies, while remaining within a narrow band, is an essential part of bringing down the cost of technologies such as LiDAR and optical communication. Much of the challenge here lies understandably in finding the right materials that enable a laser which incorporates all of these properties.

A heterogeneous Si3N4–LiNbO3 chip as used in the study. (Credit: Snigirev et al., 2023)

Here a recent study by [Viacheslav Snigirev] and colleagues (press release) demonstrates how combining the properties of lithium niobate (LiNbO3) with those of silicon nitride (Si3N4) into a hybrid (Si3N4)–LiNbO3 wafer stack allows for an InP-based laser source to be modulated in the etched photonic circuitry to achieve the desired output properties.

Much of the modulation stability is achieved through laser self-injection locking via the microresonator structures on the hybrid chip. These provide optical back reflection that forces the laser diode to resonate at a specific frequency, providing the frequency lock. What enables the fast frequency tuning is that this is determined by the applied voltage on the microresonator structure via the formed electrodes.

With a LiDAR demonstration in the paper that uses one of these hybrid circuits it is demonstrated that the direct wafer bonding approach works well, and a number of optimization suggestions are provided. As with all of these studies, they build upon years of previous research as problems are found and solutions suggested and tested. It would seem that thin-film LiNbO3 structures are now finding some very useful applications in photonics.

(Heading image: Stack of Si3N4-LiNbO3 forming the integrated laser and integrated into test setup (d). (Credit: Snigirev et al., 2023) )

The laser module shown cutting shapes out of a piece of cardboard that's lying on the CNC's work surface

Giant CNC Partners With Powerful Laser Diode

[Jeshua Lacock] from 3DTOPO owns a large-format CNC (4’x8′, or 1.2×2.4 m), that he strongly feels is lacking laser-cutting capabilities. The frame is there, and a 150 W CO2 laser tube has been sitting in a box for ages – what else could you need? Sadly, at such a scale, aligning the mirrors is a tough and finicky job – and misalignment can be literally blinding. After reading tales about cutters of such size going out of alignment when someone as much as walked nearby, he dropped the idea – and equipped the CNC head with a high-power laser diode module instead. Having done mirror adjustment on a few CO2 tube-equipped lasers, we can see where he’s coming from.

Typically, the laser modules you see bolted onto CNC heads are firmly under three watts, which is usually only enough for engraving. With a module that provides 5 watts of optical power, [Jeshua] can cut cardboard and thin plywood as well he tells us even 10 W optical power modules are available, just that he didn’t go for one. We reckon that 20 W effective power diodes are not that far into our future, which is getting very close to the potential of the blue box “40 W but actually 35 W but actually way less” K40 laser cutters we cherish. [Jeshua]’s cutter is not breaking speed limits, but it’s built on what’s already there, and the diode is comparatively inexpensive. Equipped with a small honeycomb surface and what seems to be air assist, it’s shown in the video cutting an ornamental piece out of cardboard!

We hackers have been equipping CNCs with laser diodes for a while, but on a way smaller scale and with less powerful diodes – this is definitely a step up! As a hacker, you should have at least some laser cutting options at your disposal, and this overview of CO2 cutters and their availability can get you started. We’ve also given you detailed breakdowns about different sides of laser cutting, be it the must-have of safety, or the nice-to-have of air assist.

Continue reading “Giant CNC Partners With Powerful Laser Diode”

Building A 1.4W Laser Pointer In A Tiny Housing

Laser pointers were cool for about 30 seconds when they first came out, before becoming immediately passé and doing absolutely nothing to improve the boss’s quarterly reports presentation. However, just as with boom boxes and sports cars, more power can always make things better. [Styropyro] was unimpressed with the weak and unreliable laser pointers he’d sourced from eBay, so gutted one and began a fresh build.

After fiddling with some basic 1mW eBay green lasers, [styropyro] had some fun turning up the wick by fiddling with the internal trimpots. This led to the quick and untimely death of the cheap laser diodes, leaving a compact laser pointer shell ripe for the hacking.

To replace the underwhelming stock components, [styropyro] chose a Nichia NDG7475 high-powered laser diode, fitting it into a small heatsink for thermal management. Current draw was far too high to use the original switch, so the stock housing’s button is instead used to switch a MOSFET which delivers the full current to the laser driver. To reach the higher output power of 1.4W, the laser diode is being run over specification at 2.3 amps. All this current draw would quickly overwhelm standard AAA batteries, so a pair of lithium polymer 10440 batteries are substituted in to do the job.

The build shows that with clever parts selection and some easy hand soldering, you too can build an incredibly dangerous laser pointer at home, that fits neatly in your shirt pocket. Alternatively, you might prefer something on the larger scale. Video after the break.

Continue reading “Building A 1.4W Laser Pointer In A Tiny Housing”

[Ben Krasnow] Builds A One-Component Interferometer

When we think of physics experiments, we tend to envision cavernous rooms filled with things like optical benches, huge coils in vacuum chambers, and rack after rack of amplifiers and data acquisition hardware. But it doesn’t have to be that way – you can actually perform laser interferometry with a single component and measure sub-micron displacements and more.

The astute viewer of [Ben Krasnow]’s video below will note that in order to use the one component, a laser diode, as an interferometer, he needed a whole bunch of support gear, like power supplies, a signal generator, and a really, really nice mixed-signal oscilloscope. But the principle of the experiment is the important bit, which uses a laser diode with a built-in monitoring photodiode. Brought out to a third lead, older laser diodes often used these photodiodes to control the light emitted by the laser junction. But they also respond to light reflected back into the laser diode, and thanks to constructive and destructive interference, can actually generate a signal that corresponds to very slight displacements of a reflector. [Ben] used it to measure the vibrations of a small speaker, the rotation of a motor shaft, and with a slight change in setup, to measure the range to a fixed target with sub-micron precision. It’s fascinating stuff, and the fact you can extract so much information from a single component is pretty cool.

We really like [Ben]’s style of presentation, and the interesting little nooks and crannies of physics that he finds a way to explore. He recently looked at how helium can kill a MEMS sensor, an equally fascinating topic.

Continue reading “[Ben Krasnow] Builds A One-Component Interferometer”