Adding LEDs To An Engagement Ring

ring

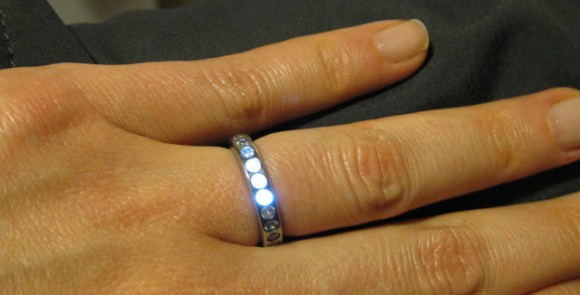
Once upon a time, a nerd met a girl. Things happen as they do, and eventually [Ben] wanted to create the be-all, end-all engagement ring. (here’s a cache) It’s a simple titanium affair with 23 stones around the perimeter. What makes this ring so cool, though, is that it lights up whenever [Ben] and his girl are holding hands.

The metalworking portion of the build was about as easy as you would expect machining titanium to be. After the ring was cut off its bar stock, [Ben] brought it over to a mill where 23 holes for each of the stones were drilled. The stones were affixed to the ring with  jewelers epoxy and the entire ring was buffed to an amazing shine.

The electronics are where this project really shines. Putting a battery of capacitor inside a ring is nigh impossible, so [Ben] decided to power the LEDs with an inductive charging circuit. A coil of wire wound around kapton tape serves as the inductor and a small SMD capacitor powers three very bright and very tiny LEDs.

The inductive charging unit itself is a masterpiece of hackery; [Ben] wanted the ring to light up whenever he and his ladyfriend were holding hands. To do this, [Ben]’s inductive charger is also a wearable device: a large coil of wire is the charger’s transformer and was would to fit around [Ben]’s wrist. The entire charging circuit can be easily hidden under a jacket sleeve, making for a nearly magical light-up ring.

An awesome piece of work, and one of the best jewelry builds we’ve seen in a long time. You can see the inductive coupling and shining LEDs in the video below.
Continue reading “Adding LEDs To An Engagement Ring”

Auto Dimmer Hacked Into Keyboard Backlight

keyboard-backlight-auto-adjustment

As the title says, [José Faria] added the ability to adjust his keyboard backlight based on ambient light levels. But that’s just one of the things he did during his hacking extravaganza with this Razer BlackWidow Ultimate.

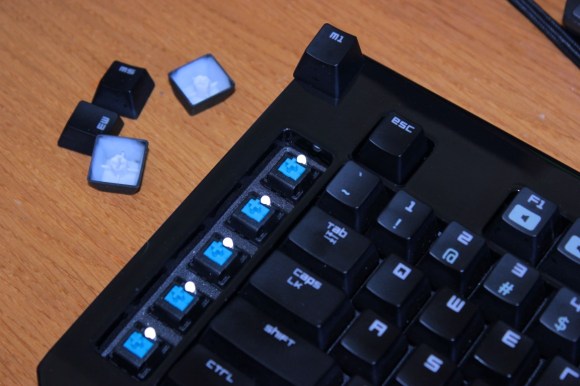
When he first received the peripheral he didn’t like the blue LEDs used as backlights. So he removed all of them and put in white ones. He doesn’t talk too much about that but we’d image it was a ton of work. The new color was pleasing, but then the ability to adjust their brightness started to irritate him. There are four predefined levels and that’s all you get. Even the GUI which has a slider for adjustment couldn’t go outside of those levels.

His solution was to augment the controller with his own. He patched in an AVR chip to the transistor which controls the low side of the LED circuits. While at it he also noticed that the keyboard case was actually translucent. This let him hide a photosensor inside which automatically adjusts the light levels. But he did it in a way that still allows him to use the original functionality with the flip of a switch. See for yourself after the break.

Continue reading “Auto Dimmer Hacked Into Keyboard Backlight”

Low Water Indicator For Coffee Maker Couldn’t Be Simpler

low-water-indicator-for-coffee-maker

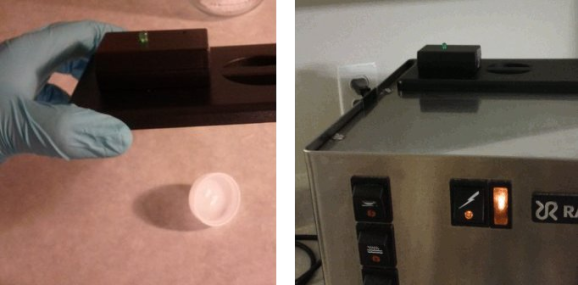
The coffee maker which [Donald Papp] uses every morning has a water reservoir on the back that can last for several days. This means he forgets to check it and from time to time will return to find that nothing has brewed. He decided to add a low-water indicator to the machine. His approach is about as simple as it gets and we admire that accomplishment.

If it were our project we’d probably try to complicate it in one way or another. The use of a microcontroller and ultrasonic rangefinder (like this tank level indicator from a February links post) would be overkill. No, [Donald] boiled down the electronics to a homemade switch, a blinking LED, and a battery. The switch is a flexible piece of metal attached to a plastic cap using some monofilament. The cap goes in the reservoir and floats until the water gets too low, it then pulls on that metal, completing a circuit between the battery and the LED. That’s it, problem solved.

Now he just needs to plumb the coffee maker into a water line and he’ll really be set.

Laptop Backlight Converted From CCFL To LED

ccfl-to-led-backlight-conversion

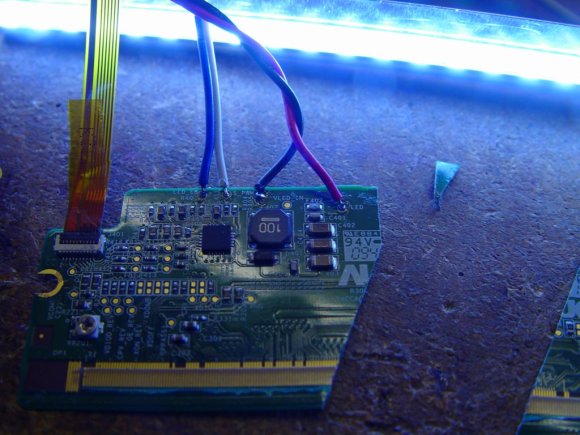
[Lee Davison] acquired an Acer laptop that didn’t have a display anymore. He had enough parts on hand to add in an LCD panel and give it a CCFL backlight. But when he started looking for an inverter to drive the backlight he couldn’t find one. What he did have on hand were some smashed screens that had LED backlights and so the CCFL to LED backlight conversion project was born.

He tore into the LED display and found the driver board. Unfortunately he didn’t locate the datasheet for the exact LED driver, but he found one that was similar and was able to trace out the support circuitry on the PCB. This let him cut away the unneeded parts of the board without damaging the driver. He didn’t want to pull out the CCFL tubes until he was sure the LED conversion would work so he tried it out on another smashed panel (where does he come up with all these parts) and it worked great. Once he got everything in place he was very happy with the results. The only drawback to the system is that he doesn’t have the ability to dim the backlight.

Life Meter Gives A Real Life Measure Of Video Game Health

water-light-health-bar

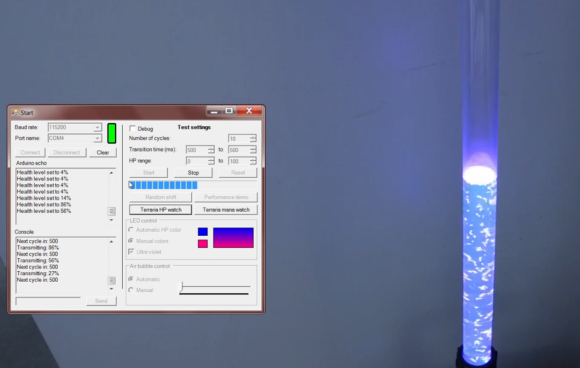
This hack makes the virtual real by displaying your video game character’s health meter as a column of illuminated water.

The build video, which you’ll find embedded after the break, is really quite remarkable. The column is a clear piece of pipe anchored at one end by hand-tightened plumbing drain fittings. This allows [Bfayer] to attach a flexible bladder which he constructed for the project. An actuator pushes a hinged board up against the bladder to raise and lower the water level in the tube.

Alone that’s pretty impressive, but [Bfayer] went the extra mile and then some. He uses a four-way fitting at the bottom of the meter. One fork connects to the bladder, another allows air to be injected using an aquarium pump. The bottom of the fitting has a clear window so that an RGB LED array can shine into the water which was doped with highlighter ink to pick up the colored glow. To pull the whole thing together he coded the custom control interface seen above.

Continue reading “Life Meter Gives A Real Life Measure Of Video Game Health”

Wristwatch Made Of Sandwiched PCBs

wristwatch-from-sandwitched-pcbs

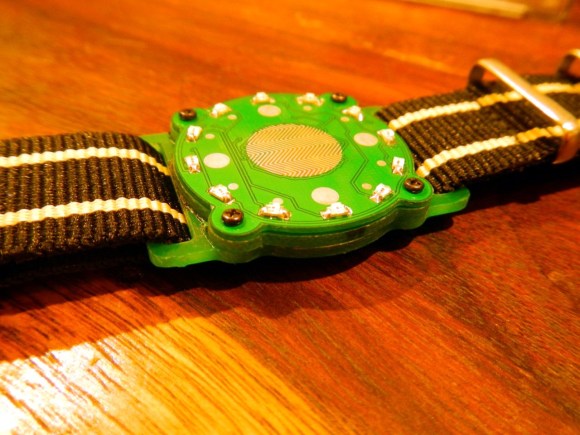
Here’s a wristwatch concept we haven’t seen before. Instead of trying to sandwich everything inside of a case it uses a stack of PCBs as the body of the watch.

[Mats Engstrom] wrote in to tip us off about his build. The design goes with LEDs which is nothing new. But unlike previous offerings [Mats] didn’t go with one LED for each minute. When the touch sensor in the middle of the watch is activated the twelve LEDs on the face will let you know the hour and the nearest five minutes. A video of this is embedded after the break.

The design uses three different circuit boards. The bottom board is the largest and provides slots through which the wrist bands can connect. It also serves as one of the two battery connectors. The second PCB is a spacer with a cutout for the coin cell that powers the device. The top board is where all the magic happens. It’s dual sided to host the LEDs and touch senor, with the PIC microcontroller and support circuitry on the other side.

Continue reading “Wristwatch Made Of Sandwiched PCBs”

Old LED Marquee Turned Embedded Video Player

driving-led-marquee-with-rpi

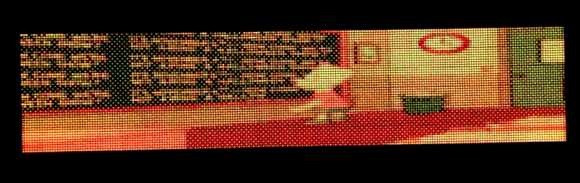
[Sprite_TM] is was sent an old LED Marquee by an anonymous fan of his hacking projects. The display isn’t full color, but it’s large — 224 by 48 pixels — and he figured he could render some okay images with the bi-color diodes. In the end, he replaced the controller and turned it into a video player.

The original system work well enough, but the 100 MHz 486 industrial style PC that drove the display seems a little comical these days. After giving it a spin and testing out how it drives the display [Sprite] hooked up an FTDI chip and managed to get it playing video from his computer. Above you can see part of the opening sequence of The Simpsons.

Now that he had learned its secrets he set out to give it an embedded controller. His first attempt was with a Carambola board which he’s worked with before. That proved to be a little slow for all the pixel data he was pushing so he upgraded to a Raspberry Pi and never looked back. You can see the demo video after the jump.

Continue reading “Old LED Marquee Turned Embedded Video Player”