Reviving A DOA Smart Bulb With Custom Firmware For Its ESP8266

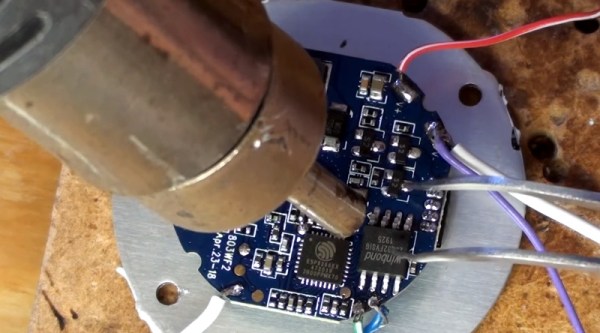
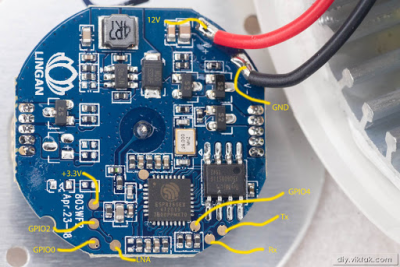
There are some incredibly cheap WiFi smart bulbs on the market these days, but as is often the case, you tend to get what you pay for. When [Viktor] took delivery of his latest bargain basement bulb, the thing didn’t even work. So much for Quality Assurance. On the plus side, it was a great excuse to pop it open and replace the firmware.

For anyone wondering, [Viktor] never actually figured out why the bulb didn’t work. Its ESP8266-based control board was getting power, and data was getting spit out of the serial port when he connected it to the computer (although he never got the communications settings right to actually see what it was saying). But he also didn’t care much; once he confirmed that the hardware was good, he just uploaded the custom firmware he’d previously developed for another ESP8266 bulb.

Of course, it wasn’t quite that easy. The chances that both bulbs would have used the same GPIO pins to control the red, green, blue, and white LEDs were pretty slim. But after some testing and modifications to the code, he was able to fire them up. The other issue was a bit trickier, as it turned out the bulb’s flash chip was too small to hold his firmware’s web configuration pages. So he had to break out the hot air gun and replace the SPI flash chip with something a bit roomier. We suppose he could have just made smaller web pages… but where’s the fun in that?

Even with the chip swap, this looks a lot easier than building your own smart bulbs from scratch. With so many cheap ESP8266 bulbs on the market, it seems there’s never been a better time to code your own home lighting solution.

Dim Hallway Gets Lighting Upgrade

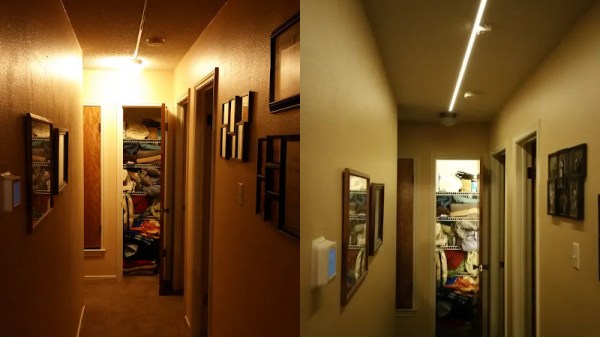
There’s nothing worse than a lightswitch that’s nowhere near where it should be, leaving you fumbling around in the dark. [supersquirrel72] had just this problem, and decided to put an Arduino to work instead.

Rather than using the original mains lighting that was poorly positioned and not enough to light the hall, instead 2 meters of white LED strip was chosen. The form factor is perfect for lighting a long, thin space – far better than running a series of seperate bulbs. The strip was rigged up to an Arduino Uno, that triggers the lights when movement is detected with a simple PIR motion sensor. After some feedback from the other occupants of the house, it was decided to tweak things further. An RTC was implemented to allow the Arduino to keep things dimmer after 9PM, so as to not wake others when making a trip to the kitchen for a midnight snack.

It’s a simple solution which brightens up the hallway nicely. We imagine this could just be the first step to a yet-more-integrated lighting solution in [supersquirrel72]’s house. Whether it’s IOT lights or something more festive, we can’t wait to see what’s next.

It’s Not An Arc Lamp, It’s A Lamp Arc

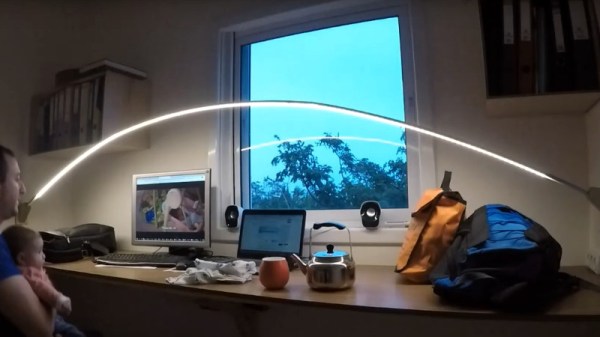
One wouldn’t expect there to be much to cause envy in the world of desk lamps, after all whether it’s a classic Anglepoise or a dollar store LED affair if it does its job of casting the requisite quantity of light where it’s needed, most of us are happy. But then we saw [Ronny Ziss]’s LED arc desk lamp, and suddenly all other lamps simply aren’t good enough any more. If it’s not a wall-to-wall arc of LEDs spanning the length of the desk, it quite simply no longer cuts the mustard. We’ve entered the world of lamp envy, folks, and it’s a poorly-illuminated place to be.

As you can see in the video below the break both the hardware and the software of this lamp are impressive in their own right, the structure being an aluminium extrusion carrying an addressable white LED strip fitted into an arc between two custom plywood blocks on the walls either side of the desk. The software is controlled through a rotary encoder, and allows command of the position, width, and brightness of the illuminated portion, as well as having a hidden Pong game. Sadly he doesn’t reveal the software or the microcontroller in question, however the task is not an onerous one and it’s likely most Hackaday readers could put it together using their board or processor of choice.

In years of lamp projects on Hackaday, we can’t find another quite like this one. Conventional lamp projects can still be stylish though.

Continue reading “It’s Not An Arc Lamp, It’s A Lamp Arc”

It’s An LED Cube, But Maybe Not Quite What You Were Expecting

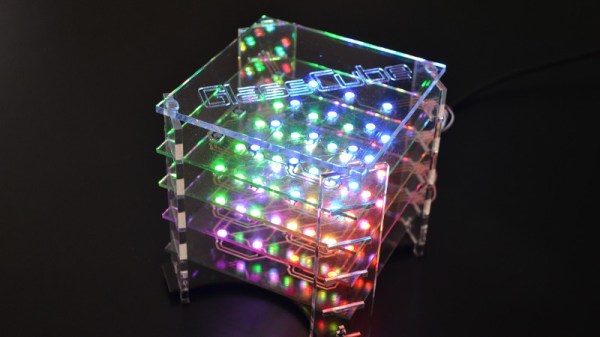
LED cubes are a pleasing ornament and still something of a talking point, but now they have reached the point of being available as inexpensive kits from China. The simpler ones don’t have quite the cachet they used to. It’s still a project that can deliver a few surprises though, as [Moritz v. Sivers] shows us very well with his glass LED cube. Instead of the usual wire frame construction he’s employed a novel technique of applying each layer of WS2812 LEDs to its own glass PCB.

The PCBs are created with self-adhesive copper foil, cut out with a CNC cutter and painstakingly transferred to the glass substrate with the help of a piece of transfer paper. The LEDs are soldered on, and once each board has been tested they are mounted in the manner of a toast rack to laser cut acrylic corner pieces. There are four layers of 16 LEDs each, which might not make for the largest cube, but still makes for a respectable show. The addressable LEDs take it a level above the 3D matrix type of cube with which you might already be familiar, and the extra time required to load each value into them doesn’t seem to slow the display down.

There are a couple of videos we’ve placed below the break, one showing it in action and the other taking us through the build process. This last one should provide plenty of inspiration for anyone with an interest in creating this type of PCB on glass or any other unusual substrate. Continue reading “It’s An LED Cube, But Maybe Not Quite What You Were Expecting”

Building A 3D Scanner With A 3D Printer

Using a 3D printer to make high quality parts is a great way to improve the look and appeal of any project. If you want to replicate something exactly, though, you’ll need either a very good set of calipers and a lot of time or a 3D scanner. Using the 3D scanner and the 3D printer go along very well together, especially if you use your 3D printer to build your 3D scanner too.

This project comes to us from [Vojislav] who spent the past two years perfecting this 3D scanner. Using a vast array of 3D printed parts, this build looks professional on every level. It also boasts a Raspberry Pi Zero and a fleet of camera modules, not to mention its own LED lighting. [Vojislav] has provided the printer files and the software needed to run it on the project page. It all runs through command line and python code, but that shouldn’t be a big hurdle.

While there is no video of it in action, it seems like all the parts are there for a solid 3D scanner, provided you have access to a 3D printer that can churn out the parts you’ll need. If you need something larger, there are some other options available as well that really take your photogrammetry skills to the next level.

LCD Panel Lamp Shade Makes For Eye-Catching Lighting

At first sight, [Kyle]’s Elroy lamp is simply an attractive piece of modern-styled interior furnishing; its clean lines, wood grain, and contemporary patterning being an asset to the room. But when he pulls out his phone, things change. Because this lamp hides a secret: at its heart may be a standard LED bulb, but the shade conceals four LCD screens driven by an Nvidia Jetson. These can be controlled through a web app to display a variety of textures, completing the effect.

This is not however simply a set of laptop screens bolted to a lampshade. The screens started life in laptops sure enough, but have since had their reflective backing removed to create a transparent LCD panel. Then an appropriate diffuser had to be found, which after much experimentation became a composite including more than one textured paper. Finally the whole was enclosed in an attractive wooden lamp frame and became part of the furniture. We like it, both as an aesthetically pleasing lamp and as a genuine departure from the norm.

This isn’t the first eye-catching lampshade we’ve brought you, but it’s certainly raised the bar. You can see it in action in the video below the break.

Continue reading “LCD Panel Lamp Shade Makes For Eye-Catching Lighting”

Super Nice LED Lamp Is Super Simple

If you’re looking for a fancy LED lamp, the Internet can provide in spades. There are all manner of flashy-this and glowing-that, often with wild and impressive designs made with high-end tools. However, when it came time to decorate the apartment, [thebigpotatoe] wanted to build something simple that anyone could attempt. From this, the Super Simple RGB WiFi Lamp was created.

The body of the lamp consists of a plank of wood. It may not sound like much, but thanks to a nifty design, it actually comes out looking remarkably stylish. The plank is fitted with aluminium angle on the back, and a strip of WS2812B LEDs are wrapped around the perimeter of the board. An ESP8266 NodeMCU is fitted to run the show, and powered from a mains supply to allow it to run all day.

The trick here is that the LEDs are mounted on the back of the board, where they are out of direct sight. The light from the LEDs is projected onto the wall the lamp is mounted on, giving a nice smooth effect without requiring any dedicated diffusers. There’s a series of animations coded in, which look great, particularly when the animations wrap around the end of the lamp.

It’s a great addition to the apartment’s feature wall, and goes to show that you don’t need world-beating crafting skills to make a great piece for your home. You can even go all out, and light your whole room this way. Video after the break.

Continue reading “Super Nice LED Lamp Is Super Simple”