ESP32 Becomes Modern Controller For A 1960s Clock

These days, everything’s got a clock in it, and a good proportion of those clocks are automatically syncronized to high-accuracy Internet time servers. Back in the past, things weren’t so easy. Often, institutions that required accurate time would use a single highly-accurate primary clock to drive a series of secondary clocks around a facility. Without the primary clock, the secondary clock has no signal to drive it. [Oleksii Samorukov] had just such a clock, and whipped up a controller to stand in for timekeeping duty.

The secondary clock in question is a Pragotron PJ 27, which requires regular 12V signals of alternating polarity in order to keep time. To handle this job, [Oleksii] decided to use an ESP32 in combination with an L298N motor controller. The L298N is an H-bridge driver chip, allowing it to easily supply the 12V signals in alternating polarities where required. To ensure the system keeps accurate time, the ESP32 regularly queries an NTP time server over WiFi.

It’s a tidy build, and one that brings this attractive 1960s timepiece into the modern era. We’d love to have such a stylish, well-built clock in our own home, too. Of course, if you want really accurate time, building a GPS clock is a great option, too!

[Thanks to Irregular Shed for the tip!]

KiwiSDR Vs RaspberrySDR — A Tale Of Two SDRs

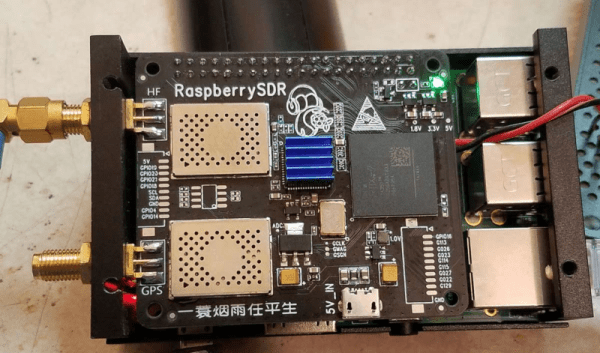
Once you move away from the usual software defined radio (SDR) dongles, you have only a few choices unless you want to drop some serious cash. One common hobby-grade SDR is the KiwiSDR. This popular unit runs Linux and can receive up to 30 MHz. The platform uses a dedicated A/D converter, an FPGA, and BeagleBone computer. Success of course breeds imitators, and especially when you have an open source design like the Kiwi, you are going to find similar devices with possibly different end goals. That’s how the RaspberrySDR came to be. This is a very similar unit to the KiwiSDR but it uses a Raspberry Pi, along with a handful of other differences. What’s different? [KA7OEI] tells us in a recent blog post.

Other than the obvious difference of the computer and all that it entails, the RaspberrySDR has a higher speed A/D (125 MHz vs 66 MHz) and 16-bits of resolution instead of the Kiwi’s 14 bits. This combines to give the Raspberry a wider receive range (up to 60 MHz) and — in theory — better performance in terms of dynamic range and distortion.

Continue reading “KiwiSDR Vs RaspberrySDR — A Tale Of Two SDRs”

Automated Tools For WiFi Cracking

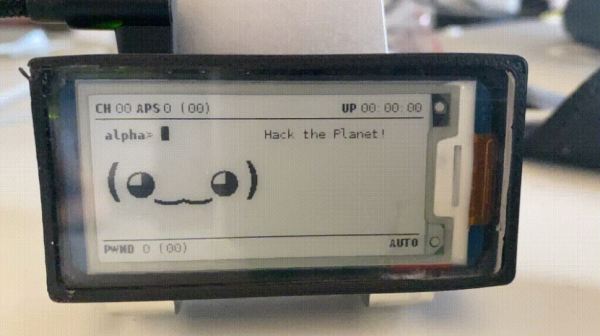
Knowing how WiFi networks can be attacked is a big part of properly securing them, and the best way to learn about it is to (legally) run some attacks. [Matt Agius] has been going down the WiFi-cracking rabbit hole, and in the process created Pwnagotchi Tools to automate the actual password cracking part.

The first step in cracking a WiFi network is to record the handshake that gets exchanged when a client connects to an access point. This has been made very simple thanks to Pwnagotchi, which turns a Raspberry Pi into an automated handshake collection tool and Pwnagothi Tools helps to automate the steps that follow. It downloads the handshakes (pcap files) from the pwnagotchi, and converts it to pmkid/hccapx files to use with the hashcat password recovery tool. Hashcat scripts can then be generated for the actual cracking using any of the attacks that [Matt] has compiled. WPA/WPA2 is slow to crack and requires a lot of processing power, so [Matt] also added the option to automatically provision AWS GPU instances to run the cracking task in the cloud. It also keeps track of the status of each of the handshakes being cracked.

As wireless networks and IoT devices become more pervasive, it’s important to know the dangers, and how to protect against them. WiFi and Bluetooth security is probably the easiest to learn about, but other networks are just as vulnerable when an RTL-SDR is used. Another option Flipper Zero, a hacking gadget for Sub-1 GHz networks inspired by Pwnagotchi, which recently hit $4.8 million in its Kickstarter campaign.

The Ultimate Model Rocket Launchpad

When you’re building advanced rockets as BPS.Space are, an unreliable launchpad is the something you really don’t want to be struggling with. [Joe Barnard] is working on a model rocket that can land vertically under its own power, like the Falcon 9, and has upgraded his launchpad in the process. A lot of thought and hard-earned experience has gone into its design, and the video after the break is a fascinating look the engineering process.

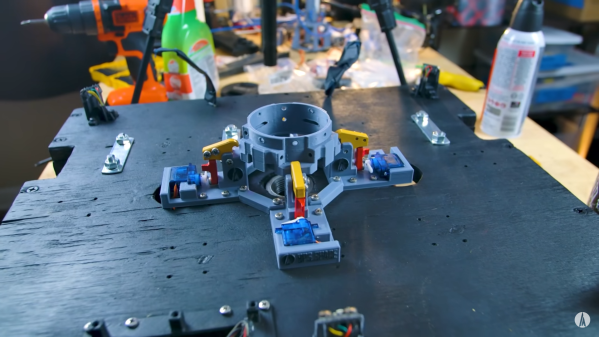
[Joe]’s rockets don’t use guide rods and fins for stabilization in the way most amateur rockets do, but instead have thrust vectoring motor mounts and reaction wheels for active stabilization during launch and flight. The rockets are clamped to the launchpad right up to ignition, and then need to release quickly and reliably. His previous clamps looked very cool, but suffered from high friction forces during release, and the integrated covers prevented easy inspection. These were replaced by much simpler spring-loaded clamp held in place by a small locking bar, which is knocked out by a servo to release the clamp. It also has no static friction, since it moves up and away from the clamping surfaces on the rocket.

The launch pad also features a ATSAMD21 based launch computer named Impulse, which at the most basic level controls the igniter, clamps, buzzer and indicator lights. It also has a number of inputs and outputs to allow for expansion. [Joe] experienced a number of inexplicable failures of rocketry electronics in the past, but believes he has finally tracked down the culprit: Tennessee humidity. He has since started conformal coating all his electronics.

The launchpad itself is made from plywood, so to protect it from the hot exhaust it has in integrated flame trench. This was made from 1 inch steel plumbing components, and directs most of the exhaust out of one side of the platform. It can also be reconfigured to allow a three core rocket like a Falcon Heavy to be launched. Continue reading “The Ultimate Model Rocket Launchpad”

Oh, Holey Light

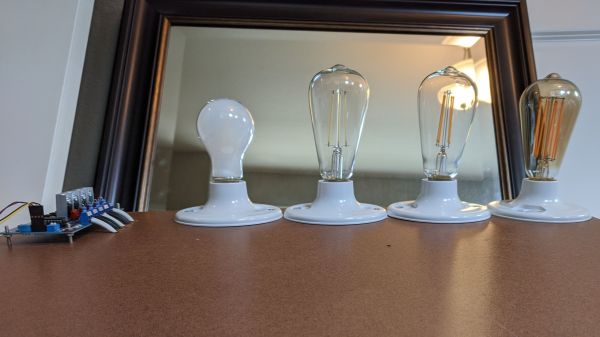
We consider ourselves well-versed when it comes to the technical literature plastered on hardware store parts. Acronyms don’t frighten us, and our Google-fu is strong enough to overcome most mysteries. One bit of dark magic we didn’t understand was the gobbledygook on LED lamps. Wattage is easy and color temperature made sense because it corresponds with warm and cool colors, but Color Rendering Index (CRI) sounds like deep magic. Of course, some folks understand these terms so thoroughly that they can teach the rest of us, like [Jon] and [Kevin], who are building a light controller that corrects inadequacies in cheap lamps by installing several lamps into one unit.

We learned a lot by reading their logs, which are like the Cliff Notes from a lighting engineer’s textbook, but we’ll leave it as an exercise for the students to read through. Their project uses precise light sensors to measure the “flavor” of light coming off cheap lamps so you can mix up a pleasing ratio. In some ways, they are copying the effects of incandescent bulbs, which emit light relatively evenly across the visible light spectrum, right into the infrared. Unfortunately, cheap LEDs have holes in their spectrum coverage, and a Warm White unit has different gaps compared with Daylight, but combining them just right gives a rich output, without breaking the bank.

Choosing The Right RTC For Your Project

When it comes to measuring time on microcontrollers, there’s plenty of ways to go about things. For most quick and dirty purposes, such as debounce delays or other wait states, merely counting away a few cycles of the main clock will serve the purpose.  Accurate to the tens of milliseconds, they get the average utility jobs done without too much fuss.

However, many projects are far more exacting in their requirements. When you’re building a clock, or a datalogger, or anything that relies on a stable sense of passing time for more than a few minutes, you’ll want a Real Time Clock. So called due to their nature of dealing with real time, as we humans tend to conceive it, these devices take it upon themselves to provide timekeeping services with a high degree of accuracy. We’ve compiled a guide to common parts and their potential applications so you can get things right the first time, every time.

Continue reading “Choosing The Right RTC For Your Project”

Robot Cat Takes Inspiration From Nature

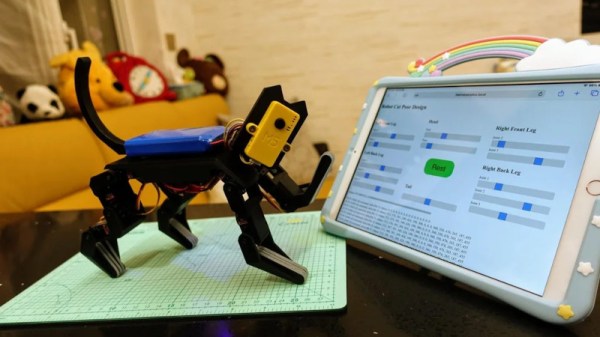
Oftentimes, a project starts with a clean sheet of paper, and we set out wildly sketching towards the goal in our minds. However, it can pay to do your research first, as [Chen Liang] demonstrates with this great robotic cat build.

[Liang] began the project after being dissatisfied with existing robot animals they’d seen online. Rather than simply attempt to build a cat from memory, instead, [Liang] decided to first study a real cat to ensure the resulting robot would bear real resemblence to its biological inspiration. [Liang]’s focus was on the skeleton, as replicating the way the real skeleton worked would create a robot with more authentic movement.

Using 3D printed parts and many, many servos, we think [Liang] has done an admirable job at creating a basic robot cat platform. With an ESP32 running the show, the cat can be posed using a web interface to control the servo positions of its various joints. We look forward to future upgrades that enable fluid movement and other capabilities, particularly involving the onboard camera.

It’s not the first robot cat we’ve seen, and it’s likely it won’t be the last. If you’ve got one living in your own lab, drop us a note on the tipline. Video after the break.

Continue reading “Robot Cat Takes Inspiration From Nature”