Logitech POP Buttons Are About To Go Pop

For those who missed out on the past few years of ‘smart home’ gadgets, the Logitech POP buttons were introduced in 2018 as a way to control smart home devices using these buttons and a central hub. After a few years of Logitech gradually turning off features on this $100+ system, it seems that Logitech will turn off the lights in two weeks from now. Remaining POP Button users are getting emails from Logitech in which they are informed of the shutdown on October 15 of 2025, along with a 15% off coupon code for the Logitech store.

Along with this coupon code only being usable for US-based customers, this move appears to disable the hub and with it any interactions with smart home systems like Apple HomeKit, Sonos, IFTTT and Philips Hue. If Logitech’s claim in the email that the buttons and connected hub will ‘lose all functionality’, then it’d shatter the hopes for those who had hoped to keep using these buttons in a local fashion.

Suffice it to say that this is a sudden and rather customer-hostile move by Logitech. Whether the hub can be made to work in a local fashion remains to be seen. At first glance there don’t seem to be any options for this, and it’s rather frustrating that Logitech doesn’t seem to be interested in the goodwill that it would generate to enable this option.

the Logitech receiver in question next to the mouse it's paired to

Uncovering Secrets Of Logitech M185’s Dongle

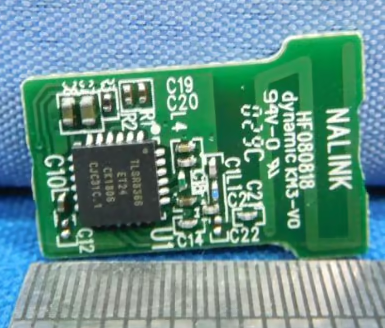
[endes0] has been hacking with USB HID recently, and a Logitech M185 mouse’s USB receiver has fallen into their hands. Unlike many Logitech mice, this one doesn’t include a Unifying receiver, though it’s capable of pairing to one. Instead, it comes with a pre-paired CU0019 receiver that, it turns out, is based on a fairly obscure TC32 chipset by Telink, the kind we’ve seen in cheap smart wristbands. If you’re dealing with a similarly obscure MCU, how do you even proceed?

In this case, GitHub had a good few tools developed by other hackers earlier — a Ghidra integration, and a tool for working with the MCU using a USB-UART and a single resistor. Unfortunately, dumping memory through the MCU’s interface was unreliable and frustrating. So it was time to celebrate when fuzzing the HID endpoints uncovered a memory dump exploit, with the memory dumper code helpfully shared in the blog post.

From a memory dump, the exploration truly began — [endes0] uncovers a fair bit of dongle’s inner workings, including a guess on which project it was based on, and even a command putting the dongle into a debug mode where a TC32-compatible debugger puts this dongle fully under your control.

Yet another hands-on course on Ghidra, and a wonderful primer on mouse dongle hacking – after all, if you treat your mouse’s dongle as a development platform, you can easily do things like controlling a small quadcopter, or pair the dongle with a SNES gamepad, or build a nifty wearable.

We thank [adistuder] for sharing this with us!

Assembled FPC PCB panels of the project

Give Your Thinkpad X1 Nano An Internal USB Port

How hard could it be to add an extra USB port inside your laptop? As [Joshua Stein] shows, it can be decently hard, but you will have fun along the way. His journey involves a Thinkpad X1 Nano, and his tech setup means it’d be most comfortable for him to have a USB port inside its case, for a Logitech mouse’s USB receiver. It wasn’t smooth sailing all throughout, but the end result is no doubt beautifully executed.

M.2 B-key, A-key and E-key slots have USB 2.0 available on them – you’d think that’s perfect for such a receiver, and there’s even plug and play adapters for this on places like eBay. Unfortunately, none of these, as Lenovo implements wireless card whitelists to this day. Tinkering with the whitelist on [Joshua]’s laptop resulted in BIOS digital signature check failures, and the USB-connected fingerprint reader was ultimately chosen as the most viable path.

Initially, he’s tested the fingerprint reader with an FPC breakout, having the USB connection work – many a hacker would stop here, pulling a few bodge wires from the breakout. [Joshua], however, raised the bar, creating a flexible PCB that would pull the fingerprint connector signals to a spot in the case where the USB receiver could fit neatly, with a 5 V step-up on the board, too.

[Joshua] tops it off by showing a 3D-printed spacer that goes into now-vacant spot where the fingerprint reader used to be. This mod is not open-source as far as we can see, but it’s definitely an inspiration. Want to put even more USB devices inside your laptop? Perhaps a tiny USB hub would help, in line with the EEE PC mods that aimed to stuff the tiny laptop with the largest amount of USB devices possible.

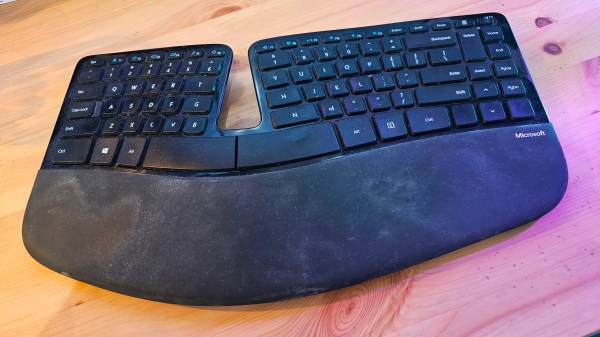
Microsoft Killed My Favorite Keyboard, And I’m Mad About It

As a professional writer, I rack up thousands of words a day. Too many in fact, to the point where it hurts my brain. To ease this burden, I choose my tools carefully to minimize obstructions as the words pour from my mind, spilling through my fingers on their way to the screen.

That’s a long-winded way of saying I’m pretty persnickety about my keyboard. Now, I’ve found out my favorite model has been discontinued, and I’ll never again know the pleasure of typing on its delicate keys. And I’m mad about it. Real mad. Because I shouldn’t be in this position to begin with!

Continue reading “Microsoft Killed My Favorite Keyboard, And I’m Mad About It”

Designing A USB-C Upgrade PCB For The MX Ergo Mouse

As the world of electronic gadgetry made the switch from micro USB to USB-C as the charging port of choice, many of us kept both of the required cables handy. But it’s fair to say that these days a micro USB port has become a pretty rare sight, and the once ubiquitous cable can be a bit elusive in the event that you encounter an older device that requires it.

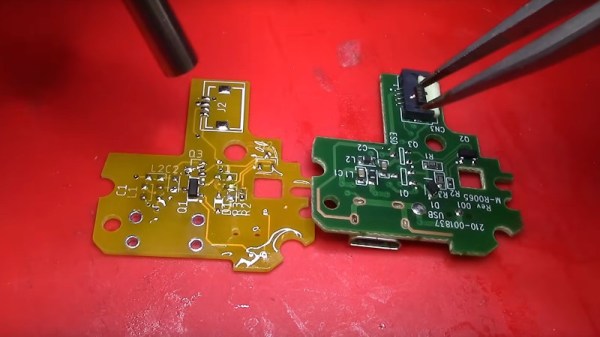
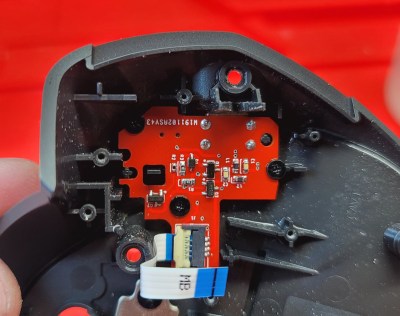
[Solderking] has a high-end Logitech cordless mouse with just this problem, and so he replaced its micro USB socket with a USB-C port. That makes the task sound deceptively simple, because in fact he had to reverse engineer one of the device’s PCBs in its entirety, making a new board with the same outline and components, but sporting the new connector.

Instead of attempting to replicate the complex shape with geometry he started with a scan of the board and had Fusion 360 trace its outline before 3D printing a version of it to check fit in the Logitech case. Then it was a case of tracing the circuit, designing the replacement, and hand transferring the parts from board to board.

The result is a USB-C chargeable mouse, and while all the design files don’t appear to be online, it’s possible to download the Gerbers from a PCBWay page. On top of that there’s a YouTube video of the process which we’ve placed below the break.

This isn’t the first time we’ve seen somebody spin up a new board to add USB-C to an older device — this drop-in replacement for Sony’s DualShock 4 comes to mind. If you’ve got enough free space inside your particular gadget, you might be able to pull of a USB-C conversion with nothing more exotic than a hacked up Adafruit breakout board.

Continue reading “Designing A USB-C Upgrade PCB For The MX Ergo Mouse”

Hacking The Logitech Z906 Speaker System

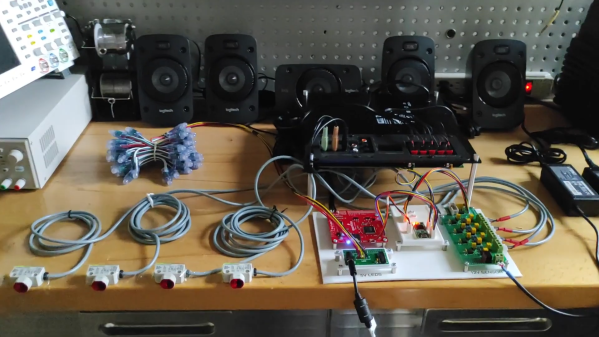
The Logitech Z906 is a well-rounded 5.1 surround sound system. It’s capable of putting out 1000W in peak power, and can decode Dolby Digital and DTS soundtracks as you’d expect. It’s intended to be used as the heart of a home cinema system and used with a central command console. However, [zarpli] figured out the device’s serial secrets and can now run the device in a standalone manner.

As it turns out, the Z906 uses a main control console that speaks to the rest of the hardware over a DE15 connector (also known as the DB-15). [zarpli] realized that the hardware could instead be commanded by just about any device with a serial port. Thus, a library was whipped up that can be readily used with an Arduino to control all the major functions of the Z906. Everything from volume levels to effect modes and channel assignments can be commanded by microcontroller. As a finale, [zarpli] shows off the hardware playing a multi-channel composition without the console connected, with his own hardware running the show instead.

If you’ve got a Logitech Z906 or similar unit that you wish to automate, you might find this work useful. It’s also a good inspiration for anyone contemplating hacking away at the console ports on other hardware. Video after the break.

Continue reading “Hacking The Logitech Z906 Speaker System”

Gaming Mouse Becomes Digital Camera

Ever since the world decided to transition from mechanical ball mice to optical mice, we have been blessed with computer pointing devices that don’t need regular cleaning and have much better performance than their ancestors. They do this by using what is essentially a tiny digital camera to monitor changes in motion. As we’ve seen before, it is possible to convert this mechanism into an actual camera, but until now we haven’t seen something like this on a high-performance mouse designed for FPS gaming.

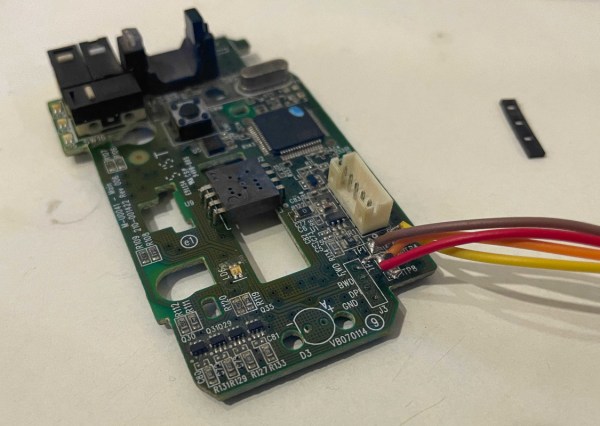
For this project [Ankit] is disassembling the Logitech G402, a popular gaming mouse with up to 4000 dpi. Normally this is processed internally in the mouse to translate movement into cursor motion, but this mouse conveniently has a familiar STM32 processor with an SPI interface already broken out on the PCB that could be quickly connected to in order to gather image data. [Ankit] created a custom USB vendor-specific endpoint and wrote a Linux kernel module to parse the data into a custom GUI program that can display the image captured by the mouse sensor on-screen.

It’s probably best to not attempt this project if you plan to re-use the mouse, as the custom firmware appears to render the mouse useless as an actual mouse. But as a proof-of-concept project this high-performance mouse does work fairly well as a camera, albeit with a very low resolution by modern digital camera standards. It is much improved on older mouse-camera builds we’ve seen, though, thanks to the high performance sensors in gaming mice.