Make Any PC A Thousand Dollar Gaming Rig With Cloud Gaming

The best gaming platform is a cloud server with a $4,000 dollar graphics card you can rent when you need it.

[Larry] has  done this sort of thing before with Amazon’s EC2, but recently Microsoft has been offering a beta access to some of NVIDIA’s Tesla M60 graphics cards. As long as you have a fairly beefy connection that can support 30 Mbps of streaming data, you can play just about any imaginable game at 60fps on the ultimate settings.

It takes a bit of configuration magic and quite a few different utilities to get it all going, but in the end [Larry] is able to play Overwatch on max settings at a nice 60fps for $1.56 an hour. Considering that just buying the graphics card alone will set you back 2500 hours of play time, for the casual gamer, this is a great deal.

It’s interesting to see computers start to become a rentable resource. People have been attempting streaming computers for a while now, but this one is seriously impressive. With such a powerful graphics card you could use this for anything intensive, need a super high-powered video editing station for a day or two? A CAD station to make anyone jealous? Just pay a few dollars of cloud time and get to it!

Re-Capping An Ancient Apple PSU

It sometimes comes as a shock when you look at a piece of hardware that you maybe bought new and still consider to be rather high-tech, and realise that it was made before someone in their mid-twenties was born. It’s the moment from that Waylon Jennings lyric, about looking in the mirror in total surprise, hair on your shoulders and age in your eyes. Yes, those people in their mid-twenties have never even heard of Waylon Jennings.

[Steve] at Big Mess o’Wires has a Mac IIsi from the early 1990s that wouldn’t power up. He’d already had the life-expired electrolytic capacitors replaced on the mainboard, so the chief suspect was the power supply. That miracle of technology was now pushing past a quarter century, and showing its age. In case anyone is tempted to say they don’t make ’em like they used to, [Steve]’s PSU should dispel the myth.

It’s easy as an electronic engineer writing this piece to think: So? Just open the lid, pop out the old ones and drop in the new, job done! But it’s also easy to forget that not everyone has the same experiences and opening up a mains PSU is something to approach with some trepidation if you’re not used to working with line power. [Steve] was new to mains PSUs and considered sending it to someone else, but decided he *should* be able to do it so set to work.

The Apple PSU is a switch-mode design. Ubiquitous today but still a higher-cost item in those days as you’ll know if you owned an earlier Commodore Amiga whose great big PSU box looked the same as but weighed ten times as much as its later siblings. In simple terms, the mains voltage is rectified to a high-voltage DC, chopped at a high frequency and sent through a small and lightweight ferrite-cored transformer to create the lower voltages. This means it has quite a few electrolytic capacitors, and some of them are significantly stressed with heat and voltage.

Forum posts on the same PSU identified three candidates for replacement – the high voltage smoothing capacitor and a couple of SMD capacitors on the PWM control board. We’d be tempted to say replace the lot while you have it open, but [Steve] set to work on these three. The smoothing cap was taken out with a vacuum desoldering gun, but he had some problems with the SMD caps. Using a hot air gun to remove them he managed to dislodge some of the other SMD components, resulting in the need for a significant cleanup and rework. We’d suggest next time forgoing the air gun and using a fine tip iron to melt each terminal in turn, the cap only has two and should be capable of being tipped up with a pair of pliers to separate each one.

So at the end of it all, he had a working Mac with a PSU that should be good for another twenty years. And he gained the confidence to recap mains power supplies.

If you are tempted to look inside a mains power supply you should not necessarily be put off by the fact it handles mains voltage as long as you treat it with respect. Don’t power it up while you have it open unless it is through an isolation transformer, and remember at all times that it can generate lethal voltages so be very careful and don’t touch it in any way while it is powered up. If in doubt, just don’t power it up at all while open. If you are concerned about high voltages remaining in capacitors when it is turned off, simply measure those voltages with your multimeter. If any remain, discharge them through a suitable resistor until you can no longer measure them. There is a lot for the curious hacker to learn within a switch mode PSU, why should the electronic engineers have all the fun!

This isn’t the first recapping story we’ve covered, and it will no doubt not be the last. Browse our recapping tag for more.

Hackaday Links: October 25, 2015

There are dozens of different 3D printable cases out there for the Raspberry Pi, but the BeagleBone Black, as useful as it is, doesn’t have as many options. The folks at 3D hubs thought they could solve this with a portable electronics lab for the BBB. It opens like a book, fits a half-size breadboard inside, and looks very cool.

The guy who 3D printed his lawnmower has a very, very large 3D printer. He now added a hammock to it, just so he could hang out during the very long prints.

There’s a box somewhere in your attic, basement, or garage filled with IDE cables. Wouldn’t they be useful for projects? Yep, only not all the wires work; some are grounds tied together, some are not wired straight through, and some are missing. [esot.eric] has the definitive guide for 80-wire IDE cables.

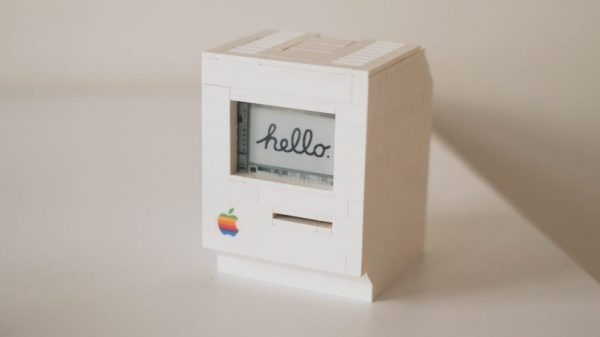
Like case mods? Here’s a golden apple, made out of walnut. Yes, there are better woods he could have used. It’s a wooden replica of a Mac 128 with a Mac Mini and LCD stuffed inside. Want a video? Here you go.

If you have a 3D printer, you’re probably familiar with PEEK. It’s the plastic used as a thermal break in non-all-metal hotends. Now it’s a filament. An extraordinarily expensive filament at €900 per kilogram. Printing temperature is 370°C, so you’ll need an all-metal hotend.

It’s the Kickstarter that just keeps going and going and going. That’s not a bad thing, though: there really isn’t much of a market for new Amiga 1200 cases. We’ve featured this project before, but the last time was unsuccessful. Now, with seven days left and just over $14k to go, it might make it this time.

Stuffing Macs Into FPGAs

A few years ago, [Steve] of Big Mess ‘O Wires fame stuffed one of the first Macintosh computers into an FPGA. While the project worked and was able to run System 6 on a virtual CPU, there were a few problems: it wasn’t exactly stable, and there was no support for a keyboard, sound, SCSI, or serial ports.

Now, there’s a new tiny FPGA board around, and this one is perfectly designed to fit the original Macintosh on it. It’s much more stable, and there is a floppy disk emulator on the horizon, just so you won’t have to deal with all those 400k 3.5″ disks anymore.

[Steve]’s brand new Mac Plus is based on the MiST board, an FPGA board that was originally designed to emulate the first Amigas and the Atari SE on an FPGA and a separate ARM CPU. There’s already been a lot of classic computers ported to the MiST, and the classic all-in-one Macs are the last project that’s left.

In the video below, you can see the MiST board running the classic System 6 at SVGA resolution. That means MacPaint and Shufflepuck in one compact board using modern hardware.

Continue reading “Stuffing Macs Into FPGAs”

44 Mac Pros Racked Up To Replace Each Rack Of 64 Mac Minis

We were delighted at a seeing 96 MacBook Pros in a rack a couple of days ago which served as testing hardware. It’s pretty cool so see a similar exquisitely executed hack that is actually in use as a production server.  imgix is a startup that provides image resizing for major web platforms. This means they need some real image processing horsepower and recently finalized a design that installs 44 Mac Pro computers in each rack. This hardware was chosen because it’s more than capable of doing the heavy lifting when it comes to image processing. And it turns out to be a much better use of rack space than the 64 Mac Minis it replaces.

Racking Mac Pro for Production

single-mac-pro-rack

Each of the 11 R2 panels like the one shown here holds 4 Mac Pro. Cooling was the first order of business, so each panel has a grate on the right side of it for cold-air intake. This is a sealed duct through which one side of each Pro is mounted. That allows the built-in exhaust fan of the computers to cool themselves, pulling in cold air and exhausting out the opposite side.

Port access to each is provided on the front of the panel as well. Connectors are mounted on the right side of the front plate which is out of frame in this image. Power and Ethernet run out the back of the rack.

The only downside of this method is that if one computer dies you need to pull the entire rack to replace it. This represents 9% of the total rack and so imgix designed the 44-node system to deal with that kind of processing loss without taking the entire rack down for service.

Why This Bests the Mac Mini

3 racks - Linux. Mac Min, Mac Pro
3 racks – Linux. Mac Min, Mac Pro

Here you can see the three different racks that the company is using. On the left is common server equipment running Linux. In the middle is the R1 design which uses 64 Mac Minis for graphic-intensive tasks. To the right is the new R2 rack which replace the R1 design.

Obviously each Mac Pro is more powerful than a Mac Mini, but I reached out to imgix to ask about what prompt them to move away from the R1 design that hosts eight rack panes each with eight Mac Minis. [Simon Kuhn], the Director of Production, makes the point that the original rack design is a good one, but in the end there’s just too little computing power in the space of one rack to make sense.

Although physically there is room for at least twice as many Mac Mini units — by mounting them two-deep in each space — this would have caused several problems. First up is heat. Keeping the second position of computers within safe operating temperatures would have been challenging, if not impossible. The second is automated power control. The R1 racks used two sets of 48 controllable outlets to power computers and cooling fans. This is important as the outlets allow them to power cycle mis-behaving units remotely. And finally, more units means more Ethernet connections to deal with.

We having a great time looking that custom server rack setups. If you have one of your own, or a favorite which someone else built, please let us know!

[Thanks to drw72 for mentioning R2 in a comment]

Mac SE

Viewing A Macintosh SE’s Video On A Modern Computer

[Bbraun] has an old Macintosh SE computer. He was looking for a way to view the video output from the SE on a newer, modern computer. He ended up working out a pretty clever solution using a stm32f4discovery board.

First, the SE’s logic board was removed from its case and placed onto a desk for easier access. The discovery board was then hooked up to the SE’s processor direct slot (PDS) using normal jumper wires. The discovery board acts as a USB COM port on a newer Mac OSX computer. The discovery board watches the SE for writes to video memory. When it sees that the R/W pin goes low, it knows that a write is occurring. It then waits for /AS to go low, which indicates that an address is on the bus. The discovery board reads the address and verifies that it falls within the range of the video frame buffer. If it does, then the discovery board writes a copy of the data to a local buffer.

The OSX computer runs a simple app that can make a request to the discovery board via USB. When the board receives the request, it sends its local frame buffer data over the USB connection and back to the host. The OSX computer then displays that data in a window using CGImage. The demo video below was captured using this technique. Continue reading “Viewing A Macintosh SE’s Video On A Modern Computer”

Rewritable ROM For The Mac Plus

The Macintosh Classic – a small all-in-one computer with a 9″ monochrome screen –  was one of the more interesting machines ever released by Apple. It was the company’s first venture into a cost-reduced computer, and the first Macintosh to sell for less than $1000. Released in 1990, its list of features were nearly identical to the Macintosh Plus, released four years earlier. The Classic also had an interesting feature not found in any other Mac. It could boot a full OS, in this case System 6.0.3, by holding down a series of keys during boot. This made it an exceptional diskless workstation. It was cheap, and all you really needed was a word processor or spreadsheet program on a 1.44 MB floppy to do real work.

[Steve] over at Big Mess O’ Wires had the same idea as the Apple engineers back in the late 80s. Take a Macintosh Plus, give it a bit more ROM, and put an OS in there. [Steve] is going a bit farther than those Apple engineers could have dreamed. He’s built a rewritable ROM disk for the Mac Plus, turning this ancient computer into a completely configurable diskless workstation.

The build replaces the two stock ROM chips with an adapter board filled with 29F040B Flash chips. They’re exactly what you would expect – huge, old PDIPs loaded up with Flash instead of the slightly more difficult to reprogram EEPROM. Because of the additional space, two additional wires needed to connected to the CPU.  The result is a full Megabyte of Flash available to the Macintosh at boot, in a computer where the normal removable disk drive capacity was only 800kB.

The hardware adapter for stuffing these flash chips inside a Mac Plus was made by [Rob Braun], while the software part of this build came from [Rob] and [Doug Brown]. They studied how the Macintosh Classic’s ROM disk driver worked, and [Rob Braun] developed a stand-alone ROM disk driver with a new pirate-themed startup icon. [Steve] then dug in and created an old-school Mac app in Metrowerks Codewarrior to write new values to the ROM. Anything from Shufflepuck to Glider, to a copy of System 7.1  can be placed on this ROM disk.

This isn’t the first time we’ve seen ROM boot disks for old Macs. There was a lot of spare address space floating around in the old Mac II-series computers, and [Doug Brown] found a good use for it. Some of these old computers had optional ROM SIMM. You can put up to 8 Megabytes  in the address space reserved for the ROM, and using a similar ROM disk driver, [Doug] can put an entire system in ROM, or make the startup chime exceptionally long.