Writing On A Whiteboard, Performed By A Robot

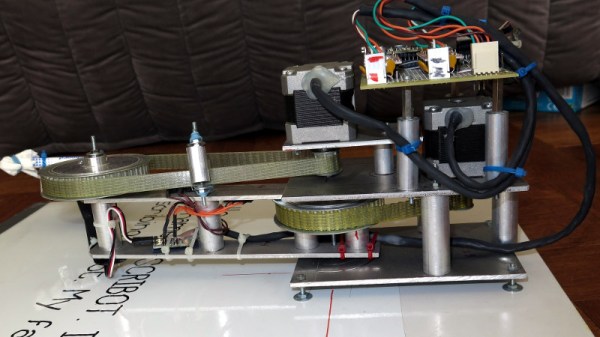
For some of us here at Hackaday, school is but a very distant memory. All that teenage awkwardness we’d rather forget, synth pop, and 8-bit computers were cool the first time around, and our newer classrooms didn’t have blackboards any more. The Whiteboard Future Had Arrived, and it came with solvent-laden pens that our more rebellious classmates swore would get you high if you sniffed them for long enough. Innocent times. Kids nowadays probably get their lessons from iPads, but the whiteboard isn’t finished just yet. [f4hdk] has updated his board with Scribot, a whiteboard-writing robot arm driven by a couple of stepper motors and a nicely-engineered set of belts, that writes text from ASCII files in a custom-designed vector font.

At the end of the arm is a whiteboard marker, and in a neat twist it has an eraser on its rear end. A quick flip of the servo holding the marker, and it can rub out any of its work. Behind it all is an LPC1789 Cortex M3-based Mbed board with appropriate servo driver boards, and for those curious enough to take a second look there is a full code repository. The result as you can see in the video below the break is a very well-executed whiteboard writer. Your 1980s teacher might have grumbled at the new technology, but certainly couldn’t accuse it of doing a bad job!

Continue reading “Writing On A Whiteboard, Performed By A Robot”

Mbed Labs Chock Full Of Arm Goodies

One of the things we like about ARM processors is that there are a variety of options for library support. You can write your own code at the bare metal, of course, but you can also use many different abstraction libraries to make things easier. At the other end of the spectrum, there is Mbed, similar to the sort of libraries that Arduino supplies. Easy to use, although not always the best possible performance. Mbed now has an Mbed Labs site with a lot of extra goodies that go with the Mbed ecosystem, and it has quite a few interesting things.

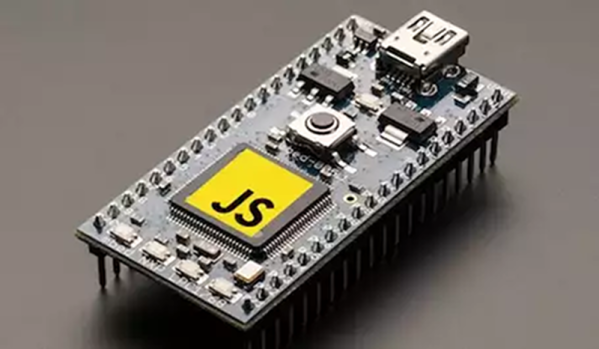
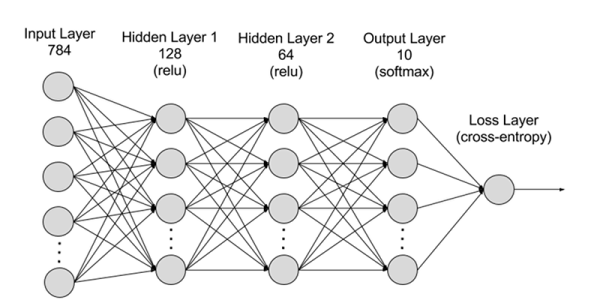
You’ve always been able to write Mbed code in your browser — some people love that and some hate it and use locally-hosted tools like Platform.io. However, with the Mbed Lab, you can build and most importantly simulate your code in the browser (something we covered last year). There’s also a Javascript interpreter that runs on your chip, a small implementation of TensorFlow for deep learning, and a few other projects on the page.

Continue reading “Mbed Labs Chock Full Of Arm Goodies”

An Mbed In Your Browser

If you have dabbled in the world of ARM microcontrollers, you might be familiar with the Mbed platform, a software abstraction layer for a range of ARM-based small dev boards. If you don’t have an Mbed board but fancy giving it a go, you might imagine that you’d be out of luck, but [Jan Jongboom] could have an answer to your problem in the form of an Mbed simulation in your browser.

We’re not high-end ARM microcontroller developers here at Hackaday so beyond observing that it brings the Mbed abstraction layer binaries to the browser through the magic of Emscripten it’s best to point the curious at its GitHub repository. But we can see its attraction as a means to take a look at Mbed, and given that [Jan] describes himself as “a developer and evangelist currently working on the Internet of Things for ARM“, it’s safe to say this one comes as they say, from the horse’s mouth.

The Mbed board that is probably most famous is the education-focused micro:bit, but there are plenty of others on the market. Back in 2015 we published a getting started guide, if you are new to the Mbed.

Via Hacker News.

Exploring The BBC Micro:Bit Software Stack

The BBC micro:bit has been with us for about eighteen months now, and while the little ARM-based board has made a name for itself in its intended market of education, we haven’t seen as much of it in our community as we might have expected.

If you or a youngster in your life have a micro:bit, you may have created code for it using one of the several web-based IDEs, a graphical programming system, TypeScript, or MicroPython. But these high level languages are only part of the board’s software stack, as [Matt Warren] shows us with his detailed examination of its various layers.

The top layer of the micro:bit sandwich is of course your code. This is turned into a hex file by the web-based IDE’s compiler, which you then place on your device. Interestingly only the Microsoft TypeScript IDE compiles the TypeScript into native code, while the others bundle your code up with an interpreter.

Below that is the micro:bit’s hardware abstraction layer, and below that in turn is ARM’s Mbed OS layer, because the micro:bit is at heart simply another Mbed board. [Matt] goes into some detail about how the device’s memory map accommodates all these components, something essential given that there is only a paltry 16 kB of RAM in hand.

You might wish to program a micro:bit somewhat closer to the metal with the Mbed toolchain, but even if that is the case it’s still of interest to read a dissection of its official stack. Meanwhile, have a look at our review of the board, from summer 2016.

Tiny Tensor Brings Machine Deep Learning To Micros

We’ve talked about TensorFlow before — Google’s deep learning library. Crunching all that data is the province of big computers, not embedded systems, right? Not so fast. [Neil-Tan] and others have been working on uTensor, an implementation that runs on boards that support Mbed-OS 5.6 or higher.

Mbed of course is the embedded framework for ARM, and uTensor requires at least 256K of RAM on the chip and an SD card less than (that’s right; less than) 32 GB. If your board of choice doesn’t already have an SD card slot, you’ll need to add one.

Continue reading “Tiny Tensor Brings Machine Deep Learning To Micros”

Hackaday Prize Entry: DIY ARM Scientific Calculator

What does a hacker do when he or she wants something but can’t afford it? They hack one together, of course. Or, in the case of [Ramón Calvo], they thoughtfully plan and prototype. [Ramón Calvo] wanted a scientific calculator, but couldn’t afford one, so he designed and built one himself.

[Ramón] started off with Arduino but upgraded initially to Freescale’s Freedom KL25Z development board upgraded to an ARM Cortex-M0+ programmed using mbed. The display is an Electronic Assembly DOGL-128 128×64 pixel LCD. [Ramón] did a couple of iterations on the PCB, going from a large DIY one in order for the Arduino version to work, to the current, smaller version for the ARM chip with hand soldered SMD components. After that, [Ramón] looked into the algorithms needed to parse mathematical input. He settled on the shunting-yard algorithm, which converts the input into Reverse Polish Notation (RPN), which is easier for the software to work with.

[Ramón] has a ton of features working, including your standard add, subtract, multiply and divide operations, square root, nth root and exponentiation, trigonometry, log and log10, and factorial(!) There are a few things still on the to-do list, such as low power and a graphing mode, and there are a couple of bugs still in the system, but the overall system is up and running. [Ramón] has put up the schematic and KiCAD files up on his Hackaday.io project page along with the bill of materials.

We’ve had a few Hackaday prize entries in the form of calculators, such as this one with Nixie tubes and this one that emulates 70’s HP calculators.

Encoders Spin Us Right Round

Rotary encoders are great devices. Monitoring just a few pins you can easily and quickly read in rotation and direction of a user input (as well as many other applications). But as with anything, there are caveats. I recently had the chance to dive into some of the benefits and drawbacks of rotary encoders and how to work with them.

I often work with students on different levels of electronic projects. One student project needed a rotary encoder. These come in mechanical and optical variants. In a way, they are very simple devices. In another way, they have some complex nuances. The target board was an ST Nucleo. This particular board has a small ARM processor and can use mbed environment for development and programming. The board itself can take Arduino daughter boards and have additional pins for ST morpho boards (whatever those are).

The mbed system is the ARM’s answer to Arduino. A web-based IDE lets you write C++ code with tons of support libraries. The board looks like a USB drive, so you download the program to this ersatz drive, and the board is programmed. I posted an intro to mbed awhile back with a similar board, so if you want a refresher on that, you might like to read that first.

Reading the Encoder

The encoder we had was on a little PCB that you get when you buy one of those Chinese Arduino 37 sensor kits. (By the way, if you are looking for documentation on those kinds of boards, look here.; in particular, this was a KY-040 module.) The board has power and ground pins, along with three pins. One of the pins is a switch closure to ground when you depress the shaft of the encoder. The other two encode the direction and speed of the shaft rotation. There are three pull-up resistors, one for each output.

I expected to explain how the device worked, and then assist in writing some code with a good example of having to debounce, use pin change interrupts, and obviously throw in some other arcane lore. Turns out that was wholly unnecessary. Well… sort of.

Continue reading “Encoders Spin Us Right Round”