Even a cursory glance through a site such as this one will show you how many microcontroller boards there are on the market these days. It seems that every possible market segment has been covered, and then some, so why on earth would anyone want to bring another product into this crowded environment?
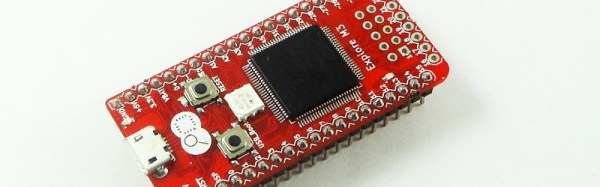
This is a question you might wish to ask of the team behind Explore M3, a new ARM Cortex M3 development board. It’s based around an LPC1768 ARM Cortex M3 with 64k of RAM and 512k of Flash running at 100MHz, and with the usual huge array of GPIOs and built-in peripherals.
The board’s designers originally aimed for it to be able to be used either as a bare-metal ARM or with the Arduino and Mbed tools. In the event the response to their enquiries with Mbed led them to abandon that support. They point to their comprehensive set of tutorials as what sets their board apart from its competition, and in turn they deny trying to produce merely another Arduino or Mbed. Their chosen physical format is a compact dual-in-line board for easy breadboarding, not unlike the Arduino Micro or the Teensy.
If you read the logs for the project, you’ll find a couple of videos explaining the project and taking you through a tutorial. They are however a little long to embed in a Hackaday piece, so we’ll leave you to head on over if you are interested.
We’ve covered a lot of microcontroller dev boards here in our time. If you want to see how far we’ve come over the years, take a look at our round up, and its second part, from back in 2011.