Build A Sheet Metal Brake With No Welding Required

Sometimes, there’s a job to be done and the required tools don’t fall easily to hand. [Bob] found himself in just such a position, needing to get some window flashing made up despite lacking a sheet metal brake. After waiting far too long for someone else to do the job, [Bob] elected to simply make the tools and do it himself instead (Youtube link, embedded below).

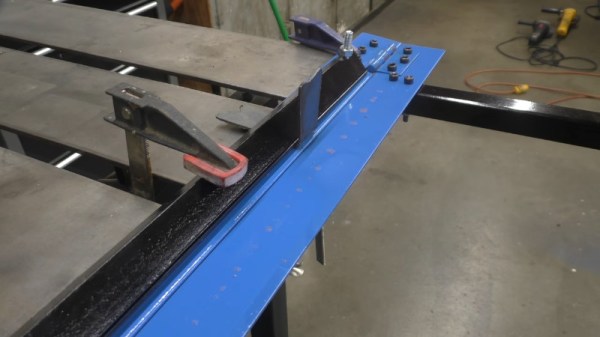
The project came about simply because [Bob] needed to bend 42″ sections of flashing, and couldn’t find a decent deal on a sheet metal brake above 36″ wide. The build starts with some angle iron and simple hinges, bolted together to form a basic brake design. With some rectangular hollow section bolted on for handles, the brake is then clamped to the bench and is ready for action.

It’s a build that any experienced hacker could whip up in an afternoon and be pumping out basic sheet metal parts by sundown, and requires no welding to boot. To learn more about bending sheet metal, check out our primer on the subject. Video after the break.

Continue reading “Build A Sheet Metal Brake With No Welding Required”

Build Your Own Metal Roller

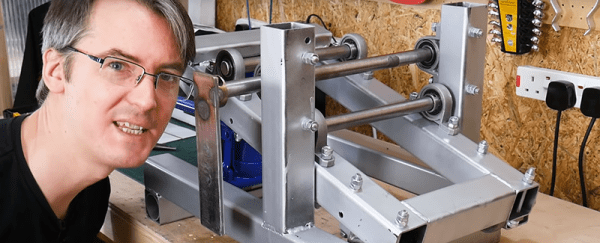
Metal fabrication is a useful skill to have. There’s plenty you can achieve in your workshop at home, given the right tools. There’s lathes for turning, mills for milling, and bandsaws and dropsaws for chopping it all to pieces. But what do you do if you need to make hoops and bends and round sections? You build a metal roller, of course – and that’s precisely what [James Bruton] did.

The main body of the tool is built out of box section, chosen largely as it’s what [James] had lying around. Bearings are of the familiar pillow block variety, with 20 mm bright steel serving as the rollers due to its better tolerance than mild steel stock. Set screws hold the shafts in place to avoid everything sliding around the place. A 10-ton bottle jack then provides the force to gently bend the workpiece as it passes through the rollers.

Initial tests were positive, with the roller producing smooth curves in 4 mm thick steel bar. There were some issues with runout, which were easily fixed with some attention to the parallelism of the shafts. It’s a tidy build, and can serve as a basis for further upgrades in future if necessary.

We’ve seen DIY roll benders before, too. Video after the break.

Continue reading “Build Your Own Metal Roller”

Hack Chat: The Home Machine Shop With Quinn Dunki

Join us Wednesday at noon Pacific time for the Home Machine Shop Hack Chat!

Even if you haven’t been here for very long, you’ll probably recognize Quinn Dunki as Hackaday’s resident consulting machinist. Quinn recently did a great series of articles on the “King of Machine Tools”, the lathe, covering everything from the history of precision machine tools to making your first chips. She’s documented the entire process of procuring and setting up a new lathe, pointing out all the potential pitfalls the budding home machinist may face. You can get a much deeper dive into her machining adventures on her YouTube channel, Blondihacks.

Flinging hot metal chips around is hardly all Quinn has accomplished, though. Long before her foray into machine tools, there was Veronica, a scratch-built 6502 machine Quinn created as an homage to the machines that launched her into a life of writing software. We’ve featured Veronica on our pages a couple of times, and she’s always made quite a hit.

Please join us for this Hack Chat, where we’ll discuss:

  • How developing software and machining are alike, and how they differ;
  • How social networks have changed the perception of machining;
  • Best practices for getting started in machining; and
  • Are there any new machine tool purchases in the pipeline?

You are, of course, encouraged to add your own questions to the discussion. You can do that by leaving a comment on the Home Machine Shop Hack Chat and we’ll put that in the queue for the Hack Chat discussion.

join-hack-chatOur Hack Chats are live community events on the Hackaday.io Hack Chat group messaging. This week we’ll be sitting down on Wednesday, March 20, at noon, Pacific time. If time zones have got you down, we have a handy time zone converter.

Click that speech bubble to the right, and you’ll be taken directly to the Hack Chat group on Hackaday.io. You don’t have to wait until Wednesday; join whenever you want and you can see what the community is talking about.

Become The Next Fabergé With A Rose Engine Lathe

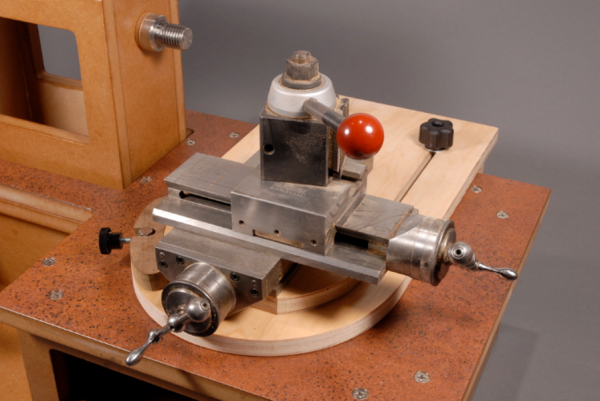
The basics of a skill may take a long time to master, but there is always something else to learn about regardless of the craft. Building a piece of fine furniture out of hardwood or being able to weld together a bicycle from scratch are all impressive feats, but there are fine details that you’ll only learn about once you get to this level of craftsmanship. One such tool that will help with these intricacies is known as the rose engine lathe.

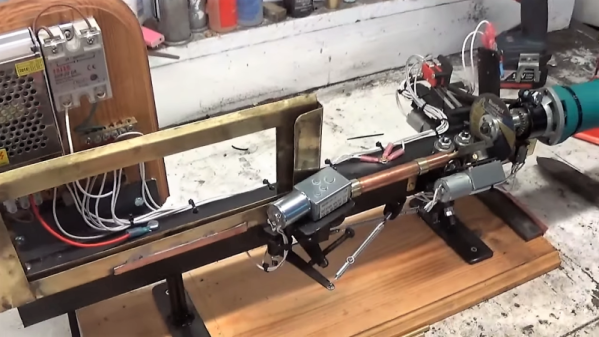
This tool is based on an average lathe, typically used for creating round things out of stock which is not round. A rose engine lathe has a set of cams on it as well which allow the lathe to create intricate patterns in the material it’s working with, such as flower type patterns or intricate spirals. One of the most famous implementations of this method was on the Fabergé eggs. While this might make it sound overly complex, this how-to actually shows you how to build your own rose engine lathe out of a piece of MDF and a large number of miscellaneous pieces of hardware.

We recently featured another build which performs a similar function called engine turning. While similar, this is the method responsible for creating overlapping spirals on a piece of metal. Either way, both projects are sure to spice up your metal or woodworking endeavors.

Thanks to [PWalsh] for the tip!

A DIY Slip Roll On The Cheap

When you need to roll sheet or thin flat bar stock into an arc, you need a rolling machine, also known as a slip roll. If you’ve priced these lately, you’ll know that they can be rather expensive, especially if you are only going to use them for one or two projects. While building a fenced enclosure for his dog, [Tim] realized he could use steel fence posts and connectors to build his own slip roll for much less, and posted a video about it on his YouTube channel.

The key realization was that not only are the galvanized posts cheap and strong, but the galvanized coating would act as a lubricant to reduce wear, especially when augmented with a bit of grease. The build looks pretty straightforward, and a dedicated viewer could probably re-create a similar version with little difficulty. The stock fence connectors serve double-duty as both fasteners and bushings for the rollers, and a pair of turnbuckles supplies tension to the assembly.

The one tricky part is the chain-and-sprocket linkage which keeps the two bottom rollers moving in tandem. [Tim] cut sprockets from some plate steel with his plasma cutter, but mentions that similar sprockets can be found cheaply online and only need to be modified with a larger hole. Although most of the build is held together with set screws in the fence post fittings, the sprockets appear to be welded to the galvanized pipe. We’re sure [Tim] knows that welding galvanized steel can lead to metal fume fever, so we were hoping the video would caution viewers to remove the zinc coating on those parts before welding.

[Tim] demonstrates forming some 4 mm flat steel into circles, and the operation seems easy enough, especially given the inexpensive nature of this build. Overall, this seems like the sort of thing we could see ourselves trying on a lazy Saturday afternoon – it certainly seems like more fun than building a fence with the parts, so be sure to check out the video, after the break.

Continue reading “A DIY Slip Roll On The Cheap”

Art Deco Control Panel Looks Out Of Metropolis

Bakelite, hammertone gray finish, big chunky toggle switches, jeweled pilot lights – these are a few of [Wesley Treat]’s favorite retro electronics things. And he’ll get no argument from us, as old gear is one of our many weak spots. So when he was tasked by a friend to come up with some chaser lights for an Art Deco-themed bar, [Wesley] jumped at the chance to go overboard with this retro-style control panel.

Granted, the video below pays short shrift to the electronics side of this build in favor of concentrating on the woodworking and metalworking aspects of making the control panel. We’re OK with that, too, as we picked up a ton of design tips along the way. The control panel is all custom, with a chassis bent from sheet aluminum. The sides of the console are laminated walnut and brushed aluminum, which looks very chic. We really like the recessed labels for the switches and indicators on the front panel, although we’d have preferred them to be backlighted. And that bent aluminum badge really lends a Chrysler Building flair that ties the whole project together.

All in all, a really nice job, and another in a long string of retro cool projects from [Wesley]. We recently featured his cloning of vintage knobs for an old Philo tube tester, and we’ll be looking for more great projects from him in the future.

Continue reading “Art Deco Control Panel Looks Out Of Metropolis”

Honda Key Fob Turned CNC Work Of Art

Now that nearly every car on the road comes with an electronic key fob, people are desperate to find ways to repair these indispensable little gadgets without coughing up potentially hundreds of dollars at the dealership. There’s a whole market for replacement shells which you can transplant your (hopefully) still functional electronics into, but if you’re going to go through the trouble of putting the electronics into a new case, why not make it special?

That’s what [Michicanery] was thinking when he decided to build his own custom key fob. The end result is an utterly magnificent feat of engineering that’s sure to be a conversation for the life of the vehicle, if not beyond. Made of wood and aluminum cut on his OpenBuilds Lead CNC 1010, this build just might inspire you to “accidentally” drop your existing fob from a great height. Oh no, what a shame.

[Michicanery] starts by disassembling his original fob, which is the type that has a key integrated directly into the device. This meant his replacement would need a bit more thought put into it than a separate stand-alone fob, but at least it wasn’t one of the ones where you have to stick the whole thing into the dashboard. To make sure the build was strong enough to survive a lifetime of being turned in the ignition and generally fiddled with, he cut the central frame and buttons out of 1/4″ thick aluminum.

The top and bottom of the fob were then cut from Chechen wood and then chamfered on a table router so it felt a bit better in the hand. He applied oil to the pieces to bring out the natural color and grain of the wood, but not before engraving his own logo onto the back of the case for that extra touch of personalization. Not that we think [Michicanery] is going to have trouble identifying his keys from this point on.

Like the incredible watch cases we’ve seen recently, this is a perfect example of an everyday object getting a new lease on life as a bespoke creation thanks to a custom built enclosure. Granted we’re not sure Honda key fobs have quite the heirloom potential of a good watch, but we’d still prefer it over the black plastic original.

[via /r/DIY]