2026 Retrocomputing Challenge: USBSID-Pico Has Two SIDs, Many Inputs

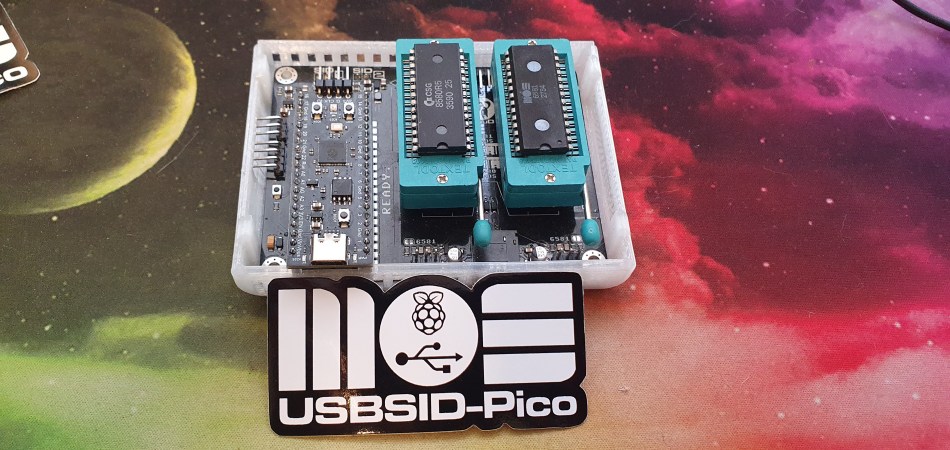
We’ll give you three guesses what the most important bits of silicon in [LouD]’s USBSID-Pico are, and two don’t count. Yes, there’s a Raspberry Pi Pico, and a pair of the unforgettable SID chips from MOS– the sound chip of the C64, the die that launched a thousand chiptunes. Well, unless you build it with a hardware SID replacement, but the goal of this device is to get SIDs hooked up to modern hardware.

To that end, USBSID-Pico can be controlled via USB– obviously– in the form of CDC/WebUSB/WebSerial but also MIDI, and even ASID, which is a specific protocol for streaming SID register data over MIDI. You might be wondering the point, since surely you can get cycle-accurate SID emulation on an RP2040, right? Well, not everyone agrees that cycle-accurate emulation is accurate enough; like the people who swear by the subtle distortions tube amplifiers introduce into the sound, some say the chip’s own inaccuracies give the sound out of the physical device a unique vibe emulators don’t match. That’s a fight for others to litigate; we just appreciate the work that went into getting these old sound chips talking to modern hardware, and getting the project certified as Open Source Hardware.

This combination of old sound and new microcontroller makes the USBSID-Pico a good entry for our ongoing retrocomputing contest, particularly the retro-modern category. Just be aware of PAL and NTSC differences with these old chips, or your beeps and boops might be out of tune. They haven’t made them in decades, but there are more than a few modern replacements for the MOS 6581.

3D Printed Piano Action Faithful To The Original

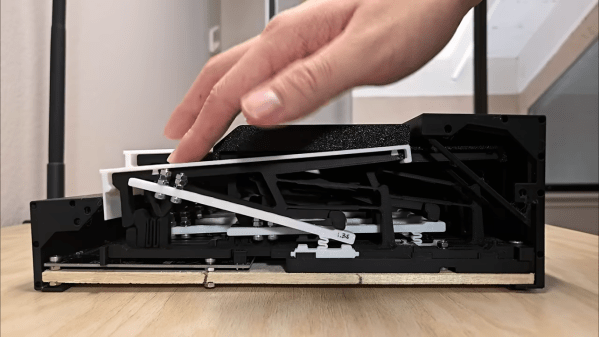
A piano’s internal mechanism for translating a key press into sound is surprisingly complicated. It has to do a lot of things simultaneously and quickly: provide precise control over velocity, ensure the hammer doesn’t press itself against the strings,  ensure the hammer rebounds without accidentally hitting the strings, allow for quick, continued strikes of the strings, and dampen the string after the key is released. Not only is that a mouthful to say, it’s a tall order for a mechanical device and took (arguably) around 150 years for the idea to be refined into what most of us would recognize as a piano. But could [dovetail] do it with a 3D printer in a few weeks?

[dovetail]’s design relies on compliant mechanisms, which are solid parts that flex in specific and controlled ways to provide movement. The action took many iterations to make sure that all of the feelings of all the parts of a real piano action were accounted for in this model. Pianos have more than one key, though, so [dovetail] also had to design a modular system to piece all the keys together. The modularity extends to the piano’s electronics as well, with a set of PCBs daisy-chained together, each of which supports a set of keys. This is a hybrid piano, a style with a real action but digital sound production. Using infrared sensors allows the instrument to behave as a MIDI keyboard, but one with the goal of feeling somewhere between a digital piano and a fully analog one.

The piano was first demonstrated at Open Sauce, where a number of musicians were able to try it out. As a prototype device it still has a few rough edges that [dovetail] plans to improve upon, like changing the sensors from IR to hall effect, improving the action and using a different filament. There are some other things he has planned as well which we look forward to seeing in future videos. And, although a completely different instrument, it has a number of similarities to this action built to strike a bass drum instead.

Continue reading “3D Printed Piano Action Faithful To The Original” →

Circuit Bending, But Make It MIDI

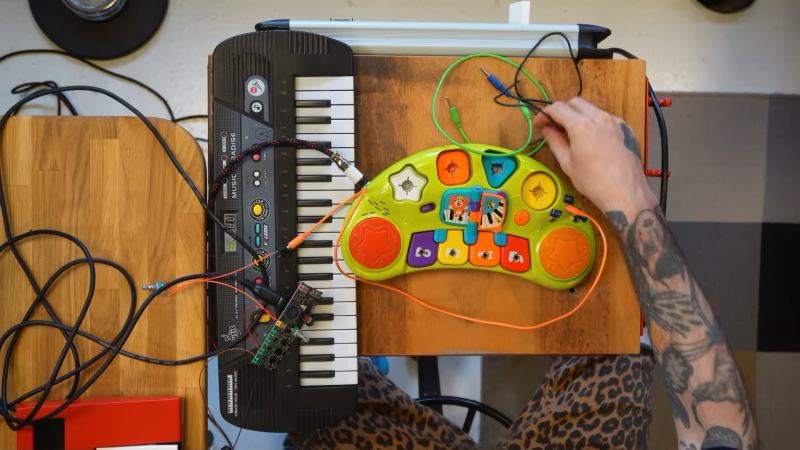
Circuit bending is a chaotic art. At its simplest, it can just involve making connections between random points on a circuit board to create weird sounds in musical hardware. Or, you can complicate things, get really specific with your hookups, and twist them with various sorts of modulation. [Simon the Magpie] has been working on something closer to the latter category, with his neat project to add MIDI to the circuit bending world. 

The concept is straightforward enough. [Simon] has created a device that you place in line with your circuit bent connections, particularly those that create pitch bends with pots thanks to their variable resistance. You can then play your MIDI keyboard, and the device will vary the resistance in the circuit and bend the pitch at your command. [Simon] simply calls the device MIDI TO RESISTANCE, because that’s… precisely what it does, with the aid of a digital potentiometer. He then demonstrates it doing its thing on pitchbent toys, and it sounds pretty radical in use.

If you’re trying to make your circuit bent toys and instruments more musical, this build should serve as a great inspiration. We’ve featured other oddball musical hacks in a similarly creative vein before, too—such as using mixers as a synthesizer in their own right. Have fun out there.

Continue reading “Circuit Bending, But Make It MIDI” →

Old Midi Instruments Don’t Like Modern Midi. What’s To Be Done?

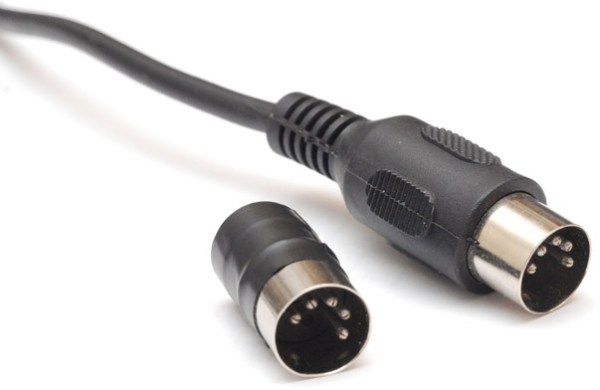
In theory, MIDI is an electrical and protocol standard that allows any such equipped instrument or computer to talk to any other. But as the wonderfully named [Knob Monster] will tell you, when the computer is new, and the instrument is old, it ain’t that simple.

They specialise in using the Web MIDI interface to allow browser control of an instrument. This might typically be done with a USB to MIDI interface, but in this lies a problem. The 8-bit microprocessor on a 1983 synth has problems keeping up with the rapid-fire data that spews relentlessly from the supercomputer-grade machine controlling it, and bad things happen as a result.

Expensive MIDI interfaces have a buffer built in, but a better solution lies in the Web MIDI code itself. They detail how to use the Web MIDI API’s built-in packet scheduler to slow things down a little and let your Yamaha DX7 chill a bit.

Meanwhile, if you need a USB to MIDI interface, we’ve covered one in the past.

Leaky Player Piano Gets MIDI Upgrade In YouTube Restomod

The word “restomod” is a bit nebulous, but it’s normally used in the automotive world to describe taking an old car and making it better-than-new with all the technological improvements the original builders would have used, had they been available. We think the word applies to [Alnwlsn]’s MIDI-actuated player piano, because what are those punched rolls of paper, but the MIDI of the 19th century?

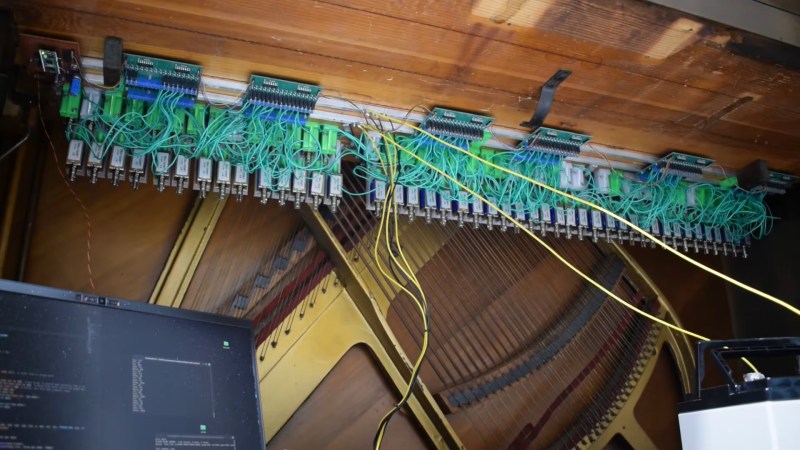
Unlike a lot of automotive restomods though, this one is mostly reversible. He did drill few holes and slots in the original wood, but nowhere that it would alter the integrity or original operation of the player piano mechanism. The MIDI-controlled solenoids just poke the same key paddles from below that the pneumatic mechanism used. From the listener or operator’s perspective, unless the doors that reveal the music scroll or lack thereof are open, the piano behaves exactly the same. Except now it has access to the whole wide array of tracks that exist in MIDI form, rather than a paltry selection of hard-to-find piano rolls.

Each of the relays is driven by a MOSFET via shift registers to get 88 outputs out of the single Pi Pico in charge, with a level shifter involved to get the RP2040 speaking 5 V logic. If you’re wondering how that gets volume control, no, the piano isn’t smacking keys at full volume all the time. He’s using the RP2040’s powerful PIO to create a sort of PWM signal to soften the solenoid blows when needed. To save his power supply, he’s also got it set up to stagger the pulses, so multiple relays aren’t pulsed at the same time when the MIDI file calls for chords.

There was actually more overlap between player pianos and MIDI than you might think, given this presentation of an Apple ][ being used to create the piano rolls.

Continue reading “Leaky Player Piano Gets MIDI Upgrade In YouTube Restomod” →

Wearable MIDI Controller Built With Raspberry Pi

Most synths happily get by with keyboard or pad inputs and make lovely sounds in response. [Becky Clarke] and her fellow collaborators are building a synth that works rather differently. DigitSynth is a wearable controller that’s rather fun to interact with.

The heart of the build is a Raspberry Pi 5. It’s set up to talk to a TI ADS1115 ADC chip that lets it read a bunch of analog flex sensors embedded in a right-hand glove, while the Pi can also read a bunch of tactile buttons activated by the left hand. The flex sensors are used to control synth parameters like LFO rate and filter cutoffs, while the buttons control chord changes. The Raspberry Pi runs custom code to read these devices and generate the requisite MIDI commands to send to a Roland JD-Xi synth which is responsible for actually making the sound. Both sets of fingers are also dotted with LEDs for visual feedback, controlled via a TLC59711 PWM driver.

It’s a fun build that creates some ethereal sounds in an intuitive way, thanks to the nature of the interface. We’ve featured some similar builds before, using the flexure of the hand to create musical soundscapes. Video after the break.

Continue reading “Wearable MIDI Controller Built With Raspberry Pi” →

Simple MIDI Sample Player Runs On ESP32

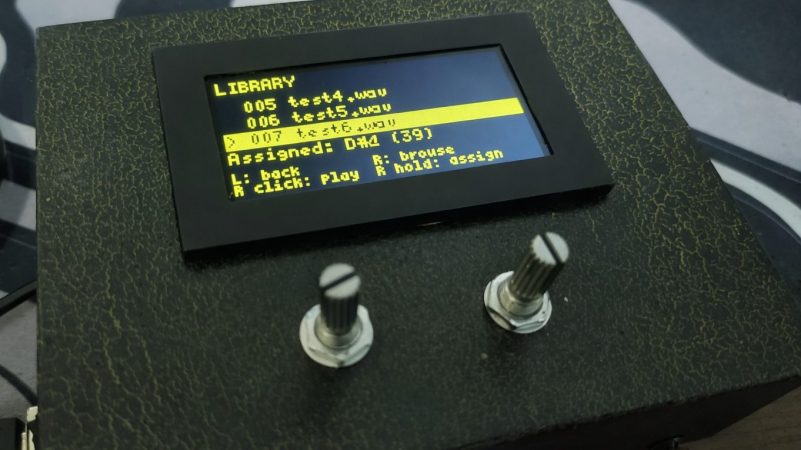
[Jakub] is a musician, and found himself in need of a simple way to trigger samples via MIDI when on stage. So many commercial solutions exist, but most were overkill for the job or too messy and complicated to justify their use in a live environment. Thus, [Jakub] worked up Samplotron to do exactly the job needed with a minimum of fuss.

The project is based around the ESP32. It’s effectively a lightweight hardware sampler that can trigger sounds on command via MIDI. Sample data is loaded from an SD card, which also stores the device configuration. The Samplotron plays back mono 16-bit WAV files at 44,100 Hz, delivering audio via an ES8388 audio codec module connected via I2S. Two encoders are used to control the device, with a menu system presented via an SSD1309 OLED screen. Samples can be loaded and managed via this interface, and it allows tweaks to be made to volume levels and one-shot/loop playback as needed. MIDI input to the device is simply handled via the onboard UART functionality of the ESP32 itself.

It’s a neat little bit of music hardware that does exactly what [Jakub] needs and nothing more. We’ve featured similar builds before, like this neat RP2040 soundboard. If you’re building rad custom hardware for your own musical adventures, we’d love to know all about it.