How A Professional Resin Caster Duplicates Parts

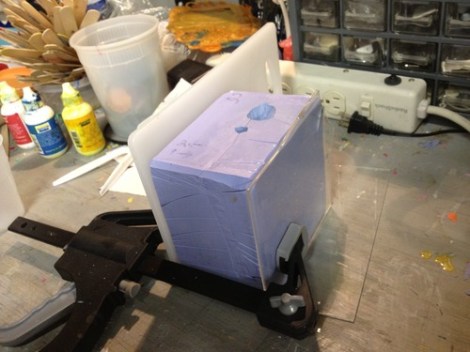
[Gregg Eshelman] reproduces plastic parts for antique car restorations for a living; likewise, he’s very good at it. Greg always chimes in with helpful hints whenever we post about resin casting. Shown above is a lens for a car turn signal. Manufactured in 1941, having [Gregg] cast a few copies is an easy option for replacing the rare part.

[Gregg] uses a similar method to us, but it is easy to see that he has done it more and his process has been refined by lots of experience. We really liked how he avoids using expensive foam core by wrapping cardboard in packing tape, or using the kind that has a plastic coating on it; the kind most retail packaging is made out of. He also has better techniques for keying the part to be manufactured, and prepping difficult geometry between different mold halves. It also never would have occurred to us to use Dremel cutting disks to cut the sprues and air vents in the silicone, a surprisingly tricky material to cut precisely with a knife.

It’s always nice when a professional takes time to write about their processes for the hobbyist trying to emulate it. We hope [Gregg] writes more tutorials, and continues to contribute in the comment section. If you have your own fabrication techniques to share we’d love to hear about it on the tips line.

Failaffle

Fail Of The Week: Not All Mold Releases Release All Molds.

I’m writing a series of articles on resin casting as an extension to my experiences with the instructions found in the wonderful Guerrilla Guide. However, mistakes were made. Having run out of my usual mold release I went to a back-up jar that was lying around from a casting project long, long ago in a workshop far, far away.

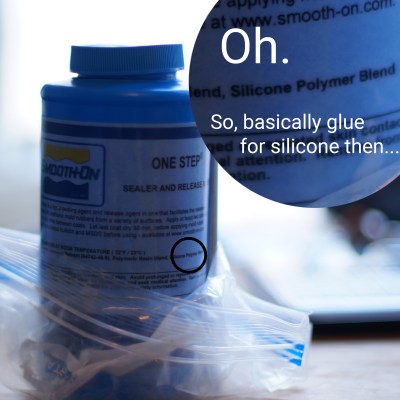
GLUE
Never much for readin’ the nutrition facts myself.

I’m refining a technique of making a mold the quick and dirty way. Everything was going well, the sprues looked good and the master released from the silicone. It was time to do the second half of the mold. As usual I applied a generous amount of mold release. Since it was the first time this mold was to be used I went ahead and did all the proper steps. Rubbing off the dried release and applying a few more coats just to be sure.

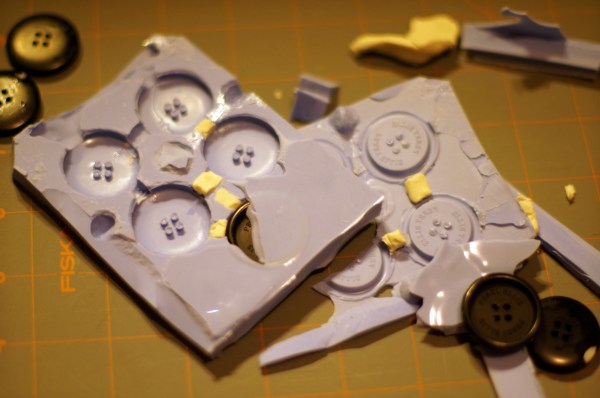
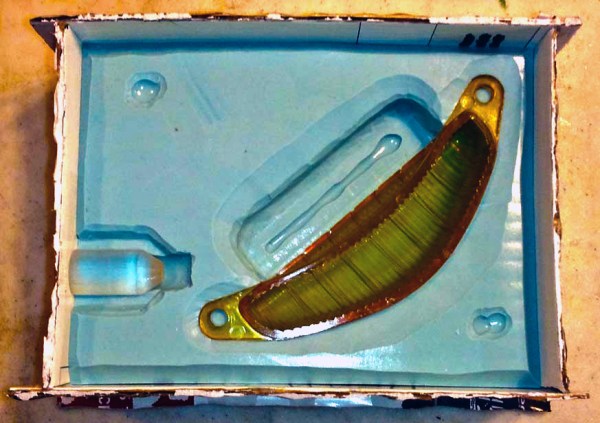
I was completely unaware that I was applying mold release designed for urethane molds only. In other words I thoroughly covered my silicone mold in silicone bonding agents. I remained unaware until trying to separate the halves of the mold and found them thoroughly joined. After going through the stages of grief I finally figured out where it all went wrong.

Oh well. I’m ordering some of my regular pick, Stoner A324, and that should do the trick. There’s also Mann- Ease Release 200. While having probably the best name a release agent can have, it doesn’t work as well and needs approximately 100 years to dry. After this setback I’d rather just, grudgingly, learn my lesson and order the correct thing.

I wonder if the smooth-on description can say URETHANE RUBBER a few more times.
Oh. Yes I see. Urethane… Urethane…

So now that we know the right way to fix this is to order the right product, is there a hack to get around it? Does anyone have a homebrew trick for release agent that can be used in a pinch? Leave your comments below.

Mythical Game Boy Advance Colors Hacked Into Reality

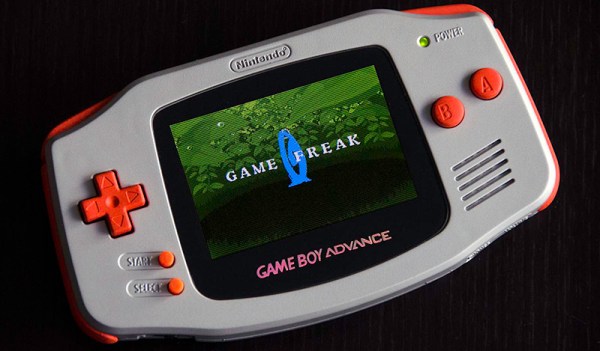
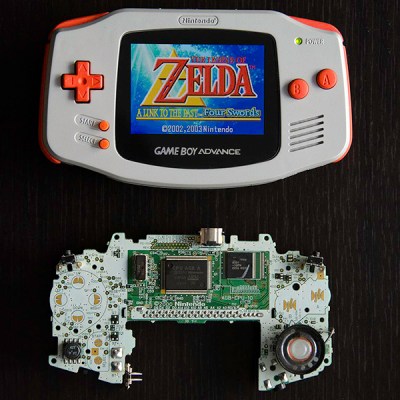
When it was announced in 2000 at a Nintendo trade show, the Game Boy Advance was clad in beautiful silver plastic, accented with brilliant orange buttons. As is usually the case with product introductions, the first color and style displayed to be public became the most popular. There was one problem with this silver and orange GBA; Nintendo never put it into production. Fast forward fifteen years, and [Michael Choi] decided it was time to make his own silver and orange Game Boy. It’s a great introduction to mold making and very detailed painting, and a useful guide for turning engineering prototypes into beautiful objects.

[Michael]’s build began with an aftermarket shell, painted with Tamiya spray paints. The color is remarkably accurate, considering the only pictures for the silver and orange Game Boy are fifteen years old, and with the right painting technique, these colors are indistinguishable from a properly colored, injection molded piece of plastic.

GBAsquareThe buttons were not as easy as the shell. [Michael] originally decided casting would be the best solution, but after multiple attempts, he couldn’t get the color right. Even with opaque dyes in the resin, the buttons would still come out slightly translucent. In the end, [Michael] decided to paint the original buttons.
This casemod isn’t just about changing the color of the enclosure. [Michael] also wanted is Game Boy to have the backlight found in the second revision clamshell GBA. This was easily acquired on eBay, and with a few slight hardware modifications and a beautiful glass lens to replace the plastic occupying the bezel, [Michael] has a gorgeous Game Boy Advance, taken straight from a press event fifteen years ago.

Optimized Molds With 3D Printing

[Florian] has a few arcade games and MAME machines, and recently he’s been trying to embed objects in those hard plastic spheres on the end of joysticks. A common suggestion is to 3D print some molds, but even though that’s a great idea in theory the reality is much different: you’re going to get layer lines on the casting, and a mirror finish is impossible.

No, a silicone mold is the way to do this, but here 3D printing can be used to create the mold for the silicone. Instead of a few pieces of hot glued cardboard or a styrofoam cup, [Florian] is 3D printing a a container to hold the liquid silicone around the master part.

After printing a two-piece part to hold both halves of a silicon mold, [Florian] put the master part in, filled it up with silicone, and took everything apart. There were minimal seam lines, but the end result looks great.

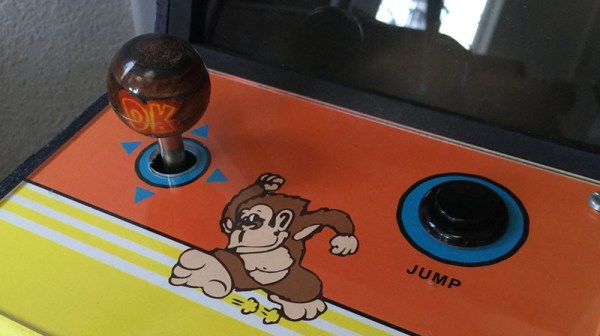
In addition to making a 3D printed mold container, [Florian] is also experimenting with putting 3D printed parts inside these joystick balls. The first experiment was a small 3D printed barrel emblazoned with the Donkey Kong logo. This turned out great, but there’s a fair bit of refraction that blows out all the proportions. Further experiments will include a Pac-Man, a skull, and a rose, to be completed whenever [Florian] gets a vacuum chamber.

Making A Violin Mold With A 3D Printer

IMG104

Some people see 3D printers as expensive and slow devices for replicating bracelets, whistles, and Yoda heads. Until the world transitions to a plastic octopus-based economy, those of us with 3D printers will have to find something useful for these tools. Bayesian Empiritheurgy out of Halifax, Nova Scotia wanted to do something useful with their 3D printer for the large-scale, distributed hackerspace competition, The Deconstruction. They ended up using their printer to make molds for a paper mache violin, and ended up being fairly successful at it.

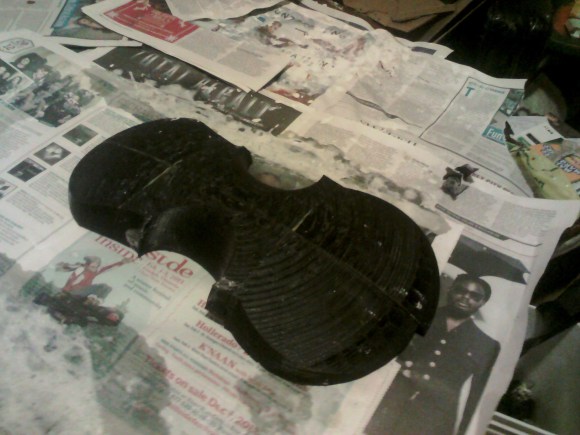
The basic idea behind their paper mache violin was to create a plastic mold for exactly half a violin body. This block was covered in newspaper drenched in wheat paste. Once the paste was dry, the violin half was pulled off the mold and another half was created. These were stitched and glued together, resulting in a violin body.

The bridge, tailpiece, tuners, and fingerboard were 3D pprinted and held together with epoxy. The epoxy flexed a lot, so every time a string was tuned it threw out the tuning of the other three strings. In the video after the break, you can check out the paper mache and plastic violin being played. It’s not much for the eyes or ears, but everyone had fun, and the team completed the proof of concept for a fiberglass or carbon fiber violin we’d suggest they try next.

Continue reading “Making A Violin Mold With A 3D Printer”

Adventures In Mold Making And Making Your Own Enclosures

case

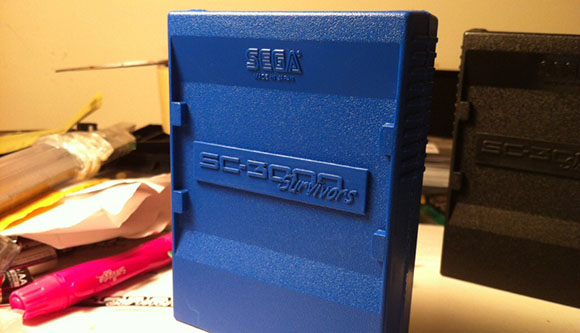
The folks at SC-3000 survivors have been working on a cartridge capable of storing dozens of games for the ancient Sega SC-3000 computer. The PCB works beautifully, but making a case for their cartridge left them with few options. They could use a 3D printer or simply collect a whole bunch of used cartridge cases, but making their own mold for a cartridge case was the best solution.

To create the mold for their multicart enclosure, the SC-3000 survivors first took an old, used case and made a silicone mold. While the first attempt at mold making was encouraging, several problems began to crop up due to the lack of vent holes and wiggling the mold before the resin had set. Before long, a proper technique to make resin casts was developed: use lots of resin, and don’t apply pressure or rubber bands to a curing mold.

We’re always impressed by what can be done with a few sheets of plastic, some Bondo, and the inordinate amounts of patience and sandpaper we see with other case mods and enclosure builds. the SC-3000 survivors put together an enclosure that rivals any Bondo build, and we’re happy they put out this tutorial.

Reproduce 3D Printed Models By Making Your Own Molds

Need fifty copies of that 3D printed whirligig you’re so proud of? It might be faster to just cast copies by using the 3D printed model to make a mold. [Micah] found himself in this situation and managed to cast one copy every 10-12 minutes using the mold seen above.

With the object in hand, you need to find a container which will fit the mold without too much waste. The bottom half of the mold is then filled with modeling clay, a few uniquely shaped objects to act as keys, and the model itself. After getting a good coating of release agent the rest of the mold is filled with a silicone rubber product which is sold for mold making. This creates one half of the mold. After it cures the clay and key objects are removed, everything is sprayed with the release agent, and the other half of the mold is poured.

Now your 3D object can be copied by pouring two-part resins in the to shiny new mold.