Making Silicone Molds – Big Ones!

If you’ve got one of something and you want more, duplicating it with a silicone mold can be a great way to go. This is applicable to 3D printing something you need many copies of, and a whole variety of other usecases. [Eric Strebel] prides himself on his abilities in this area, and has put out a guide to producing very large silicone molds in a simple and reliable manner.

The overarching process is simple, but followed properly, it produces great results. [Eric] starts by building a mold box out of wood, coated in shellac to ensure it doesn’t stick to the silicone. The master part is then stuck to the base, surrounded by a lasercut cardboard strip which acts as a seal and key. Once properly degassed silicone is poured in and cured, the second half can be made. The mold is flipped in the mold box, the seal key removed,  and release agent applied to the silicone surfaces. With another pour and cure, the mold is ready for casting new parts.

While simple, if the correct equipment isn’t used or steps skipped, you’ll end up with a useless mold full of air bubbles or surface irregularities. It’s useful to see just what it takes to get a mold of such scale (13″ x 19″!) completed without flaws. We’ve featured [Eric]’s work before, such as his fine detail improvements on the Apple Pencil. Video after the break.

Continue reading “Making Silicone Molds – Big Ones!”

DIY Injection Molding Press

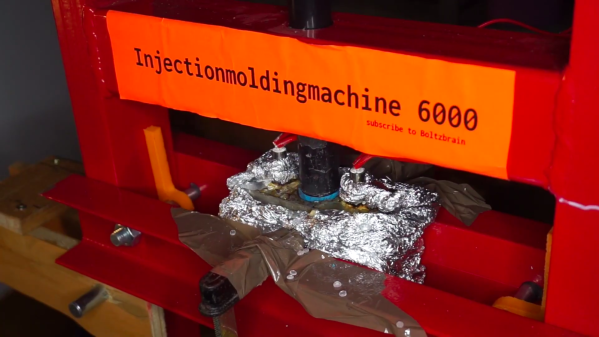
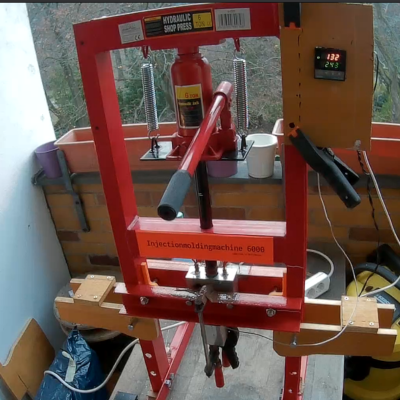
While 3D printing has now become easily accessible and cheap, there are still several use cases where you need the advantages offered by injection molding, even for small batch runs. Professional small-batch injection molding can be pretty expensive, and buying a manual machine can cost quite a bit. Of course, there are a number of DIY injection molding projects to choose from, but they usually involve a fair amount of tools and labour. [Bolzbrain] wanted to bypass all of the heavy cutting, welding and frame assembly work, so he’s built himself a DIY Injection Molding Press for cheap using an off the shelf, six ton hydraulic press. At final count, he ended up spending about €150 for the machine and another €120 for tools to build the machine. He also managed to locate a cheap, local CNC service that gave him a good deal on machining the Dies. But of course you can’t put a price on the lessons learnt and the satisfaction of having built it by hand.

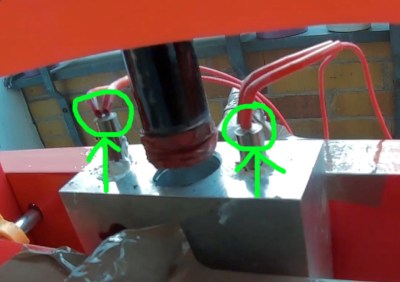
Choosing the hydraulic press is a great idea as it provides the high pressure needed for the job without the operator having to exert a lot of effort, which is a big drawback with some of the other DIY machines. As a bonus, the structural frame is quite sturdy and well suited for this purpose. The other main part of such a machine is the heated injection block and there are several different ways of doing it. After some amount of studying probable solutions, he decided to build a heated aluminium block through which the plastic granules can be rammed using the hydraulic piston. Heating is provided by a pair of 500W heaters and a type ‘k’ thermocouple does temperature sensing. An industrial PID controller adjusts the block temperature via a solid state relay. Overall, the electrical and mechanical layout cannot get any simpler.

[Bolzbrain] did a great job of documenting his build over a series of videos and more wizened hackers watching them will squirm in their seats spotting the numerous fails. He bought the cheapest pedestal drill machine that he could buy and watching the drill struggle while making a 26mm hole in the aluminium block is quite jarring.

The electrical wiring has a lot of scope for improvement – with 220V AC heaters, exposed wiring and jury rigged panel held up with a pair of clamps. Installing and removing the die is a task and requires a lot of fiddling with several C-clamps — something which needs to be repeated for every shot. Maybe toggle clamps could help him to ease die fixing and removal. Once he figures out about mold release agents and wall draft angles, he won’t have to struggle trying to remove the molded article from the die. Then there’s the issue of proper runner design so that the thermo-plastic can quickly fill the mold cavity completely without any pockets.

But in the end, all that matters is that he is getting reasonably good molded parts for his purposes. With more tweaking and incremental improvements, we’re sure he’ll get better results. The video after the break is a short overview of his build, but the project page has a series of detailed videos covering all aspects of the project. And if you’d like to get an introduction to desktop injection molding, check out “Benchtop Injection Molding for the Home Gamer

Continue reading “DIY Injection Molding Press”

3D Printing Paper — Sort Of

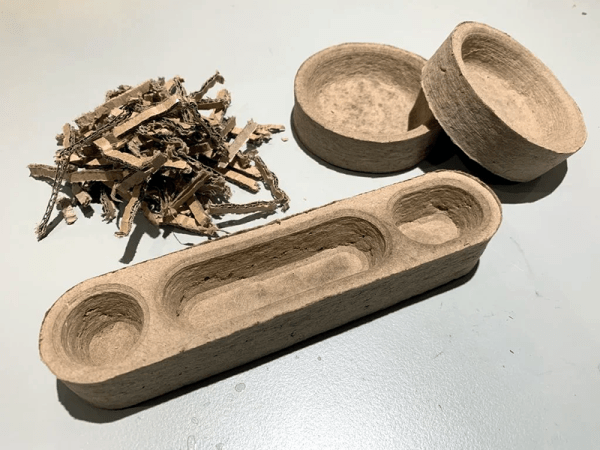
There are only a few truly ancient engineered materials, and among the oldest is paper. Traditionally, paper is flat and can be bent into shapes. However, paper can be molded into for example packing material or egg cartons. [XYZAidan]  has a process that can recycle paper into 3D cardboard-like objects. You need a 3D printer, but it doesn’t actually print the paper. Instead, you use the printer to create a mold that can form paper pulp you make out of recycled paper and a blender.

[Aidan] provides seven different molds ranging from a desk tray and a dish to simple cubes and coasters. The molds are made in three parts to assist in removing the finished product.

Continue reading “3D Printing Paper — Sort Of”

A Trove Of Cosplay Prop Making Tutorials And Blueprints

[CutTransformGlue] recently posted a build video for “Making Rey’s Star Wars Blaster“, embedded after the break. The construction uses layered MDF sheets to build up the blaster, and it’s a treat to see it taking shape, ending with an amazing paint job. It’s a good way to learn about the techniques used to bring such props to life and help you hone your skills. But digging deeper led us down an awesome rabbit hole.

[CutTransformGlue] got plans for Rey’s Blaster from the Punished Props Academy – a prop and costume making team from Seattle committed to “transforming passionate fans into confident, skillful makers”. These folks have built a wide variety of projects ranging from guns, weapons, costumes, props and more, and are obviously extremely skilled at what they do. But they aren’t keeping those skills to themselves and in a series of posts and videos they are sharing with us such varied skills as Foamsmithing (gotta love that coinage), Molding, Casting, Painting, 3D printing, Vacuum Forming and electronics. If you’d like more information about supplies, check out the Tools and Materials section. And if all of this has given you the itch to build a Skyrim Wuuthrad or a Halo4 Sniper Rifle, head over to the amazing Free Blueprints section for a treasure chest full of downloads.

Like we said earlier, if building such stuff is your thing, it’s a rabbit hole from which you’ll find it extremely difficult to extract yourself. Have fun.

Continue reading “A Trove Of Cosplay Prop Making Tutorials And Blueprints”

Damaged Power Cord Repaired With Shop-Made Mold

We’ve likely all seen a power tool with a less-than-functional strain relief at one end of the power cord or the other. Fixing the plug end is easy, but at the tool end things are a little harder and often not worth the effort compared to the price of just replacing the tool. There’s no obsolescence like built-in obsolescence.

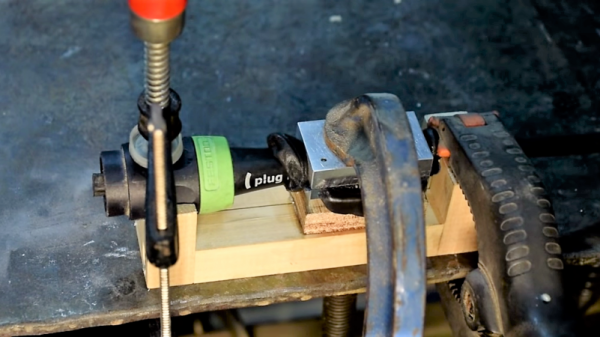
But in the land of Festo, that high-quality but exorbitantly priced brand of premium tools, the normal cost-benefit relationship of repairs is skewed. That’s what led [Mark Presling] to custom mold a new strain relief for a broken Festool cord. The dodgy tool is an orbital sander with Festool’s interchangeable “Plug It” type power cord, which could have been replaced for the princely sum of $65. Rather than suffer that disgrace, [Mark] built a mold for a new strain relief from two pieces of aluminum. The mold fits around the cord once it has been slathered with Sugru, a moldable adhesive compound. The video below shows the mold build, which has some interesting tips for the lathe, and the molding process itself. The Sugru was a little touchy about curing, but in the end the new strain relief looks almost like an original part.

Hats off to [Presser] for not taking the easy way out, and for showing off some techniques that could really help around the shop. We suppose the mold could have been 3D-printed rather than machined; after all, we’ve seen such molds before, and that 3D-printed dies can be robust enough to punch metal parts.

Continue reading “Damaged Power Cord Repaired With Shop-Made Mold”

Replicating A Victorian Era Console

[Dt99jay] lives in a historic Victorian-era district in the UK.  Most homes in the area have ornate exterior window dressings with stone consoles holding up heavy stone hood molding.

The window hood molding turned out to be wood — most likely the result of damage repaired after the blitzkrieg bombings of WWII. The 1940’s era work is now rotting away, so it was time for a repair. When the hood was pulled away from the window, disaster struck. One console completely crumbled, while the other lost large chunks of material. The They weren’t solid stone after all, but replacements most likely molded with Coade stone.

There are no ready replacements for consoles like this. [dt99jay] couldn’t just swap them out for modern looking replacements, so he set about replicating the consoles. The remaining console was much too delicate to remove from the building, so [dt99jay] glued the missing pieces back on. He then filled any missing parts and carefully scraped way all the loose paint. Then came the difficult part — making a mold while the console was still mounted on the house.

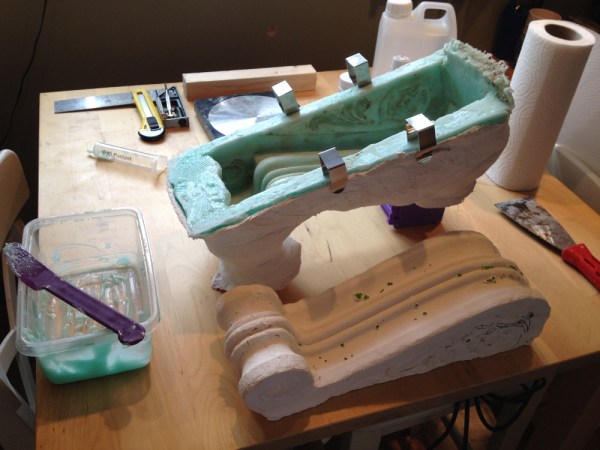
Room Temperature Vulcanizing (RTV) silicone rubber was carefully applied to the console. The RTV is thick enough to stay on while it dries. After several thick layers of RTV, the console was covered. [Dt99jay] then covered the mold with plaster of Paris bandages to support it. The finished mold was carefully removed from the house, and [dt99jay] filled all the low spots and air bubbles with RTV.

New castings were made using a mixture of cement and playground sand. Once painted, the results matched perfectly. The historic conservation committee was pleased, and the window was once again structurally sound.

MDF as a mold master. It works, but nowhere near as well as tooling board.

Materials To Know: Medium Density Fiberboard

MDF is the cheapest and flattest wood you can buy at local hardware stores. It’s uniform in thickness, and easy to work with. It’s no wonder that it shows up in a lot of projects. MDF stands for Medium Density Fiberboard. It’s made by pressing materials together along with some steam, typically wood, fibers and glue. This bonds the fibers very tightly. Sometimes MDF is constructed much like plywood. Thinner layers of MDF will be made. Then those layers will be laminated together under glue and steam.The laminated MDF is not as good as the monolithic kind. It tends to tear and break out along the layers, but it’s hard to tell which kind you will get.

Proper way to attatch a fastener to MDF.

MDF is great, but it has a few properties to watch for. First, MDF is very weak in bending and tension. It has a Modulus of Elasticity that’s about half of plywood. Due to its structure, short interlocking fibers bound together by glue and pressure, it doesn’t take a lot to cause a crack, and then, quickly, a break. If you’d like to test this, take a sheet of MDF, cut it with a knife, flip it over, and hit the sheet right behind your cut. Chances are the MDF will split surprisingly easily right at that point.

Because of the way MDF is constructed, fasteners tend to pull out of it easily. This means that you must always make sure a fastener that sees dynamic loads (say a bearing mount) goes through the MDF to the other side into a washer and bolt. MDF also tends to compress locally after a time, so even with a washer and bolt it is possible that you will see some ovaling of the holes. If you’re going to use screws, make sure they don’t experience a lot of force, also choose ones with very large threads instead of a finer pitch. Lastly, always use a pilot hole in MDF. Any particle board can split in alarming ways. For example, if you just drive a screw into MDF, it may appear to go well at first. Then it will suddenly jump back against you. This happened because the screw is compressing the fibers in front of it, causing an upward force. The only thing pressing against that force is the top layer of laminate contacting the threads. The screw then jumps out, tearing the top layer of particle board apart.

Continue reading “Materials To Know: Medium Density Fiberboard”