Tri-mounted Monitors Using Strut Channeling (no Welding)

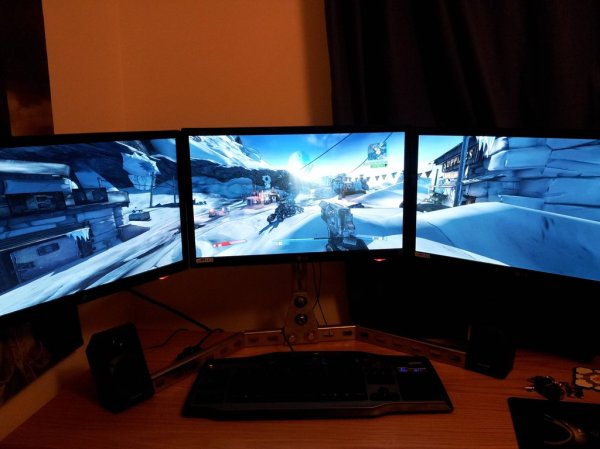
[Optec] want his own triple monitor setup built to his specifications. It turns out to have been a pretty easy project thanks to his mastery of stock materials. The image above is just a bit dim, but if you look closely you can see the strut channel which makes up the monitor frame.

When it comes to this type of metal strut material there’s a lot to choose from. [Optec] went with the half-slot format which provides a little bit of left and right wiggle room. This is important to get the edges of those monitors to butt up to one another. After making a pair of relief cuts he bent the channel in two places, using 45 degree brackets as reinforcement. The monitor mounts are made of MDF with countersunk holes to hide the bolt heads which connect it to the channel.

He figures the total cost of the mount was around $40. Seeing how easy it was makes us think we may never buy a commercial TV mounting bracket again. Of course if you’re more into woodworking there’s a tri-monitor project for you too.

[via reddit]

A Custom Monitor Mount Built From Wood

[LuckyNumbrKevin] wanted an epic monitor array of his own but didn’t really have the desk real estate to pull it off. His solution was to build a three computer monitor mounting rack with a relatively small footprint.

The design started with some virtual test builds using SketchUp. Once he had it dialed in he began transferring measurements for the base onto some plywood. The rest of the parts are built using dimensional lumber. As the project shaped up he wrapped the edges of the plywood with some trim, and gave the piece a good sanding. After a few passes with a dark stain he was ready to mount the monitors he bought from Newegg.

[Kevin] left a comment in the Reddit thread about the parts cost for his design. Including the monitors, this came in under $300. That does not include the Nvidia graphics card which is capable of driving the trio.

Wireless Camera Mount Offers Pan And Tilt Functions

[Chris] put together a bunch of common components to create this wireless pan and tilt system for a security camera or a robot.

The motorized base is simple enough, using two servos to make up a mount for the digital camera. In this case he used a parts package which is designed to mount the servos perpendicular to each other. You could also 3D print, our build your own brackets quite easily. The control circuitry consists of a pair of PIC 18LF4520 microcontrollers and a set of Xbee modules. This is where the wireless connectivity comes in.

On the transmitter side, a pair of potentiometers are read by the microcontroller’s ADC and translated into position values. The receiver takes those values and drives the servo motors accordingly. In the clip after the break [Chris] is using micro trimpots which require a screw driver to adjust. You might want to hit the parts bin and see if you can get some that have a more user-friendly shaft or knob.

Unfortunately this system doesn’t transmit video. But WiFi webcams are getting quite affordable so that might be a good option in this case. Continue reading “Wireless Camera Mount Offers Pan And Tilt Functions”

Four-axis Camera Mount Rides On A Wire

Here’s [Badwolf’s] team posing with their college project. It’s a 4-axis gimbal mount for a camera that they designed in CAD, cut parts using a laser, then milled them down to specifications. In the picture above there is a tiny point-and-shoot camera mounted inside the suspended ring but the rig’s strong enough to support cameras of any size.

That mounting ring can rotate like the hands of a clock, but it also pivots on a horizontal axis. The bracket that holds the ring can rotate on a vertical axis, and the entire assembly moves along the wire supporting it. After the break you can see some test footage that shows the rig being operated via a handheld radio controller.

This setup let’s the camera travel as far as the cable can reach. But if you want something that lets you take photographs of very tall objects you’ll need to use a different setup. Continue reading “Four-axis Camera Mount Rides On A Wire”

Rotary Wall Plug From Scrap

Rotary tools such as a Dremel are useful to have around for all sorts of tasks in a workshop, including cutting, polishing, and grinding. [Konstantin] sent us in his home made wall mount rotary tool based off of parts from a blender and an old bench top jigsaw. Unlike a Dremel where the motor is in the hand held part of the tool, this setup hides the blender motor (which provides the power) behind a wall panel, and is controlled via the blender’s speed settings buttons. We could see this configuration allowing for more delicate work due to the reduction of weight in hand, as well as the added bonus of a near impossibility of losing this tool. Overall an excellent re-purposing of leftover parts, be sure to check out [Konstantin]’s blog for more build info and photos.

DSLR Shoulder Holster With Follow Focus

[vimeo=http://vimeo.com/11435910]

[Erik] and [Jonathan Bergqvist] built this shoulder mount for a Canon 7D camera. It’s made from wood and it hooks over the top of the photographer’s shoulder with a handle for each hand. The left handle also controls the focus, using a similar method to the hardware store follow focus we looked at in January. Like it or not, you’ll love watching a master woodworker build this starting with un-milled logs. It’s all about having and knowing how to use the right tools.

[Thanks Juan]

GPS Embedded In Visor

We’re all for putting a GPS where it doesn’t normally go, but we’re not sure [Roberto’s] version* is the best of locations. Take for example [Jair2k4’s] GPS. It doesn’t block out 50% of his vision of the road and the impending accident in front of him.

Regardless, the solid aluminum and seamless mounting really does make it look like part of the car, and props to him for making it ‘hidden’ when he’s out of the car to try and prevent thieves. But there are cheaper, easier, and dare we say better solutions out there.

*We found his site only works in Internet Explorer, gah!