Octosonar Is 8X Better Than Monosonar

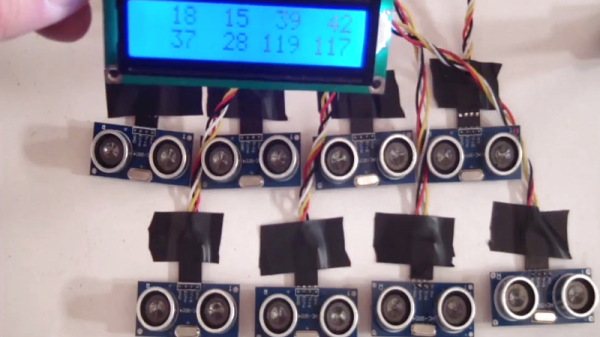
The HC-SR04 sonar modules are available for a mere pittance and, with some coaxing, can do a pretty decent job of helping your robot measure the distance to the nearest wall. But when sellers on eBay are shipping these things in ten-packs, why would you stop at mounting just one or two on your ‘bot? Octosonar is a hardware and Arduino software library that’ll get you up and running with up to eight sonar sensors in short order.

Octosonar uses an I2C multiplexer to send the “start” trigger pulses, and an eight-way OR gate to return the “echo” signal back to the host microcontroller. The software library then sends the I2C command to select and trigger a sonar module, and a couple of interrupt routines watch the “echo” line to figure out the time of flight, and thus the distance.

Having two sonars on each side of a rectangular robot allows it move parallel to a wall in a straightforward fashion: steer toward or away from the wall until they match. Watch the video below for a demo of this very simple setup. (But also note where the robot’s 45-degree blind spot is: bump-bump-bump!)

Continue reading “Octosonar Is 8X Better Than Monosonar”

Perpetual Pong

perpetual-pong

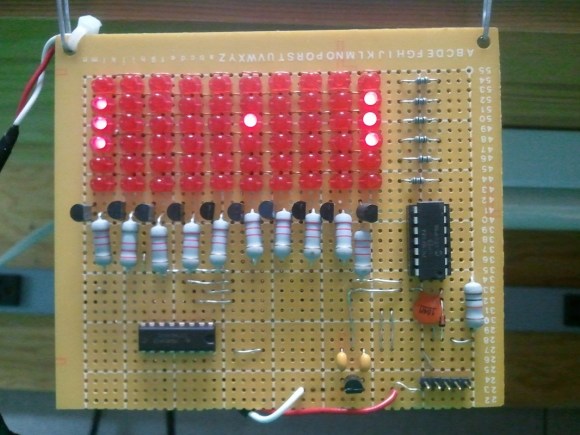
[Jeff Joray] wrote in to show off this perpetual Pong device he built. The six by ten LED matrix acts as a game board for Pong but there are no controls. The board simply plays against itself. It’s pretty much a pong clock without the clock.

The brain of the device is a PIC 16F684 which drives the six rows of the display directly. He went with a decade counter (CD74HC401) to scan the rows one at a time. Now what would you expect to find on the underside of this hunk of protoboard? A rat’s nest of point to point wiring? If so you’re going to be disappointed. [Jeff] spent the time to generate a schematic and board layout in Eagle. While at it, he knew he was going to be using protoboard so the artwork is designed to use solder bridging as much as possible. What he ends up with is one of the cleanest mutiplexed one-off projects you’re going to find. See it in action after the jump.

Continue reading “Perpetual Pong”

AVR External Memory Interface (XMEM) Reads Input Matrix

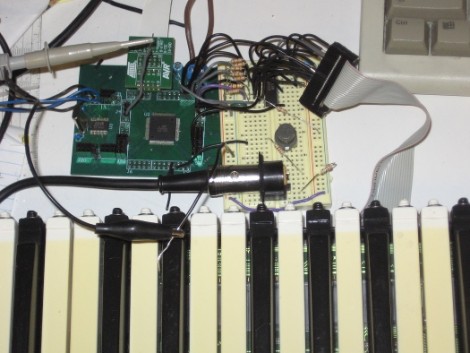
Reading from a large number of inputs, like this piano keyboard, can be tedious. Even when multiplexing there’s a lot to keep track of. But if you choose the right microcontroller, you may have hardware assistance. Here’s an ATmega640 is using it’s external memory interface to read the key matrix.

You may remember the Open Music Labs article about reading from a shift register using just one pin of a microcontroller. This time around a shift register is still used, but instead of pulling in a long line of parallel inputs, the switches are multiplexed to reduce the number of I/O pins used to read them.

A 74HC573 is used to facilitate the multiplexing. We won’t go into how that part is accomplished; there’s a separate post that explains the process. What’s unique here is that the XMEM peripheral of the AVR microcontroller is used to grab the data. This is intended for external memory chips, but if you get the timing just right, it greatly simplifies reading in a matrix of up to 128 inputs.

Pulito: The LEGO Roomba

When [Dave] installed hardwood flooring in his house, he needed a solution to help automate the monotonous task of routine sweeping. Rather than go out and buy one of the many existing automated sweep robots out there, he decided to use his passion for LEGO Robotics to design and build a NXT based Swifferbot he calls Pulito. His version implements all the important features such as object avoidance using bump sensors, an IR beacon used to automatically return to the charging station, and a photoresistor to monitor the charge of the battery. [Dave] also includes a nifty LEGO sensor multiplexor, allowing him to save on I/O ports, which is almost worth sharing by itself.

Videos after the break.

Continue reading “Pulito: The LEGO Roomba”

Putting On A Show In The Rain

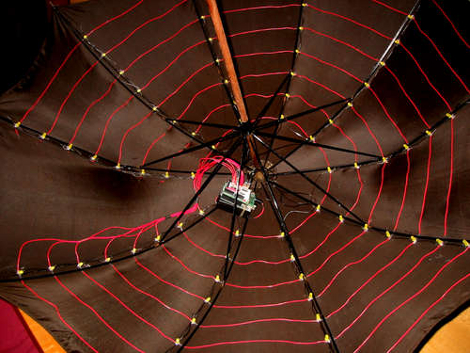
Let’s face it, walking around in the rain sucks. [Matth3w] is trying to add a little whimsy to an unpleasant experience by adding an LED matrix to his umbrella. The array contains 80 LEDs that are individually addressable. This is a mutiplexed array that relies on a MIC2981 source driver for the eight rows (or rings in this case), with the ten columns handled by the Arduino. The effect is quite nice as you can see in the video after the break. Now that he’s proven this works, you might want to etch your own PCB in order to get rid of the Arduino board and prototyping shield, making it easier to waterproof the control circuitry. This would make a nice addition to your illuminated umbrella stock.

Continue reading “Putting On A Show In The Rain”

BlokClok – Abstract Time Display

blokclok_abstract_time_display

Clocks made from blinking LEDs always make for fun projects. [Earthshine] built a clock that displays time abstractly using an 8×8 RGB LED matrix. The video embedded after the break illustrates how to read the time but here’s the gist of it: One LED is illuminated in the outside box of LEDs and moved in a clockwise motion to approximate seconds. Inside of this, there are four quadrants; upper left indicates hour-tens digit, upper right hour-ones, lower left minute-tens, and lower right minute-ones. This certainly makes for an interesting conversation piece!

There is no schematic and no code available but it’s really the concept that we’re interested in. If you must know, [Earthshine] bases this build around an Arduino. A DS1307 real time clock keeps the time, while four 74HC595 shift registers are utilized to control the three LED colors and the multiplexing.

Continue reading “BlokClok – Abstract Time Display”

Ikea LED Matrix

8x8

[Spikenzie] has created an 8×8 LED array that fits inside an ikea frame. He multiplexed the 64 red LEDs on a PCB with connections on the back. He then used a MAX7129, an LED multiplexer and driver, driven by a PIC over SPI to do animations and play pong. He then encased the array in laser-cut cardboard and white acrylic to get large dots. This entire assembly was then placed inside an Ikea RIBBA picture frame. The result is an aesthetic homebrew display that is easy to control.

Related: 64pixels are enough