Commodore 64 And Nintendo Make Beautiful Music Together With SYNCART

Cyncart

[Dan] has been hard at work developing CYNCART to get his Commodore 64 and original NES to play together. We’ve seen [Dan’s] handiwork before, and it’s pretty clear that he is serious about his chip tunes.

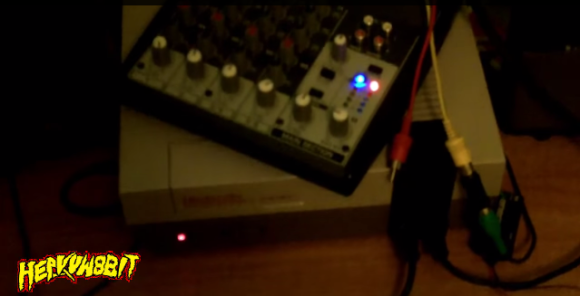
This project starts with something called a Cynthcart. The Cynthcart is a Commodore 64 cartridge that allows you to control the computer’s SID chip directly. In effect, it turns your Commodore 64 into a synthesizer. [Dan] realized that the Commodore’s user port sends out simple eight bit values, which happens to match perfectly with the NES’ controller ports. In theory, he should be able to get these two systems communicating with each other.

[Dan] first modified the Cynthcart to send data out of the user port on the Commodore. This data gets sent directly to the NES’ 4021 shift register chip in the second player controller port. The NES runs a program to turn this data into sound on the NES’ audio chip. The first player controller can then be used to modify some other sound settings on the NES. Musical notes are played on the Commodore’s keyboard. This setup can also be used to play music on both systems at the same time. Be sure to watch the video of the system in action below.

Continue reading “Commodore 64 And Nintendo Make Beautiful Music Together With SYNCART”

Tetris Duel With The Raspberry Pi

Tetris Duel

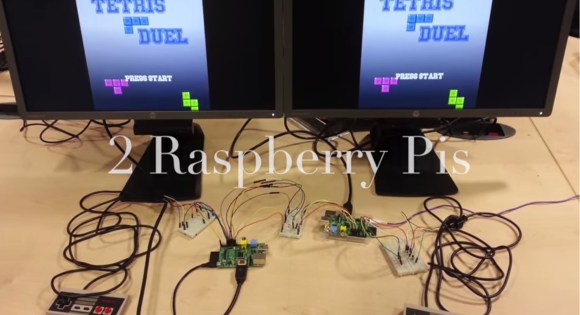
Building a multiplayer network game with multiple Raspberry Pis can be very difficult. Doing it in assembly is outright insane! This is exactly what a group of first year students at Imperial College London did; they created a network based multiplayer Tetris game for the Raspberry Pi.

[Han], [Piotr], [Michal], and [Utsav] have created this entire game from bare metal assembly, and it only consists of 4000 lines of code! The code is well documented, so be sure to look through their Github repository. This project is a great reference for those looking to learn bare metal assembly and networking. They even chose to use the old NES controllers, a very nice touch. While we have featured what seems like a million different Tetris games in the past, this is the first multiplayer version. See Tetris Duel in action in the video after the break!

This is a shout-out to all of you students out there. Take the time to create quality documentation for your class project, and upload it to the internet. Not only is it a great resume boost, but it could very well end up on Hackaday!

Continue reading “Tetris Duel With The Raspberry Pi”

Hackaday Links: June 29, 2014

hackaday-links-chain

Ever see a really cool build on YouTube with no build details at all? Frustrating, right? That’s us with the NES Keytar covering the Game of Thrones theme. He’s using a Raspi with the sound chip in the NES to do live chiptunes. Freakin’ awesome. There’s also the ST:TNG theme as well.

A few years ago the folks at Oculus had an idea – because of cellphones, small, high resolution displays are really cheap, so why not make VR goggles? At Google IO this week someone figured out everyone already has a cellphone, so just wrap it in some cardboard and call it a set of VR goggles. You can get a kit here, but the only difficult to source components are the lenses.

What happens when you put liquid nitrogen under a vacuum? Well, it should evaporate more, get colder, and freeze. Then it breaks up into solid nitrogen snow. No idea what you would do with this, but there ‘ya go. Oh, [NC], we’re going to need a writeup of that LN2 generator.

About a month ago, the House4Hack hackerspace in South Africa told us of their plans to bring a glider down from 20km above the Earth. They finally launched it, The CAA only allowed them to glide back from 6km (20,000 feet), but even from there the foam glider hit 230kph (124 knots). That’s a little impressive for a foam FPV platform, and we’re betting something with a larger wingspan would probably break a spar or something. Shout out to HABEX.

All the electronic dice projects we’ve seen have one thing in common: they’re not cubes. Thus uberdice. It’s six nine-pixel displays on the faces of a cube, powered by a battery, and controlled by an accelerometer. Yes, it is by far the most complicated die ever made, but it does look cool.

NES RetroPi

Original NES Guts Upgraded With RetroPie

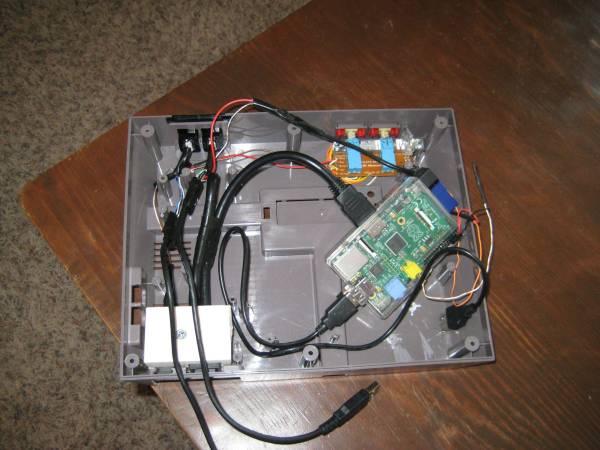
If you have an old broken NES lying around and have no idea what to do with it, you may want to check out [snoius’s] latest project. He replaced the guts of his old NES with a Raspberry Pi. [snoius] started out by removing most of the electronics from his original NES to make room for the Pi. He left the original control panel board so he would be able to use the original power button and power LED. The NES power switch is an on/off toggle switch. [snoius] decided to just route the 5V USB power input directly through this switch. The result is a hard power switch for the tiny computer. The original power LED is wired up to the Pi’s 3.3V GPIO header through a 330 ohm resistor. Now when the Pi has power, the LED lights up.

The next step was controllers. It looks like [snoius] is using some USB SNES controller clones. He wanted to use the original NES controller ports but obviously the NES did not utilize USB. [snoius] used a saw to cut the backs off of the controller ports, leaving a flat surface. He then used a utility knife to carve out a hole in the shape of a female USB port. He mounted some ports in place and then wired the inside up to some short USB cables with male ends. These were plugged into a USB hub that is hidden inside of the NES case.

The Pi is also hooked up to a short HDMI cable and a short power cable. The loose ends of the cables are mounted to a small block of wood. Notches are cut out of the wood to better fit the cable ends. The rear of the NES has two holes cut out where the original connectors used to be in order to accommodate the new connectors.

With all of the hardware taken care of, [snoius] still needed a way to actually play his games. That’s where RetroPie saved the day. RetroPie is a Linux distribution for the Raspberry Pi that is specifically created to make it easy to play old video games. It includes emulators for many old systems including NES, SNES, SEGA Genesis, Gameboy, etc. [snoius] installed RetroPie onto an 8GB SD card and copied over all of the ROMs he could find. The end result is what appears to be an original NES at a glance, but is in fact multiple retro gaming systems in one. It also contains hundreds of video games in on board memory instead of requiring a large library of physical cartridges.

[via reddit]

Dual Port RAM Teaches An Old NES New Tricks

nesDPR

[Andrew] is developing a game for the Nintendo Entertainment System (NES). Emulators are great for this, but [Andy] loves running on the real iron. To help, he’s created a dual port RAM interface for his NES. As the name implies, a dual port RAM is a memory with two separate data and address buses. The Cypress Semiconductor CY7C136 [Andy] used also includes arbitration logic to ensure that both ports don’t attempt to access the same memory cell and cause data corruption. In [Andy’s] case the NES was on one side, oblivious to the new hardware. On the other side of the dual port RAM, [Andy] installed an ATmega164 running his own custom firmware.

The new hardware gives [Andy] a live view of what’s going on in the NES’s memory. He added a live memory view/edit screen similar to the FCEUX emulator. The window runs on a PC while the game itself is running on an NES. [Andy] was even able to add rudimentary break and step features by connecting his circuit to the Non Maskable Interrupt (NMI) line of the NES. By holding the NMI asserted, the ATmega can essentially freeze the game in progress.

[Andy] has even used his circuit to teach the NES some new tricks. By reading the timer and score memory locations on Ice Hockey, he was able to create a scoreboard and goal light. Similar techniques were used to give Contra a muzzle flash light which puts Ambilight systems to shame.

We don’t know what [Andy] is planning next, but we hope it’s a source release so we can start hacking some some games ourselves!

Click past the break to see a couple of [Andy’s] Vine videos.

Continue reading “Dual Port RAM Teaches An Old NES New Tricks”

The 8 Bit Harmonica Blows In From Japan

8bit-harmonica

From [Basami Sentaku] in Japan comes this 8bit harmonica. [Basami] must remember those golden days of playing Famicom (or Nintendo Entertainment System for non-Japanese players). As the systems aged, the contacts would spread. In the case of the NES, this would often mean the infamous blinking red power light. The solution for millions of players was simple. Take the cartridge out, blow on it, say a few incantations, and try again. In retrospect, blowing on the cartridges probably did more harm than good, but it seemed like a good idea at the time. We’d always assumed that the Famicom, being a top loading design, was immune from the issues that plagued the horizontal slot on the NES. Either [Basami] spent some time overseas, or he too took to tooting his own cartridge.

Blowing into cartridges has inspired a few crafty souls to stuff real harmonicas into cartridge cases. [Basami] took a more electronic route. A row of 8 microphones picks up the players breath sound. Each microphone is used to trigger a specific note. The katakana in the video shows the traditional Solfège musical scale: do, re, mi, fa, so, la ti, do. A microcontroller monitors the signal from each microphone and determines which one is being triggered. The actual sound is created by a Yamaha YMZ294. The ‘294 is an 18 pin variant of the venerable General Instrument AY-3-8910, a chip long associated with video game music and sound effects. While we’re not convinced that the rendition of Super Mario Bros’ water theme played in the video wasn’t pre-recorded, we are reasonably sure that the hardware is capable of doing everything the video shows.

Continue reading “The 8 Bit Harmonica Blows In From Japan”

A Deep Dive Into NES Tetris

Tetris AI

Back in 1989, Nintendo released Tetris for the NES. This detailed article first explains the mechanics of how Tetris works, then builds an AI to play the game.

To understand the mechanics of the game, the ROM source was explored. Since the NES was based of the MOS 6502 microprocessor, this involves looking at the 6502 assembly. The article details how the blocks (called Tetriminos) are created and how they move across the screen. The linear feedback shift register used for random number generation is examined. Even details of the legal screen and demo mode are explained.

After the tour through how Tetris works, an algorithm for the AI is presented. This AI is implemented in Lua inside of the FCEUX NES/Famicom emulator. It works by evaluating all of the possible places to put each new Tetrimino, and choosing the best based on a number of criteria. The weighting for each criterion was determined by using a particle swarm optimization.

The source for both the Lua version and a Java version of the code is available with the article. Everything you need to run the AI is available for free, except the Tetris ROM. If you’re interested in how 8 bit games were built, this dissection is a great read.

[via Reddit]